Contents
Introduction to the Bash Command Line
Introduction
Many of the lessons at the Programming Historian require you to enter commands through a Command-Line Interface. The usual way that computer users today interact with their system is through a Graphical-User Interface, or GUI. This means that when you go into a folder, you click on a picture of a file folder; when you run a program, you click on it; and when you browse the web, you use your mouse to interact with various elements on a webpage. Before the rise of GUIs in the late 1980s, however, the primary way to interact with a computer was through a command-line interface.
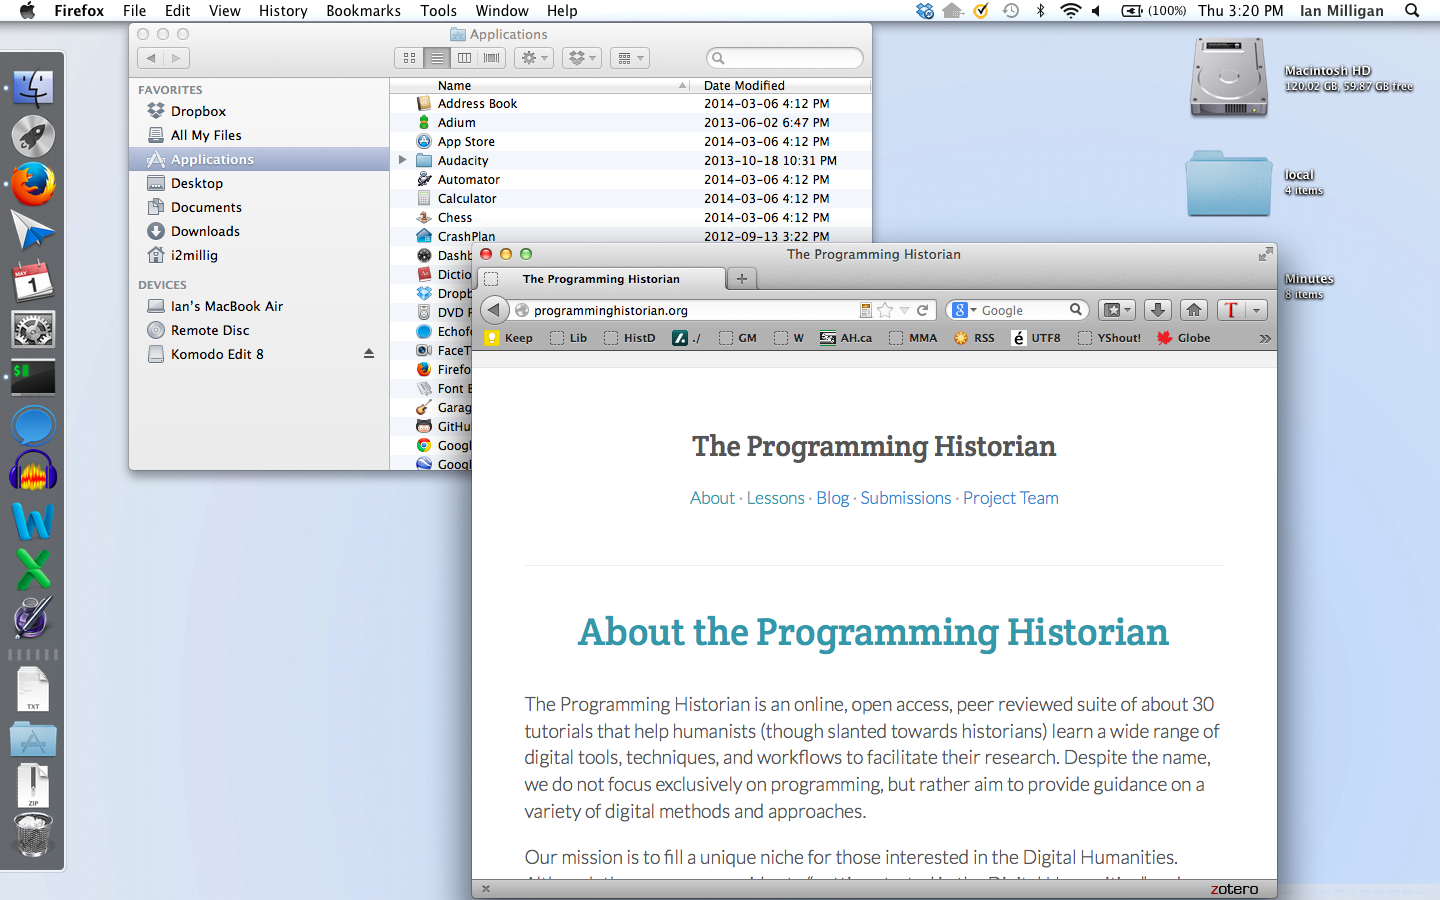
Figure 1. GUI of Ian Milligan’s Computer
Command-line interfaces have advantages for computer users who need more precision in their work – such as digital historians. They allow for more detail when running some programs, as you can add modifiers to specify exactly how you want your program to run. Furthermore, they can be easily automated through scripts, which are essentially recipes of text-based commands.
There are two main command-line interfaces, or ‘shells,’ that many digital historians use. On OS X or many Linux installations, the shell is known as bash, or the ‘Bourne-again shell.’ For users on Windows-based systems, the command-line interface is by default MS-DOS-based, which uses different commands and syntax, but can often achieve similar tasks. This tutorial provides a basic introduction to the bash terminal, and Windows users can follow along by installing popular shells such as Cygwin or Git Bash (see below).
This lesson uses a Unix shell, which is a command-line interpreter that provides a user interface for the Unix operating system and for Unix-like systems. This lesson will cover a small number of basic commands. By the end of this tutorial you will be able to navigate through your file system and find files, open them, perform basic data manipulation tasks such as combining and copying files, as well as both reading them and making relatively simple edits. These commands constitute the building blocks upon which more complex commands can be constructed to fit your research data or project. Readers wanting a reference guide that goes beyond this lesson are recommended to read Deborah S. Ray and Eric J. Ray, Unix and Linux: Visual Quickstart Guide, 4th edition (2009).
Windows Only: Installing Git Bash
For those on OS X, and most Linux installations, you’re in luck — you already have a bash shell installed. For those of you on Windows, you’ll need to take one extra step and install Git Bash. This can be installed by downloading the most recent ‘Full installer’ at this page. Instructions for installation are available at Open Hatch.
Opening Your Shell
Let’s start up the shell. In Windows, run Git Bash from the directory that you installed it in. You will have to run it as an administrator - to do so, right click on the program and select ‘Run as Administrator.’ In OS X, by default the shell is located in:
Applications -> Utilities -> Terminal
Figure 2. The Terminal.app program on OS X
When you run it, you will see this window.
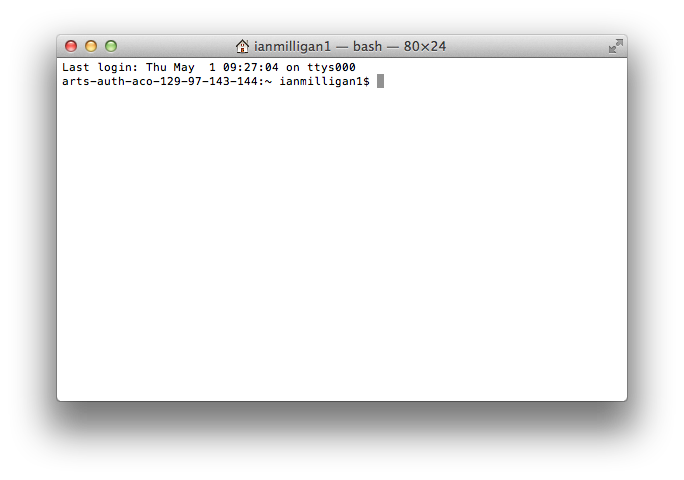
Figure 3. A blank terminal screen on our OS X workstation
You might want to change the default visual appearance of the terminal, as eyes can strain at repeatedly looking at black text on a white background. In the default OS X application, you can open the ‘Settings’ menu in ‘Preferences’ under Terminal. Click on the ‘Settings’ tab and change it to a new colour scheme. We personally prefer something with a bit less contrast between background and foreground, as you’ll be staring at this a great deal. ‘Novel’ is a soothing one as is the popular Solarized suite of colour palettes. For Windows users, a similar effect can be achieved using the Git Bash Properties tab. To reach this, right-click anywhere in the top bar and select Properties.
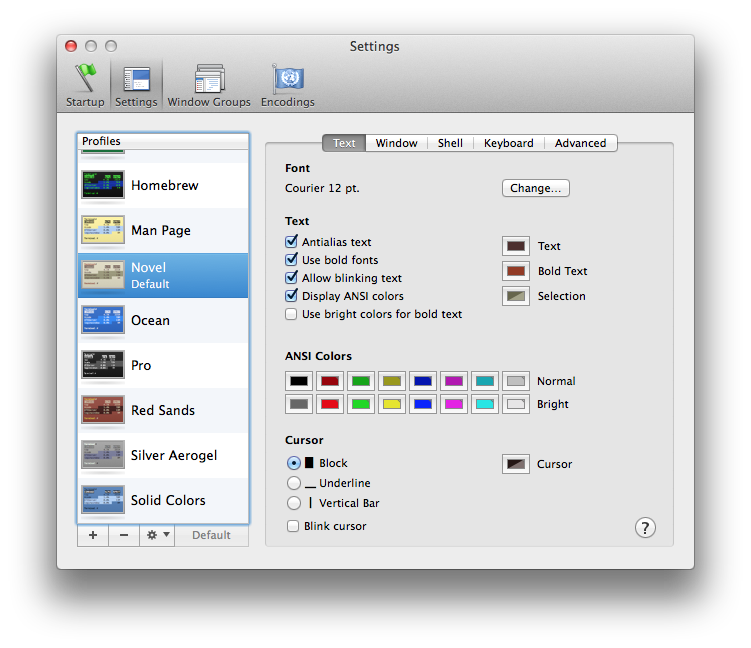
Figure 4. The Settings Screen on the OS X Terminal Shell Application
Once you are happy with the interface, let’s get started.
Moving Around Your Computer’s File System
If, when opening a command window, you are unsure of where you are in a computer’s file system, the first step is to find out what directory you are in. Unlike in a graphical system, when in a shell you cannot be in multiple directories at once. When you open up your file explorer on your desktop, it’s revealing files that are within a directory. You can find out what directory you are in through the pwd command, which stands for “print working directory.” Try inputing:
pwd
and hitting enter. If you’re on OS X or Linux, your computer will probably display /users/USERNAME with your own user name in place of USERNAME. For example, Ian’s path on OS X is /users/ianmilligan1/.
Here is where you realize that those on Windows and those on OS X/Linux will have slightly different experiences. On Windows, James is at:
c/users/jbaker
There are minor differences, but fear not; once you’re moving and manipulating files, these platform divergences can fade into the background.
To orient ourselves, let’s get a listing of what files are in this directory. Type
ls
and you will see a list of every file and directory within your current location. Your directory may be cluttered or it may be pristine, but you will at a minimum see some familiar locations. On OS X, for example, you’ll see Applications, Desktop, Documents, Downloads, Library, Pictures, etc.
You may want more information than just a list of files. You can do this by specifying various flags to go with our basic commands. These are additions to a command that provide the computer with a bit more guidance of what sort of output or manipulation you want. To get a list of these, OS X/Linux users can turn to the built-in help program. OS X/Linux users type
man ls
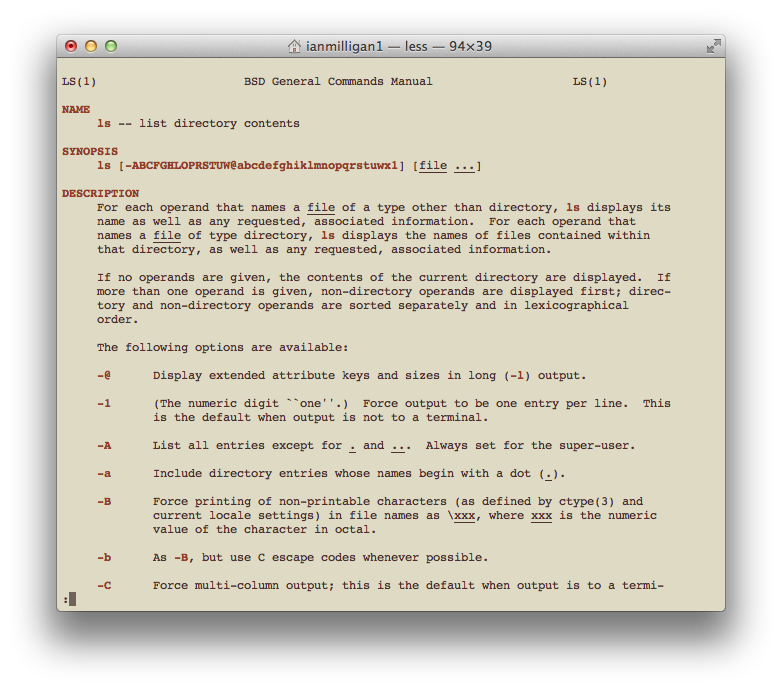
Figure 5. The Manual page for the LS command
Here, you see a listing of the name of the command, the way that you can format this command and what it does. Many of these will not make sense at this stage, but don’t worry; over time you will become more familiar with them. You can explore this page in a variety of ways: the spacebar moves down a page, or you can arrow down and arrow up throughout the document.
To leave the manual page, press
q
and you will be brought back to the command line where you were before entering the manual page.
Try playing around with the man page for the other command you have learned so far, pwd.
Windows users can use the help command, though this command has fewer features than man on OS X/Linux. Enter help to see the help available, and help pwd for an example of the command’s output.
Let’s try using a few of those options you saw in the man page for ls. Perhaps you only want to see TXT files that are in our home directory. Type
ls *.txt
which returns a list of text files, if you have any in your home directory (you may not, and that is OK as well). The * command is a wildcard — it stands for ‘anything.’ So, in this case, you’re indicating that anything that fits the pattern:
[anything.txt]
will be displayed. Try out different combinations. If, for example, you had several files in the format 1-Canadian.txt, 2-Canadian.txt, and so forth, the command ls *-Canadian.txt would display them all but exclude all other files (those that do not match the pattern).
Say you want more information. In that long man page, you saw an option that might be useful:
-l      (The lowercase letter ``ell''.)  List in long format.  (See below.)  If
        the output is to a terminal, a total sum for all the file sizes is out-
        put on a line before the long listing.
So, if you type
ls -l
the computer returns a long list of files that contains information similar to what you’d find in your finder or explorer: the size of the files in bites, the date it was created or last modified, and the file name. However, this can be a bit confusing: you see that a file test.html is ‘6020’ bits large. In commonplace language, you are more used to units of measurement like bytes, kilobytes, megabytes, and gigabytes.
Luckily, there’s another flag:
-h      When used with the -l option, use unit suffixes: Byte, Kilobyte,
        Megabyte, Gigabyte, Terabyte and Petabyte in order to reduce the number
        of digits to three or less using base 2 for sizes.
When you want to use two flags, you can just run them together. So, by typing
ls -lh
you receive output in a human-readable format; you learn that that 6020 bits is also 5.9KB, that another file is 1 megabyte, and so forth.
These options are very important. In other lessons within the Programming Historian, you’ll see them. Wget, MALLET, and Pandoc all use the same syntax. Luckily, you do not need to memorize syntax; instead, keep these lessons handy so you can take a quick peek if you need to tweak something. These lessons can all be done in any order.
You’ve now spent a great deal of time in your home directory. Let’s go somewhere else. You can do that through the cd or Change Directory command.
If you type
cd desktop
you are now on your desktop. This is akin to you ‘double-clicking’ on the ‘desktop’ folder within a file explorer. To double check, type pwd and you should see something like:
/Users/ianmilligan1/desktop
Try playing around with those earlier commands: explore your current directory using the ls command.
If you want to go back, you can type
cd ..
This moves us ‘up’ one directory, putting us back in /Users/ianmilligan1/. If you ever get completely lost, the command
cd --
will bring you right back to the home directory, right where you started.
Try exploring: visit your documents directory, your pictures, folders you might have on your desktop. Get used to moving in and out of directories. Imagine that you are navigating a tree structure. If you’re on the desktop, you won’t be able to cd documents as it is a ‘child’ of your home directory, whereas your Desktop is a ‘sibling’ of the Documents folder. To get to a sibling, you have to go back to the common parent. To do this, you will have to back up to your home directory (cd ..) and then go forward again to cd documents.
Being able to navigate your file system using the bash shell is very important for many of the lessons at the Programming Historian. As you become more comfortable, you’ll soon find yourself skipping directly to the directory that you want. In our case, from anywhere on our system, you could type
cd /users/ianmilligan1/mallet-2.0.7
or, on Windows, something like
cd c:\mallet-2.0.7\
and be brought to our MALLET directory for topic modeling.
Finally, try
open .
in OS X or
explorer .
in Windows. That command will open up your GUI at the current directory. Make sure to leave a space between open or explorer and the period.
Interacting with Files
As well as navigating directories, you can interact with files on the command line: you can read them, open them, run them, and even edit them, often without ever having to leave the interface. There is some debate over why one would do this. The primary reason is the seamless experience of working on the command line: you never have to pick up your mouse or touch your track pad, and, although it has a steep learning curve it can eventually become a sole writing environment. Furthermore, many programs require you to use the command line to operate with them. Since you’ll be using programs on the command line, it can often be quicker to make small edits without switching into a separate program. For some of these arguments, see Jon Beltran de Heredia’s “Why, oh WHY, do those #?@! nutheads use vi?”.
Here’s a few basic ways to interact with files.
First, you can create a new directory so you can engage with text files. We will create it on your desktop, for convenience’s sake. You can always move it later. Navigate to your desktop using your shell, and type:
mkdir ProgHist-Text
This creates a directory named, you guessed it, ‘ProgHist-Text.’ In general, it’s good to avoid putting spaces in your filenames and directories when using the command line (there are workarounds, of course, but this approach is simpler). You can look at your desktop to verify it has worked. Now, move into that directory (remember, that would be cd ProgHist-Text).
But wait! There’s a trick to make things a bit quicker. Go up one directory (cd .. - which will take you back to the Desktop). To navigate to the ProgHist-Text directory you could type cd ProgHist-Text. Alternatively, you could type cd Prog and then hit tab. You will notice that the interface completes the line to cd ProgHist-Text. Hitting tab at any time within the shell will prompt it to attempt to auto-complete the line based on the files or sub-directories in the current directory. This is case sensitive, however (i.e. in the previous example, cd prog would not auto complete to ProgHist-Text. Where two or more files have the same characters, the auto-complete will only fill up to the first point of difference. We would encourage using this method throughout the lesson to see how it behaves.
Now you need to find a basic text file to help us with the example. Why don’t you use a book that you know is long, such as Leo Tolstoy’s epic War and Peace. The text file is availiable via Project Gutenberg. If you have already installed wget, you can just type
wget http://www.gutenberg.org/files/2600/2600-0.txt
If you do not have wget installed, download the text itself using your browser. Go to the link above, and, in your browser, use the ‘Save Page as..’ command in your ‘file menu.’ Save it in your new ‘ProgHist-Text directory.’ Now, when you type
ls -lh
you see
-rw-r–r–+ 1 ianmilligan1 staff 3.1M 1 May 10:03 2600-0.txt
You can read the text within this file in a few different ways. First, you can tell our computer that you want to read it using the standard program that you use to open text files. By default, this may be TextEdit on OS X or Notepad in Windows. To open a file, just type
open 2600-0.txt
on OS X, or
explorer 2600-0.txt
in Windows.
This selects the default program to open that type of file, and opens it.
However, you often want to just work on the command line without leaving it. You can read files within this environment as well. To try this, type:
cat 2600-0.txt
The terminal window erupts and War and Peace cascades by. That’s great, in theory, but you can’t really make any sense of that amount of text? Instead, you may want to just look at the first or the last bit of the file.
head 2600-0.txt
Provides a view of the first ten lines, whereas
tail 2600-0.txt
provides a perspective on the last ten lines. This is a good way to quickly determine the contents of the file. You could add a command to change the amount of lines displayed: head -20 2600-0.txt, for example, would show the first twenty lines.
You may also want to change the file name to something more descriptive. You can ‘move’ it to a new name by typing
mv 2600-0.txt tolstoy.txt
Afterwards, when you perform a ls command, you will see that it is now tolstoy.txt. Had you wanted to duplicate it, you could also have run the copy command by typing
cp 2600-0.txt tolstoy.txt
you will revisit these commands shortly.
Now that you have used several new commands, it’s time for another trick. Hit the up arrow on your keyboard. Notice that cp 2600-0.txt tolstoy.txt appears before your cursor. You can continue pressing the up arrow to cycle through your previous commands. The down arrow cycles back toward your most recent command.
After having read and renamed several files, you may wish to bring their text together into one file. To combine, or concatenate, two or more files, you can use the cat command. First, let’s duplicate the Tolstoy file ( cp tolstoy.txt tolstoy2.txt). Now that you have two copies of War and Peace, let’s put them together to make an even longer book.
To combine, or concatenate, two or more files use the cat command. Type
cat tolstoy.txt tolstoy2.txt
and press enter. This prints, or displays, the combined files within the shell. However, it is too long to read on this window! Luckily, by using the > command, you can send the output to a new file, rather than the terminal window. Type
cat tolstoy.txt tolstoy2.txt > tolstoy-twice.txt.
Now, when you type ls you’ll see tolstoy-twice.txt appear in your directory.
When combining more than two files, using a wildcard can help avoid having to write out each filename individually. As you have seen above, *, is a place holder for zero or more characters or numbers. So, if you type
cat *.txt > everything-together.txt
and hit enter, a combination of all the .txt files in the current directory are combined in alphabetical order as everything-together.txt. This can be very useful if you need to combine a large number of smaller files within a directory so that you can work with them in a text analysis program. Another wildcard worth remembering is ? which is a place holder for a single character or number.
Editing Text Files Directly on the Command Line
If you want to read a file in its entirety without leaving the command line, you can fire up vim. Vim is a very powerful text editor, which is perfect for using with programs such as Pandoc to do word processing, or for editing your code without having to switch to another program. Best of all, it comes included with bash on both OS X and Windows. Vim has a fairly steep learning curve, so we will just touch on a few minor points.
Type
vim tolstoy.txt
You should see vim come to life before you, a command-line based text editor.

Figure 6. Vim
If you really want to get into Vim, there is a good Vim guide available.
Using Vim to read files is relatively simple. You can use the arrow keys to navigate around and could theoretically read War and Peace through the command line (one should get an achievement for doing that). Some quick basic navigational commands are as follows:
Ctrl+F (that is, holding down your ‘control key’ and pressing the letter F) will move you down a page (Shift+UpArrow for Windows).
Ctrl+B will move you up a page. (Shift+DownArrow for Windows users).
If you want to rapidly move to the end of a line, you can press: $ and to move to the start of one, 0. You can also move between sentences by typing ) (forward) or ( (backwards). For paragraphs, use } and {. Since you are doing everything with your keyboard, rather than having to hold your arrow key down to move around a document, this lets you zip quickly back and forth.
Let’s scroll to the top and do a minor change, such as adding a Reader field in the heading. Move your cursor in between Author: and Translators:, like so:
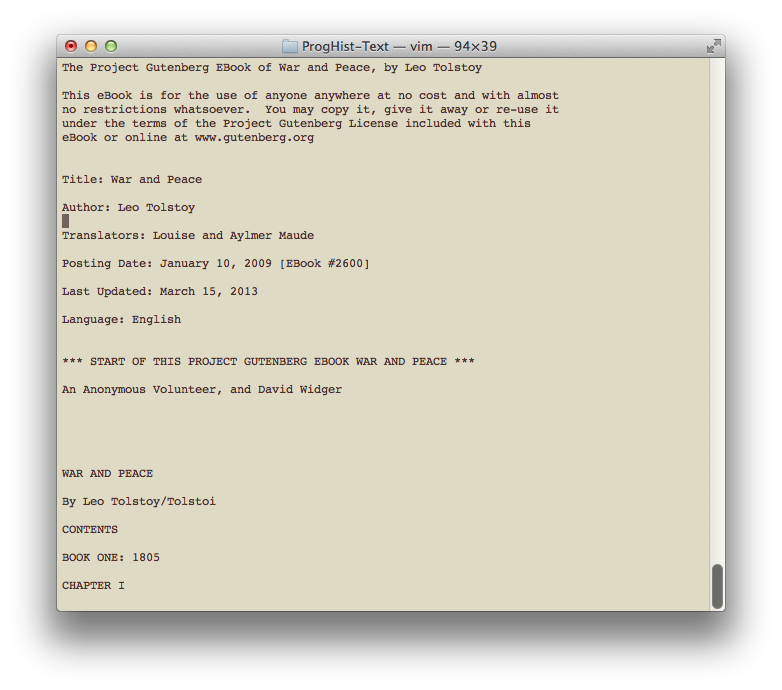
Figure 7. About to Insert a Field
If you just start typing, you’ll get an error message or the cursor will begin jumping around. This is because you have to specify that you want to do an edit. Press the letter
a
At the bottom of the screen, you will see
-- INSERT --
This means you are in insert mode. You can now type and edit text as if you are in a standard text editor. Press enter twice, then arrow up, and type
Reader: A Programming Historian
When you are done, press ESC to return to reading mode.
To leave vim or to make saves, you have to enter a series of commands. Press : and you’ll move to the command input line of Vim. you can enter a variety of commands here. If you want to save the file, type w to ‘write’ the file. If you execute that command, you will see
“tolstoy.txt” [dos] 65009L, 3291681C written
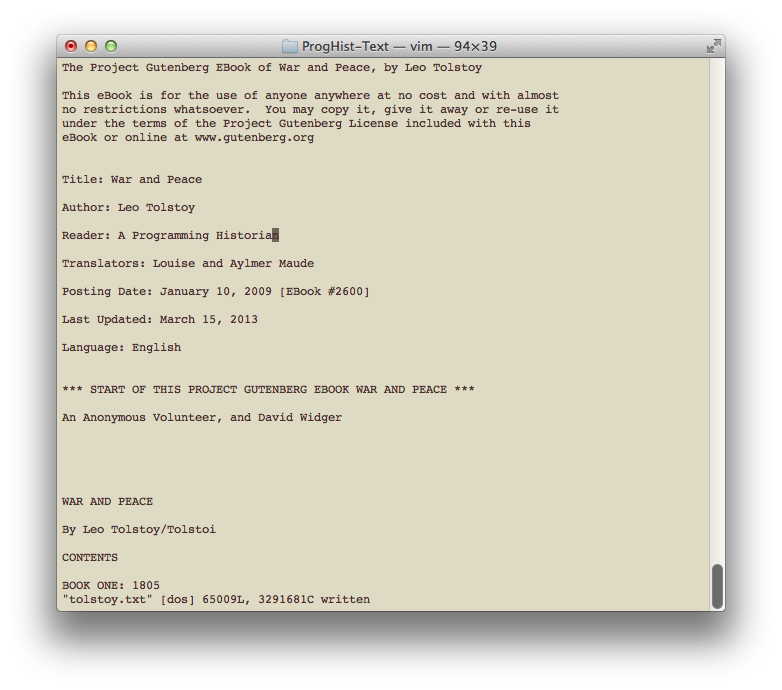
Figure 8. After Writing the File, with Our Minor Change
If you want to quit, type : again and then q. It will return you to the command line. As with the rest of bash, you could have also combined the two commands. Pressing : and then typing wq would have written the file and then quit. Or, if you wanted to exit without saving, q! would have quit vim and overriden the default preference to save your changes.
Vim is different than you are likely used to and will require more work and practice to become fluent with it. But if you are tweaking minor things in files, it is a good way to get started. As you become more comfortable, you might even find yourself writing term papers with it, by harnessing the footnoting and formatting power of Pandoc and Markdown.
Moving, Copying, and Deleting Files
Let’s say you are done with this directory, and you would like to move tolstoy.txt somewhere else. First, you should create a backup copy. The shell is quite unforgiving with mistakes, and backing up is even more important than with GUIs. If you delete something here, there’s no recycling bin to fish it out of. To create a backup, you can type
cp tolstoy.txt tolstoy-backup.txt
Now when you run a ls command you will see five files, two of which are the same: tolstoy.txt and tolstoy-backup.txt.
Let’s move the first of these somewhere else. By way of example, let’s create a second directory on your desktop. Move up to your desktop (cd ..) and mkdir another directory. Let’s call it proghist-dest.
To copy tolstoy.txt you have a few different options. you could run these commands from anywhere in the shell, or you could visit either the origin or destination directories. For this example, let’s just run it from here. The basic format of the copy command is cp [source] [destination]. That is, you type cp first, and then enter the file or files that you want to copy followed by where they should go.
In this case, the command
cp /users/ianmilligan1/desktop/proghist-text/tolstoy.txt /users/ianmilligan1/desktop/proghist-dest/
will copy Tolstoy from the first directory to the second directory. You will have to insert your own username in place of ‘ianmilligan1’. This means you now have three copies of the novel on our computer. The original, the backup and the new copy in the second directly. If you wanted to move the file, that is, not leave a copy behind, you could run the command again, swapping cp for mv; let’s not do this yet.
You can also copy multiple files with a single command. If you wanted to copy both the original and the backup file, you could use the wildcard command.
cp /users/ianmilligan1/desktop/proghist-text/*.txt /users/ianmilligan1/desktop/proghist-dest/
This command copies all the text files from the origin directory into the destination directory.
Note: If you are in the directory that you either want to move things to or from, you do not have to type out the whole directory structure. Let’s do two quick examples. Change your directory to the proghist-text directory. From this location, if you wanted to copy these two files to proghist-dest, this command would work:
cp *.txt /users/ianmilligan1/desktop/proghist-dest/ (on OS X, substitute the directory on Windows)
Alternatively, if you were in the proghist-dest directory, this command would work:
cp /users/ianmilligan1/desktop/proghist-text/*.txt ./
The ./ command refers to the current directory you’re in. This is a really valuable command.
Finally, if you want to delete a file, for whatever reason, the command is rm, or remove. Be careful with the rm command, as you don’t want to delete files that you do not mean to. Unlike deleting from within your GUI, there is no recycling bin or undo options. For that reason, if you are in doubt, you may want to exercise caution or maintain a regular backup of your data.
Move to proghist-text and delete the original file by typing
rm tolstoy.txt
Check that the file is gone using the ls command.
If you wanted to delete an entire directory, you have two options. you can use rmdir, the opposite of mkdir, to delete an empty directory. To delete a directory with files, you could use from the desktop:
rm -r proghist-text
Conclusions
You may want to take a break from the terminal at this point. To do so, enter exit and you’ll close your session.
There are more commands to try as you get more comfortable with the command line. Some of our other favourites are du, which is a way to find out how much memory is being used (du -h makes it human readable — as with other commands). For those of you on OS X, top provides an overview of what processes are running (mem on Windows) and touch FILENAME can create a basic text file on both systems
By this point, we hope you have a good, basic understanding of how to move around using the command line, move basic files, and make minor edits here and there. This beginner-level lesson is designed to give you some basic fluency and confidence. In the future, you may want to get involved with scripting.
Have fun! Before you know it, you may find yourself liking the convenience and precision of the command line - for certain applications, at least - far more than the bulkier GUI that your system came with. Your toolkit just got bigger.
Reference Guide
For your convenience, here are the commands that you have learned in this lesson:
| Command | What It Does |
|---|---|
pwd |
Prints the ‘present working directory,’ letting you know where you are. |
ls |
Lists the files in the current directory |
man * |
Lists the manual for the command, substituted for the * |
cd * |
Changes the current directory to * |
mkdir * |
Makes a directory named * |
open or explorer |
On OS X, open followed by a file opens it; in Windows, the command explorer followed by a file name does the same thing. |
cat * |
cat is a versatile command. It will read a file to you if you substitute a file for *, but can also be used to combine files. |
head * |
Displays the first ten lines of * |
tail * |
Displays the last ten lines of * |
mv |
Moves a file |
cp |
Copies a file |
rm |
Deletes a file |
vim |
Opens up the vim document editor. |
