Introduction to OCR
Lesson Goals
The goal of this lesson is to teach how to do OCR (Optical Character Recognition) for printed or typewritten text. After this lesson you will able to convert printed and typewritten texts into digital text files. In order to be able to go through all the steps the OCR’ing process demands, you’ll need to have access to either a scanner or digital camera, a computer with internet access, some patience, and a lot of curiosity! We will make a few easy commands using the Command line, but if you have never used it before, you might want to look at the lesson [Introduction to the Bash Command Line] (/lessons/intro-to-bash). I use Windows, but these instructions should function also in Mac.
Why OCR?
Before starting, I would like to say a couple of words on why would anyone want to learn to OCR. There is an increasing amount of digitized sources available in various databases. Simultaneously, OCR’ing takes a lot of time, so why bother? That’s true! However, sometimes just the most relevant and interesting documents for your project are not in digital form. And if you think about the source materials that we use for producing new insights and knowledge on our past, it is very important that we not deliberately restrict ourselves to the already digitized documents, but look also at the sources that might provide alternative and contradictory views!
OCR’ing takes a lot of time. You’ll spend numerous hours with your documents, and you might be frustrated. But don’t worry! I have realized that actually, when you spend a lot of time doing relatively simple and repetitive work, you’ll process the issues related to source criticism more thoroughly.
Stages of the Lesson
The OCR process can be divided into four stages:
In this lesson, Prework means scanning or taking digital photographs of the printed or typewritten texts. The Image Preprocessing part means the work you do to the acquired images so that they will be more readable for the OCR program. OCR is the process where a program converts the images of the letters, which are not understandable to a computer, into letters that are computer readable. The result of the OCR will not be without misspellings and other errors. Therefore, you’ll need to Clean the OCR output so that you’ll be able to use it for your purposes.
Before starting, try to doublecheck that no-one else has done the work already. I have once spent one week in scanning something I later found already digitized. Yes, I felt a bit stupid!
Ok, are you ready? Let’s start then!
Prework
So, now that you have the material you want to convert into text form, there are two options for doing the prework. The preferable option is to scan the texts, if you have a good scanner. If you don’t, you can take digital photographs of the documents. Scanning is a better option, because when the paper lays on the scanner’s glass, it will be more or less straight. When you are taking photographs of a big book, the flexure of the paper might cause reduced readability later in the process.
My scan.
When you are scanning or photographing the document, scan all the pages. At some point you’ll be tempted to scan only 500 of the 1000 pages, but don’t do it! Just do all 1000 pages. Partial documentation will not reveal the whole picture of it, and you will not be able to relate your findings or analysis to the whole document. And although this part of the work is the most boring, try to be patient and diligent. There is nothing more frustrating than noticing that there is one page missing from the entire document!
For the next steps, save the scans or images in .tiff or .png formats. Save the images to a place that is logical and easy to find for you, and prefereably create a separate folder for each book or entity of documents.
It will be a good practice to save the metadata as well. That is, write down to yourself everything related to the document: what it is, where you found it, which dates it covers, who published it, how many pages there are, anything. You will never know what information will later prove to be important. And this is also very important information in case you end up sharing the texts later with someone else, using your text files for another project.
I use Zotero for keeping track of the metadata of my sources, and here is an example of one of them. If you prefer, you can also just write down the metadata on a notepad. Just make sure that you’ll store the information in a logical place, where you’ll be able to find it.

My metadata in Zotero
Image Preprocessing
So, now that we have the text as an image, we will move on to image preprocessing.
For image preprocessing I use a free and open source program called Scan Tailor. You can download Scan Tailor [here] (http://scantailor.org/downloads/).
When you have downloaded Scan Tailor, open the text scans in the program by clicking “New project”, browsing and selecting the file where you saved your text scans, and finally selecting the images you want to preprocess. Scan Tailor is a relatively heavy program, which means that it reserves quite a lot of the computer’s capacity. For that reason it is better to divide large files into smaller entities, and preprocess them in parts. When starting a new project you can choose which images you want to select for preprocessing. When you have selected the scans for preprocessing, click “OK”.
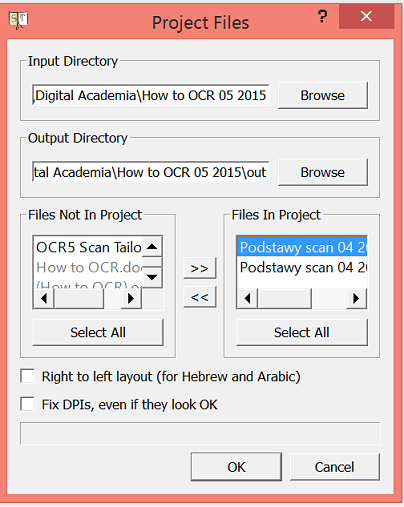
Starting a new project in Scan Tailor
Before starting the actual preprocessing we will need to fix the DPI of the images. DPI stands for dots per inch, which practically means the resolution of the images. In order to ensure high quality OCR, it is better to choose 300 DPI or more. Click “Apply”, and then “OK”.
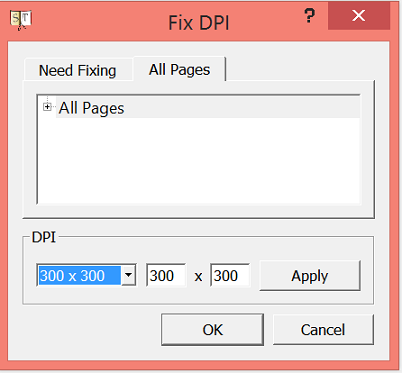
Choosing DPI
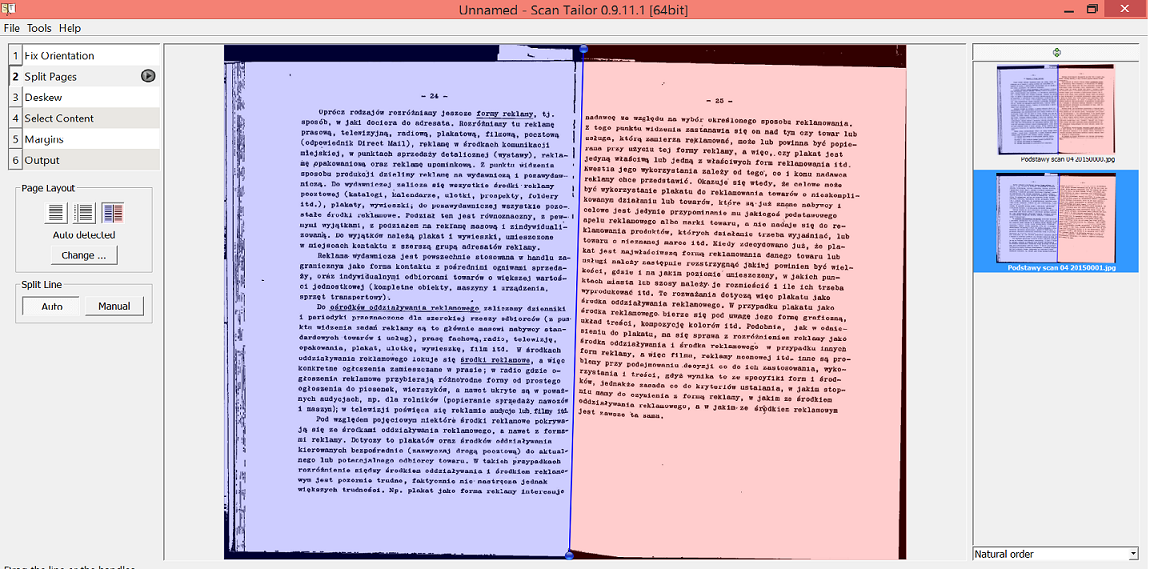
Now we have the project open in Scan Tailor, and we can start preprocessing. On the left bar you can see the steps of preprocessing work, and in the right bar are the scans that we are going to preprocess. Remember to save the project every now and then so that you will not lose the work you’ve done!
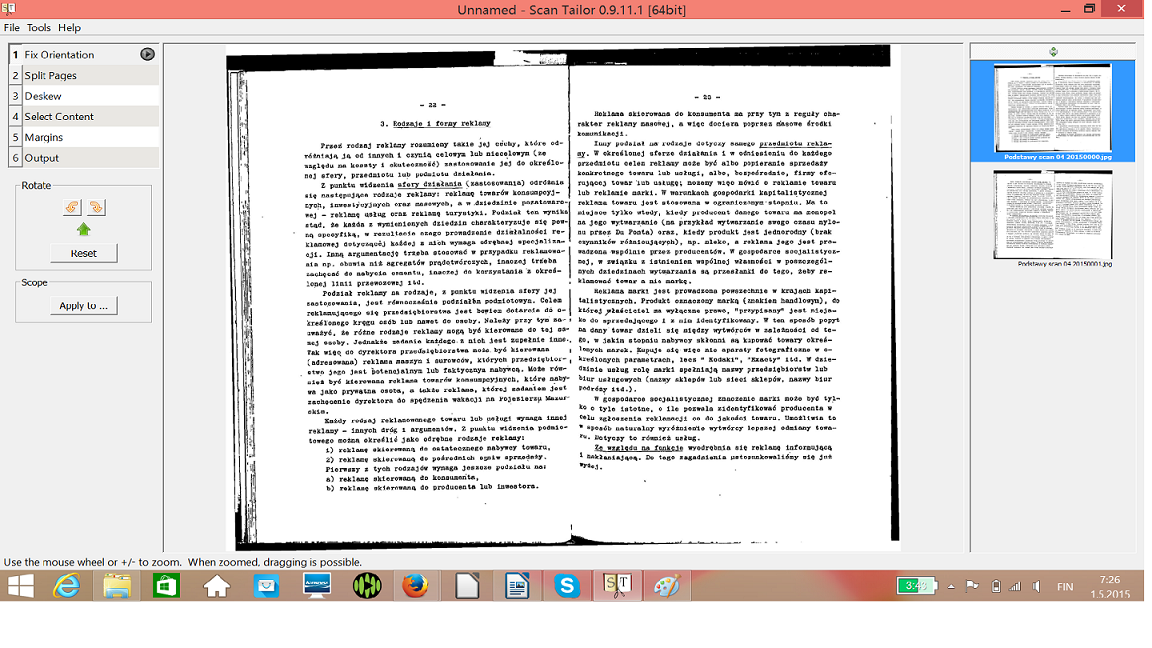
Fixing orientation of the scans.
The first step is to fix the orientation of the scans by using the arrows, if the scans are not already straight. By selecting all the scanned pages one by one we can fix the orientation of each of them.
The next step is to split the pages, if you have scanned two pages at once. You can move the line pointing to the automatic suggestion of the program if you need to.
Splitting the pages.
Now that we have split the pages, the third step is to deskew the orientation of the texts.
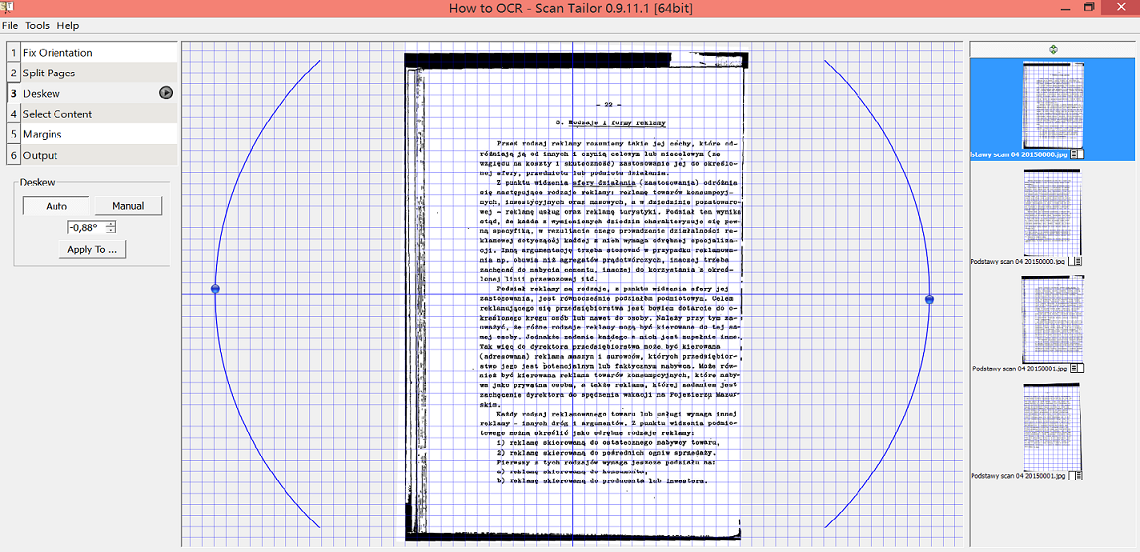
Deskewing the orientation of the scans.
The fourth step is to select the content. In this project the page numbers were not important, and therefore I left them out.
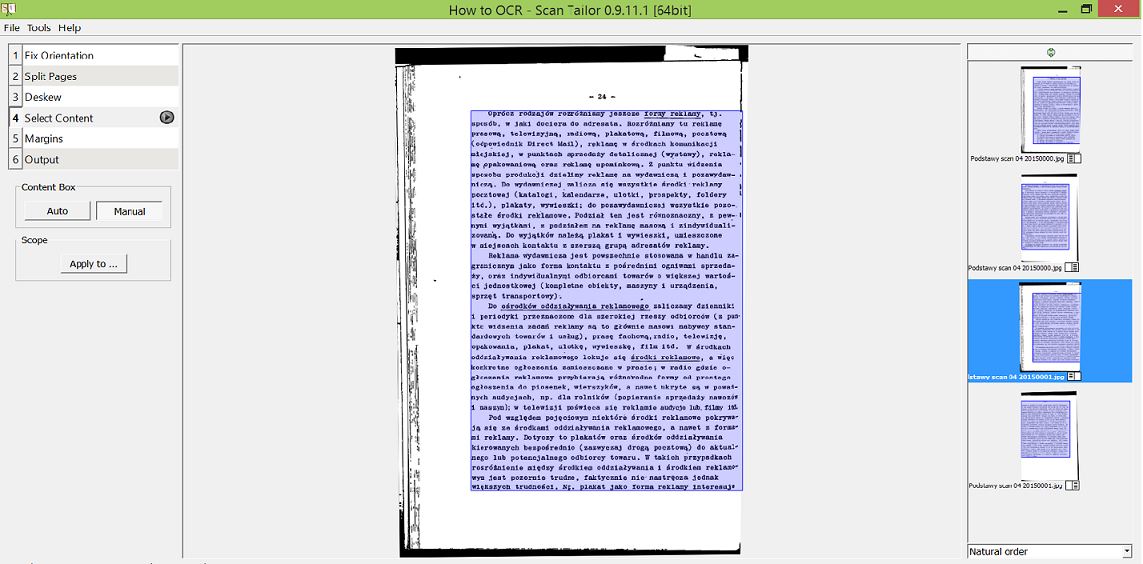
Selecting content.
After selecting the content we will set the margins. For ORC results the margins are not important, and at this point we can just check that everything that we want to OCR is within the white text area.
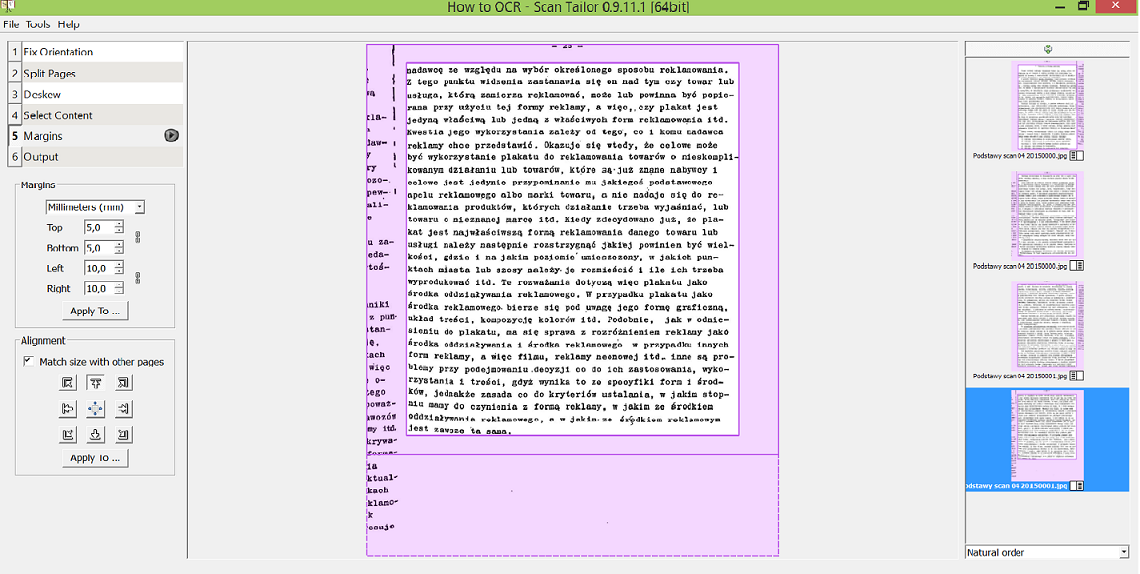
Setting the margins.
The last step is to check the output by selecting the coloring of the image and thickness of the lines, and cleaning the unnecessary spots and lines. For OCR purposes it is important that the letters are clear (not too thick, nor thin) and that there is as little “noise” as possible. For my pages I wanted to remove the lines (by choosing the Fill Zones function in the right side of the image) and to make the letters slightly thinner. You might also want to try dewarping the text, which helps especially if your text is uneven. At this point you can also check that the output resolution is at least 300 DPI.
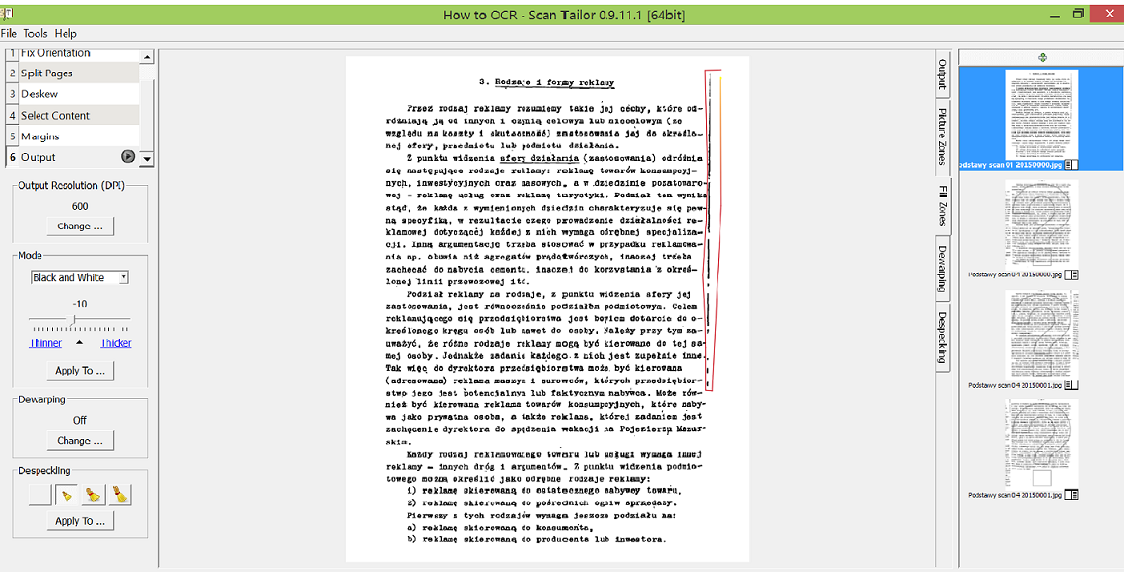
Checking the output of the images.
When you are satisfied with the output, click the small arrow in the “Output” bar. The program will run for a moment, and then your preprocessing work is done! Save the project once more, and now you can close the program. Scan Tailor created a new folder for the preprocessed images named “out” inside the project folder. Scan Tailor will name the preprocessed images. For the next step it is a good idea to make sure that the names are short and easy, and if they are not, rename them.
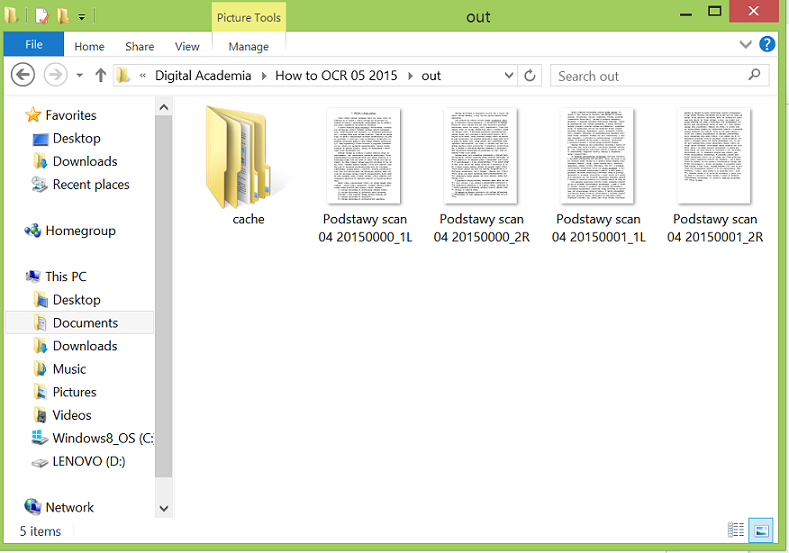
Preprocessed scans in the ‘out’ folder.
If you feel you need more instructions on how to use Scan Tailor, they have good instructions on their web page, and a handy video.
Save the preprocessed images to a place where it is easy to access them by using the command line.
OCR
OK, let’s move on! For OCR we will use a free and open source program called Tesseract.
You can install Tesseract here. If you are going to OCR other languages than English, you will also need to install the language package for that language, and unpack it by using 7-zip.
Now that we have Tesseract, we can proceed to doing the actual OCR!
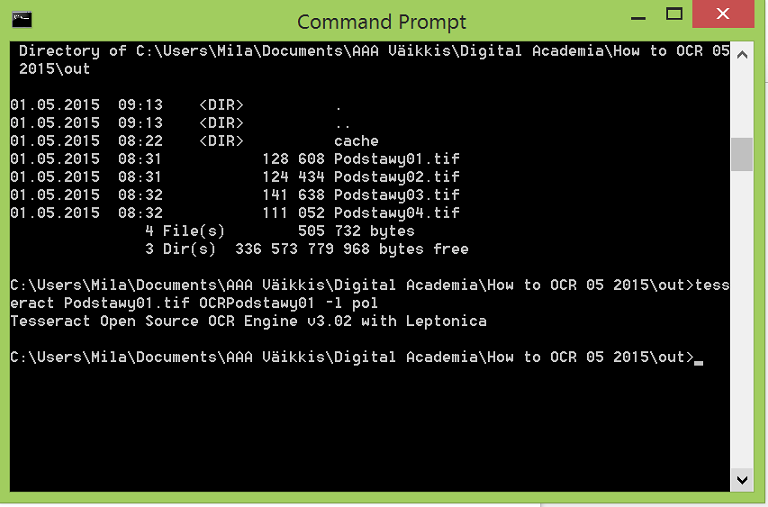
Open your command line, and go to the folder where the preprocessed images are located. Type
tesseract yourdocument.tif outputdocument
If you are doing OCR for non-English language documents, just add
-l yourlanguage
The name of the document I’ll OCR is Podstawy01.tif, and I want the name of the OCR’d text to be OCRPodstawy01. In addition, becaue my text is in Polish, I’ll need to add the language definition in the command. My command goes like this:
tesseract Podstawy01.tif OCRPodstawy01 -l pol
After running the command.
Tesseract saves the OCR outputs in Unicode, which means that it should also understand characters that are not used in English. If you click with the right button of your mouse the OCR output document, and choose to “Open with” Notepad, Notepad will display the “special characters” correctly:
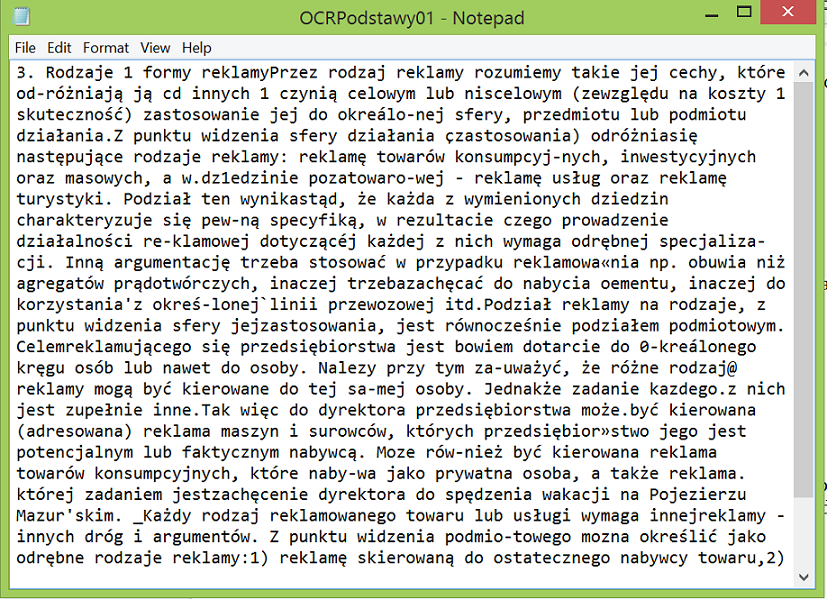
Ready OCR’d text in Notepad.
Now you know how to OCR! Congratulations!
Well, of course this was not the whole story. You will most likely want to do OCR for a batch of images at the same time. For doing batch OCR, you’ll need to do the following things:
First, make sure that the path to the preprocessed image folder is not too long, and the names of the folders don’t contain breaks. Then create a folder for the ready OCR’d texts to come.
Then we’ll create a little gadget: open an empty Notepad and copy the following commands there.
`:Start
   @Echo off
   Set _SourcePath=inputsource\*.tif
   Set _OutputPath=outputsource\
   Set _Tesseract="C:\Program Files (x86)\Tesseract-OCR\tesseract.exe"
:Convert
   For %%A in (%_SourcePath%) Do Echo Converting %%A...&%_Tesseract% %%A %_OutputPath%%%~nA
:End
   Set "_SourcePath="
   Set "_OutputPath="
   Set "_Tesseract="`
Then write the path for the input source (the folder where the preprocessed images are located) after ‘Set_SourcePath=’, and the path for the output (the folder where you want the ready OCR’d texts to be stored) after ‘Set_OutputPath=’. If your texts are not in English, you’ll need to indicate the language right after ‘For %%A in (%_SourcePath%) Do Echo Converting %%A…&%_Tesseract% %%A %_OutputPath%%%~nA’.
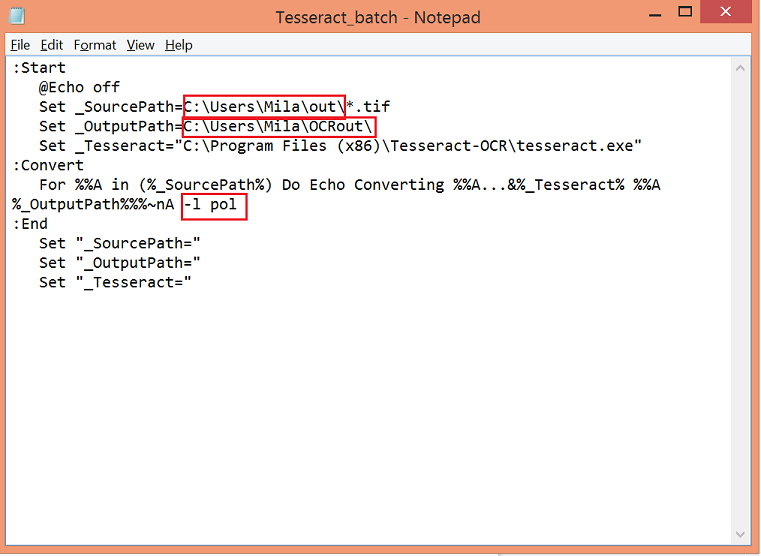
My script looks like this.
Now, save the notepad as .bat format (Windows batch file) and name it Tesseract_batch. Note that the encoding of the .bat file should be ANSI.
Then go with the command line to the folder where you saved the Tesseract_batch, and type ‘Tesseract_batch’. Tesseract OCR’s all the preprocessed documents in the file for you.
Now you have a bunch of text documents. If you want to unite the separate text documents into one document, you will need to go with the command line to the file where you have the OCR output texts, and type in the command line:
copy *.txt outputfile.txt
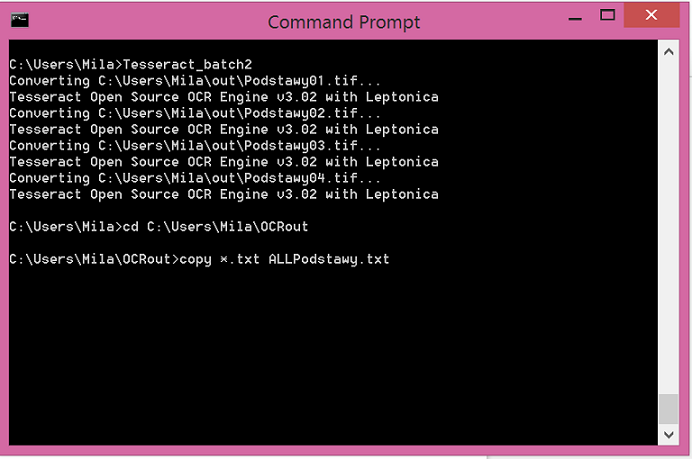
With my documents it looks like this.
The batched text file will appear in the file.
Now you have the OCR raw data! Congratulations!
OCR Cleaning
So, now as you look at the OCR’d text, you will notice soon, that the text is not perfect. Some words are probably not separated and some letters are not correctly written. What remains to be done, is to go through the text, and correct the errors.
This is the moment when you will thank yourself if you have been able to do a good quality job in the previous phases, because you will probably have pretty clear data. This is also the moment when you will need to decide how pure text you want to have: are you willing to pay less attention in this phase and accept some blurred words, or is the clarity of the text so essential that you will check all the output?
You might be interested in reading further on what to do with the raw OCR data. Fortunately, there are great lessons for that: Cleaning the OCR results with regular expressions or generating an ordered data set from the OCR results or preserving your data.
Before OCR’ing all of your sources, try with a small sample of materials to do the whole process from scratch to the analysis part you are planning to do. When doing the latter steps you might realize some details that you will need to take into account when doing the previous stages.
I would not have been able to learn myself and write this lesson without help of many people. Especially the help of Brooks Ambrose and the folks at the UC Berkeley D-lab!