Contents
- Lesson Goals
- Example 1: Fetching and Parsing HTML
- Example 2: URL Queries and Parsing JSON
- Example 3: Advanced APIs
Lesson Goals
OpenRefine is a powerful tool for exploring, cleaning, and transforming data. An earlier Programming Historian lesson, “Cleaning Data with OpenRefine”, introduced the basic functionality of Refine to efficiently discover and correct inconsistency in a data set. Building on those essential data wrangling skills, this lesson focuses on Refine’s ability to fetch URLs and parse web content. Examples introduce some of the advanced features to transform and enhance a data set including:
- fetch URLs using Refine
- construct URL queries to retrieve information from a simple web API
- parse HTML and JSON responses to extract relevant data
- use array functions to manipulate string values
- use Jython to extend Refine’s functionality
It will be helpful to have basic familiarity with OpenRefine, HTML, and programming concepts such as variables and loops to complete this lesson.
Why Use OpenRefine?
The ability to create data sets from unstructured documents available on the web opens possibilities for research using digitized primary materials, web archives, texts, and contemporary media streams. Programming Historian lessons introduce a number of methods to gather and interact with this content, from wget to Python. When working with text documents, Refine is particularly suited for this task, allowing users to fetch urls and directly process the results in an iterative, exploratory manner.
David Huynh, the creator of Freebase Gridworks (2009) which became GoogleRefine (2010) and then OpenRefine (2012+), describes Refine as:
- more powerful than a spreadsheet
- more interactive and visual than scripting
- more provisional / exploratory / experimental / playful than a database 1
Refine is a unique tool that combines the power of databases and scripting languages into an interactive and user friendly visual interface. Because of this flexibility it has been embraced by journalists, librarians, scientists, and others needing to wrangle data from diverse sources and formats into structured information.
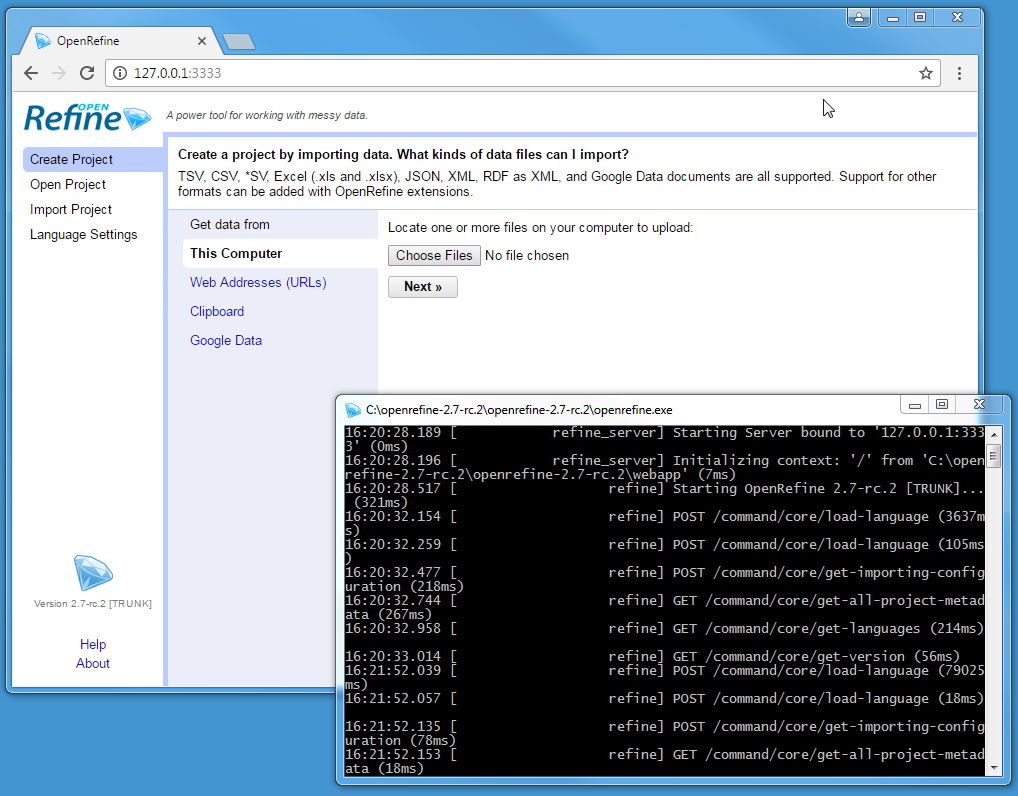
OpenRefine terminal and GUI
OpenRefine is a free and open source Java application. The user interface is rendered by your web browser, but Refine is not a web application. No information is sent online and no internet connection is necessary. Full documentation is available on the official wiki. For installation and staring Refine check this workshop page.
Note: this lesson was written using openrefine-2.7. Although almost all functionality is interchangeable between versions, I suggest using the newest version.
Lesson Outline
This lesson presents three examples demonstrating workflows to harvest and process data from the web:
- Example 1: Fetching and Parsing HTML transforms an ebook into a structured data set by parsing the HTML and using string array functions.
- Example 2: URL Queries and Parsing JSON interacts with a simple web API to construct a full text data set of historic newspaper front pages.
- Example 3: Advanced APIs demonstrates using Jython to implement a POST request to a natural language processing web service.
Example 1: Fetching and Parsing HTML
This example downloads a single web page and parses it into a structured table using Refine’s built in functions. A similar workflow can be applied to a list of URLs, often generated by parsing another web page, creating a flexible web harvesting tool.
The raw data for this example is an HTML copy of Shakespeare’s Sonnets from Project Gutenberg. Processing a book of poems into structured data enables new ways of reading text, allowing us to sort, manipulate, and connect with other information.
Start “Sonnets” Project
Start OpenRefine and select Create Project. Refine can import data from a wide variety of formats and sources, from a local Excel file to web accessible RDF. One often over looked method is the Clipboard, which allows entering data via copy & paste. Under “Get Data From”, click Clipboard, and paste this URL into the text box:
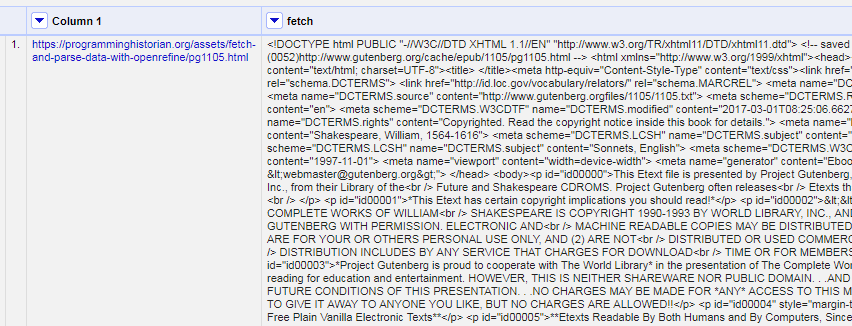
https://programminghistorian.org/assets/fetch-and-parse-data-with-openrefine/pg1105.html
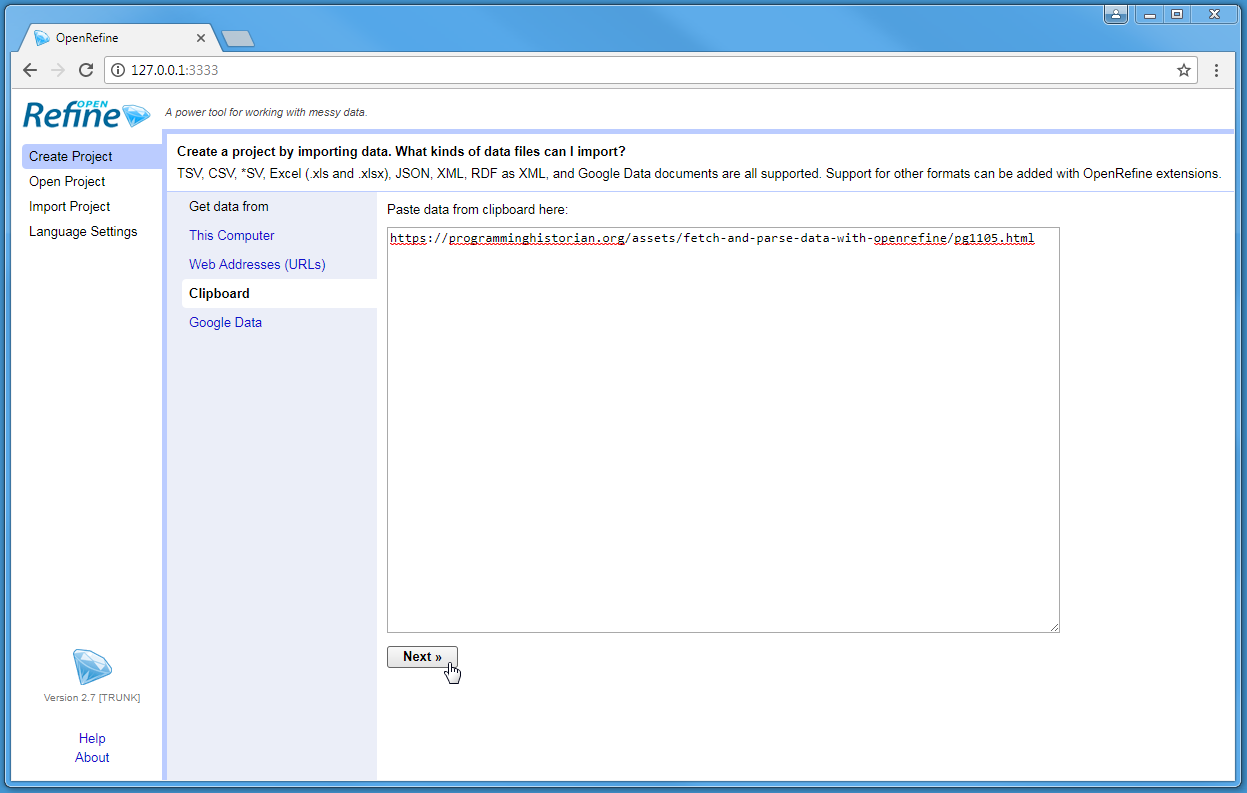
Start project with clipboard
After clicking Next, Refine should automatically identify the content as a line-based text file and the default parsing options should be correct. Add the project name “Sonnets” at the top right and click Create project. This will result in a project with one column and one row.
Fetch HTML
Refine’s built-in function to retrieve a list of URLs is done by creating a new column. Click on the menu arrow of Column 1 > Edit column > Add column by fetching urls.
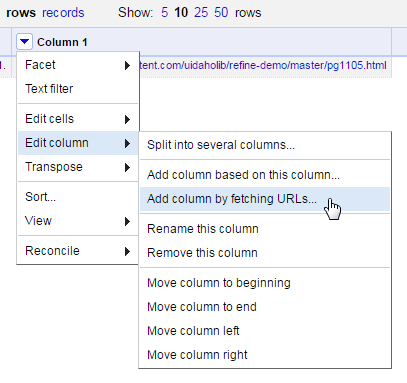
Edit column > Add column by fetching URL
Name the new column “fetch”. The Throttle delay option sets a pause time between requests to avoid being blocked by a server. The default is conservative.
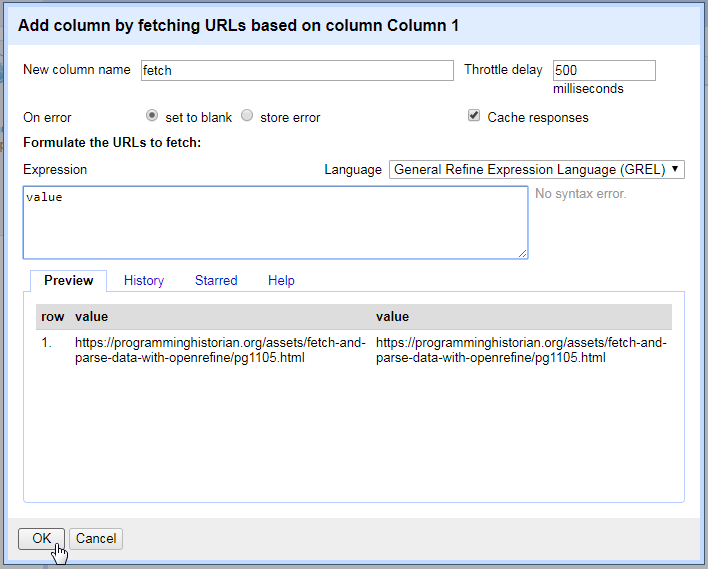
Add column by fetch dialog box
After clicking “OK”, Refine will start requesting the URLs from the base column as if you were opening the pages in your browser, and will store each response in the cells of the new column. In this case, there is one URL in Column 1 resulting in one cell in the fetch column containing the full HTML source for the Sonnets web page.
Fetch results
Parse HTML
Much of the web page is not sonnet text and must be removed to create a clean data set. First, it is necessary to identify a pattern that can isolate the desired content. Items will often be nested in a unique container or given a meaningful class or id.
To make examining the HTML easier, click on the URL in Column 1 to open the link in a new tab, then right click on the page to “View Page Source”.
In this case the sonnets page does not have distinctive semantic markup, but each poem is contained inside a single <p> element.
Thus, if all the paragraphs are selected, the sonnets can be extracted from the group.
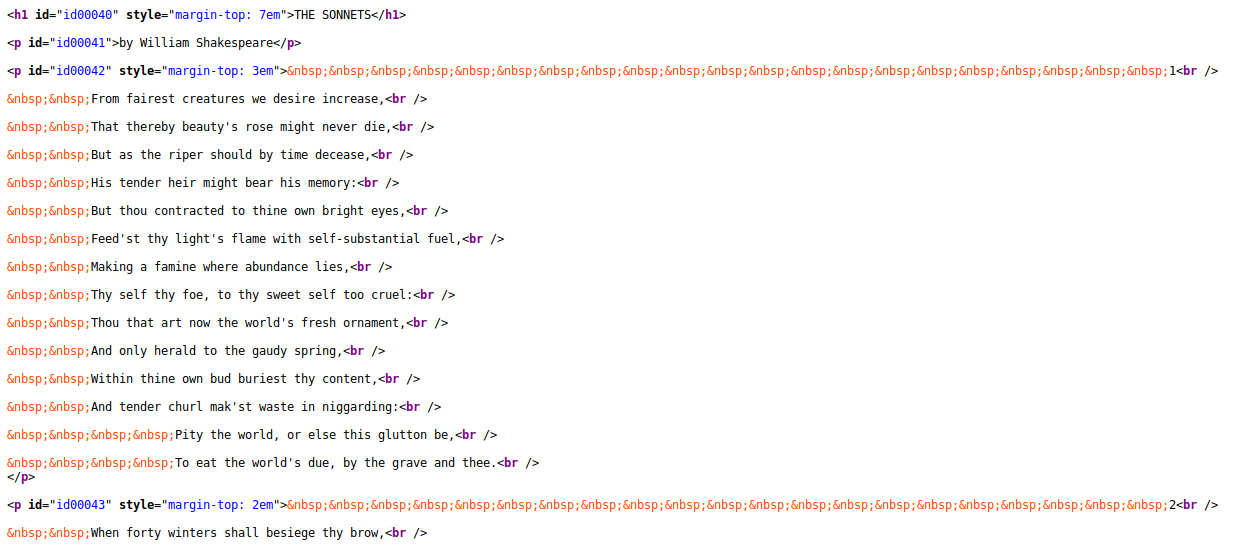
Each sonnet is a <p> with lines separated by <br />
On the fetch column, click on the menu arrow > edit column > Add column based on this column. Give the new column the name “parse”, then click in the Expression text box.
Edit column > Add column based on this column
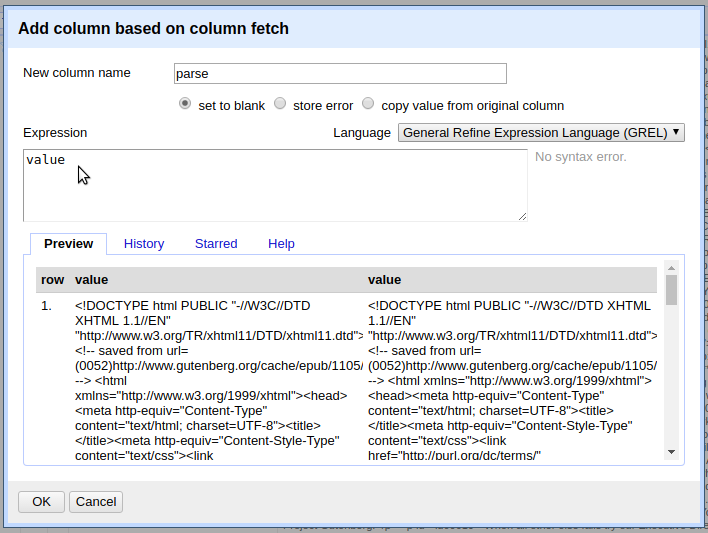
Data in Refine can be transformed using the General Refine Expression Language (GREL). The Expression box accepts GREL functions that will be applied to each cell in the existing column to create values for the new one. The Preview window below the Expression box displays the current value on the left and the value for the new column on the right.
The default expression is value, the GREL variable representing the current contents of a cell.
This means that each cell is simply copied to the new column, which is reflected in the Preview.
GREL variables and functions are strung together in sequence using a period, called dot notation.
This allows complex operations to be constructed by passing the results of each function to the next.
GREL’s parseHtml() function can read HTML content, allowing elements to be accessed using the select() function and the jsoup selector syntax.
Starting with value, add the functions parseHtml() and select("p") in the Expression box using dot notation, resulting in:
value.parseHtml().select("p")
Do not click OK at this point, simply look at the Preview to see the result of the expression.
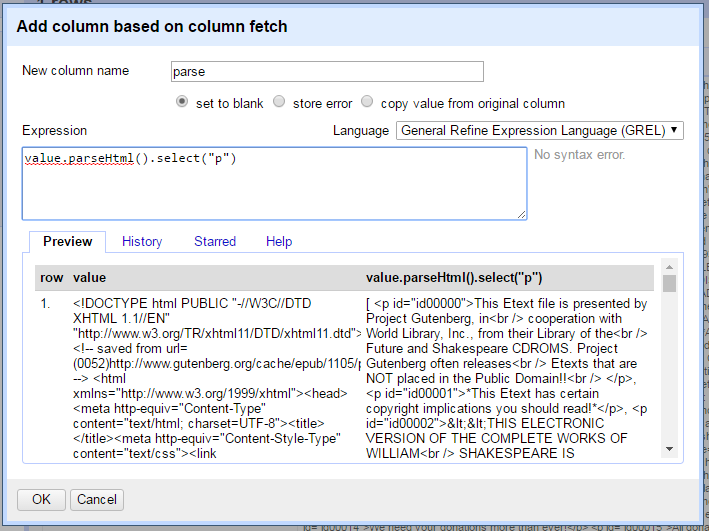
Edit the GREL expression, parseHtml function
Notice that the output on the right no longer starts with the HTML root elements (<!DOCTYPE html etc.) seen on the left.
Instead, it starts with a square bracket [, displaying an array of all the p elements found in the page.
Refine represents an array as a comma separated list enclosed in square brackets, for example [ "one", "two", "three" ].
Refine is visual and iterative; it is common to gradually build up an expression while checking the preview to see the result. In addition to helping debug your GREL, this provides an opportunity learn more about the data set before adding more functions. Try the following GREL statements in the Expression box without clicking OK. Watch the preview window to understand how they function:
- Adding an index number to the expression selects one element from the array, for example
value.parseHtml().select("p")[0]. The beginning of the sonnets file contains many paragraphs of license information that are unnecessary for the data set. Skipping ahead through the index numbers, the first sonnet is found atvalue.parseHtml().select("p")[37]. - GREL also supports using negative index numbers, thus
value.parseHtml().select("p")[-1]will return the last item in the array. Working backwards, the last sonnet is at index[-3]. - Using these index numbers, it is possible to slice the array, extracting only the range of
pthat contain sonnets. Add theslice()function to the expression to preview the sub-set:value.parseHtml().select("p").slice(37,-2).
Clicking OK with the expression above will result in a blank column, a common cause of confusion when working with arrays.
Refine will not store an array object as a cell value.
It is necessary to use toString() or join() to convert the array into a string variable.
The join() function concatenates an array with the specified separator.
For example, the expression [ "one", "two", "three" ].join(";") will result in the string “one;two;three”.
Thus, the final expression to create the parse column is:
value.parseHtml().select("p").slice(37,-2).join("|")
Click OK to create the new column using the expression.
Split Cells
The parse column now contains all the sonnets separated by “|”, but the project still contains only one row.
Individual rows for each sonnet can be created by splitting the cell.
Click the menu arrow on the parse column > Edit cells > Split multi-valued cells.
Enter the separator | that was used to join in the last step.

Edit cells > Split multivalued cells
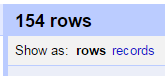
After this operation, the top of the project table should now read 154 rows. Below the number is an option toggle “Show as: rows records”. Clicking on records will group the rows based on the original table, in this case it will read 1. Keeping track of these numbers is an important “sanity check” when transforming data in Refine. The 154 rows make sense because the ebook contained 154 sonnets, while 1 record represents the original table with only one row. An unexpected number would indicate a problem with the transformation.
Project rows
Each cell in the parse column now contains one sonnet surround by a <p> tag.
The tags can be cleaned up by parsing the HTML again.
Click on the parse column and select Edit cells > Transform.
This will bring up a dialog box similar to creating a new column.
Transform will overwrite the cells of the current column rather than creating a new one.
In the expression box, type value.parseHtml().
The preview will show a complete HTML tree starting with the <html> element.
It is important to note that parseHtml() will automatically fill in missing tags, allowing it to parse these cell values despite not being valid HTML documents.
Select the p tag, add an index number, and use the function innerHtml() to extract the sonnet text:
value.parseHtml().select("p")[0].innerHtml()
Click OK to transform all 154 cells in the column.
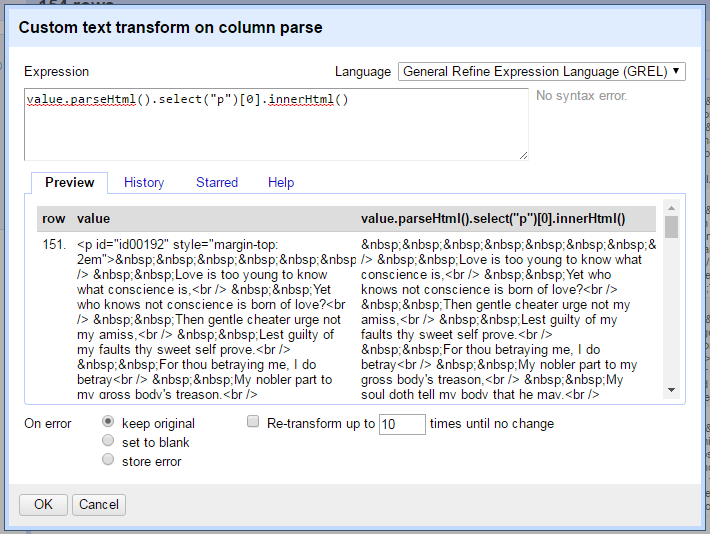
Edit cells > Transform
select returns an array of p elements even though there is only one in each cell.
Attempting to pass an array to innerHtml() will raise an error.
Thus, an index number is necessary to select the first (and only) item in the array to pass the correct object type to innerHtml().
Keep data object types in mind when debugging GREL expressions!
Unescape
Notice that each cell has dozens of , an HTML entity used to represent “no-break space” since browsers ignore extra white space in the source.
These entities are common when harvesting web pages and can be quickly replaced with the corresponding plain text characters using the unescape() function.
On the parse column, select Edit cells > Transform and type the following in the expression box:
value.unescape('html')
The entities will be replaced with normal whitespace.
Extract Information with Array Functions
GREL array functions provide a powerful way to manipulate text data and can be used to finish processing the sonnets.
Any string value can be turned into an array using the split() function by providing the character or expression that separates the items (basically the opposite of join()).
In the sonnets each line ends with <br>, providing a convenient separator for splitting.
The expression value.split("<br>") will create an array of the lines of each sonnet.
Index numbers and slices can then be used to populate new columns.
Keep in mind that Refine will not output an array directly to a cell.
Be sure to select one element from the array using an index number or convert it back to a string with join().
Furthermore, the sonnet text contains a huge amount of unnecessary white space that was used to layout the poems in the ebook.
This can be cut from each line using the trim() function.
Trim automatically removes all leading and trailing white space in a cell, an essential for data cleaning.
Using these concepts, a single line can be extracted and trimmed to create clean columns representing the sonnet number and first line. Create two new columns from the parse column using these names and expressions:
- “number”,
value.split("<br>")[0].trim() -
“first”,
value.split("<br>")[1].trim()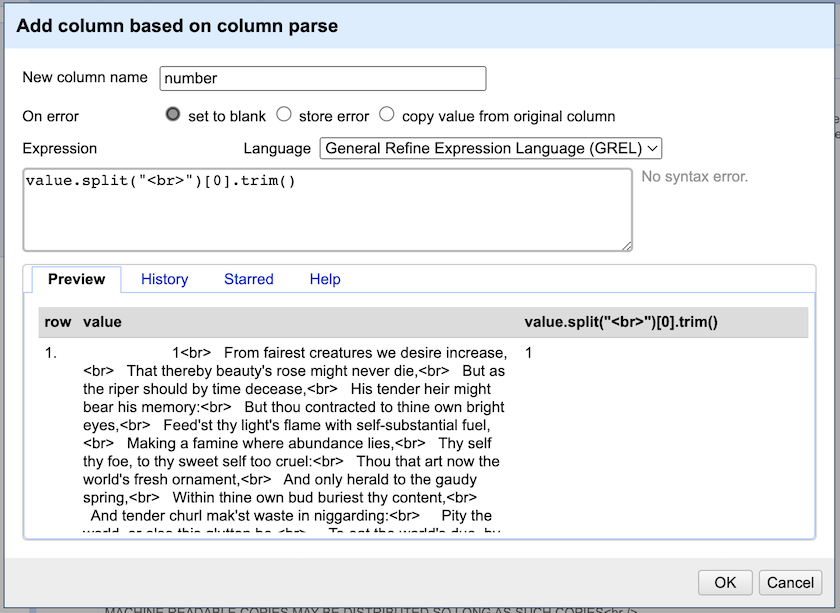
GREL split and trim
The next column to create is the full sonnet text which contains multiple lines.
However, trim() will only clean the beginning and end of the cell, leaving unnecessary whitespace in the body of the sonnet.
To trim each line individually use the GREL control forEach(), a handy loop that iterates over an array.
From the parse column, create a new column named “text”, and click in the Expression box.
A forEach() statement asks for an array, a variable name, and an expression applied to the variable.
Following the form forEach(array, variable, expression), construct the loop using these parameters:
- array:
value.split("<br>"), creates an array from the lines of the sonnet in each cell. - variable:
line, each item in the array is then represented as the variable (it could be anything,vis often used). - expression:
line.trim(), each item is then evaluated separately with the specified expression. In this case,trim()cleans the white space from each sonnet line in the array.
At this point, the statement should look like forEach(value.split("<br>"), line, line.trim()) in the Expression box.
Notice that the Preview now shows an array where the first element is the sonnet number.
Since the results of the forEach() are returned as a new array, additional array functions can be applied, such as slice and join.
Add slice(1) to remove the sonnet number, and join("\n") to concatenate the lines in to a string value (\n is the symbol for new line in plain text).
Thus, the final expression to extract and clean the full sonnet text is:
forEach(value.split("<br>"), line, line.trim()).slice(1).join("\n")
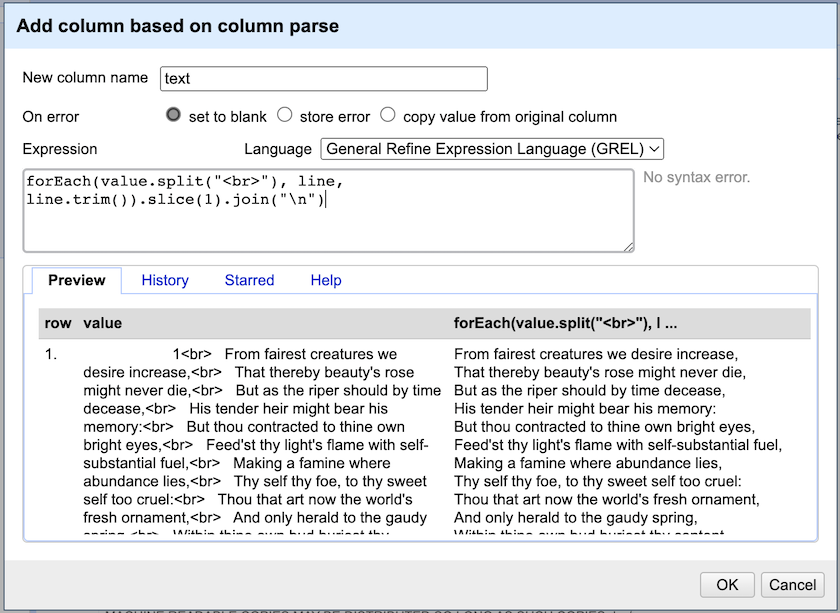
GREL forEach expression
Click “OK” to create the column. Following the same technique, add another new column from parse named “last” to represent the final couplet lines using:
forEach(value.split("<br>"), line, line.trim()).slice(-3).join("\n")
Finally, numeric columns can be added using the length() function.
Create new columns from text with the names and expressions below:
- “characters”,
value.length() - “lines”,
value.split(/\n/).length()
Cleanup and Export
In this example, we used a number of operations to create new columns with clean data. This is a typical Refine workflow, allowing each transformation to be easily checked against the existing data. At this point the unnecessary columns can be removed. Click on the All column > Edit columns > Re-order / remove columns.
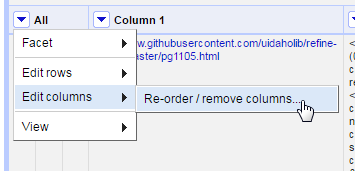
All > Edit columns
Drag unwanted column names to the right side of the dialog box, in this case Column 1, fetch, and parse. Drag the remaining columns into the desired order on the left side. Click Ok to remove and reorder the data set.
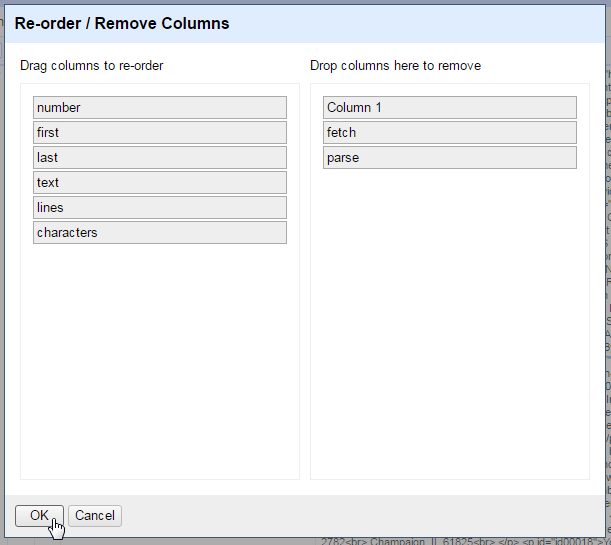
Re-order / Remove columns
Use filters and facets to explore and subset the collection of sonnets. Then click the export button to generate a version of the new sonnet table for use outside of Refine. Only the currently selected subset will be exported.
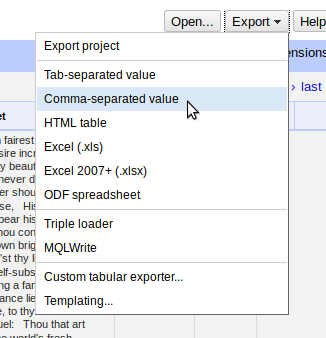
Export CSV
Example 2: URL Queries and Parsing JSON
Many cultural institutions provide web APIs allowing users to access information about their collections via simple HTTP requests. These sources enable new queries and aggregations of text that were previously impossible, cutting across boundaries of repositories and collections to support large scale analysis of both content and metadata. This example will harvest data from the Chronicling America project to assemble a small set of newspaper front pages with full text. Following a common web scraping workflow, Refine is used to construct the query URL, fetch the information, and parse the JSON response.
Start “Chronicling America” Project
To get started after completing Example 1, click the Open button in the upper right. A new tab will open with the Refine start project view. The tab with the Sonnets project can be left open without impacting performance. Create a project from Clipboard by pasting this CSV into the text box:
state,year
Idaho,1865
Montana,1865
Oregon,1865
Washington,1865
After clicking Next, Refine should automatically identify the content as a CSV with the correct parsing options. Add the Project name “ChronAm” at the top right and click Create project.
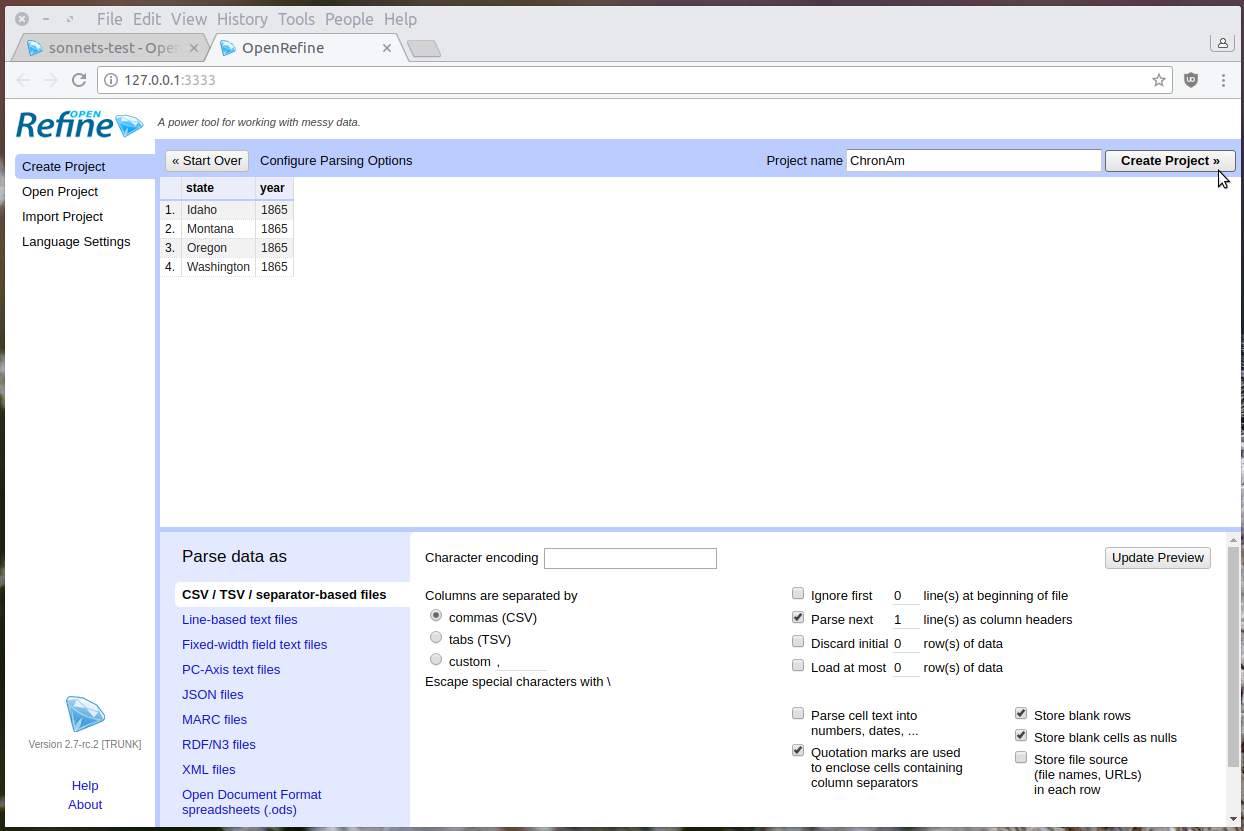
Create project
Construct a Query
Chronicling America provides documentation for their API and URL patterns.
In addition to formal documentation, information about alternative formats and search API are sometimes given in the <head> element of a web page.
Check for <link rel="alternate", <link rel="search", or <!-- comments which provide hints on how to interact with the site.
These clues provide a recipe book for interacting with the server using public links.
The basic components of the ChromAm API are:
- the base URL,
https://chroniclingamerica.loc.gov/ - the search service location for individual newspaper pages,
search/pages/results - a query string, starting with
?and made up of value pairs (fieldname=value) separated by&. Much like using the advanced search form, the value pairs of the query string set the search options.
Using a GREL expression, these components can be combined with the values in the “ChronAm” project to construct a search query URL.
The contents of the data table can be accessed using GREL variables.
As introduced in Example 1, the value of each cell in the current column is represented by value.
Values in the same row can be retrieved using the cells variable plus the column name.
There are two ways to write a cells statement: bracket notation cells['column name'].value which allows column names that include a space, or dot notation cells.column_name.value which allows only single word column names.
In GREL, strings are concatenated using the plus sign.
For example, the expression "one" + "two" would result in “onetwo”.
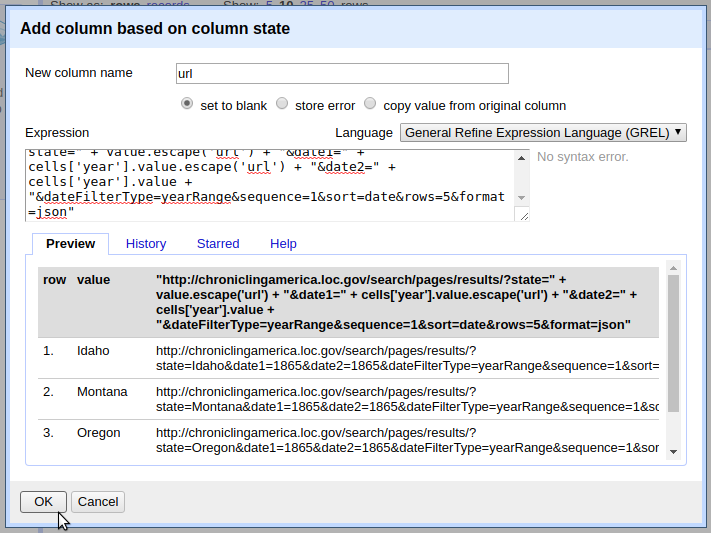
To create the set of search queries, from the state column, add a column named “url” with this expression:
"https://chroniclingamerica.loc.gov/search/pages/results/?state=" + value.escape('url') + "&date1=" + cells['year'].value.escape('url') + "&date2=" + cells['year'].value.escape('url') + "&dateFilterType=yearRange&sequence=1&sort=date&rows=5&format=json"
Create query URL
The expression concatenates the constants (base URL, search service, and query field names) together with the values in each row.
The escape() function is added to the cell variables to ensure the string will be safe in a URL (the opposite of the unescape() function introduced in Example 1).
Look at the value pairs after the ? to understand the parameters of the search.
Explicitly, the first query URL will ask for newspapers:
- from Idaho (
state=Idaho) - from the year 1865, (
date1=1865&date2=1865&dateFilterType=yearRange) - only the front pages (
sequence=1) - sorting by date (
sort=date) - returning a maximum of five (
rows=5) - in JSON (
format=json)
Fetch URLs
The url column is a list of web queries that could be accessed with a browser. To test, click one of the links. The url will open in a new tab, returning a JSON response.
Fetch the URLs using url column by selecting Edit column > Add column by fetching urls. Name the new column “fetch” and click OK. In a few seconds, the operation should complete and the fetch column will be filled with JSON data.
Parse JSON to Get Items
The first name/value pairs of the query response look like "totalItems": 52, "endIndex": 5.
This indicates that the search resulted in 52 total items, but the response contains only five (since it was limited by the rows=5 option).
The JSON key items contains an array of the individual newspapers returned by the search.
To construct a orderly data set, it is necessary to parse the JSON and split each newspaper into its own row.
GREL’s parseJson() function allows us to select a key name to retrieve the corresponding values.
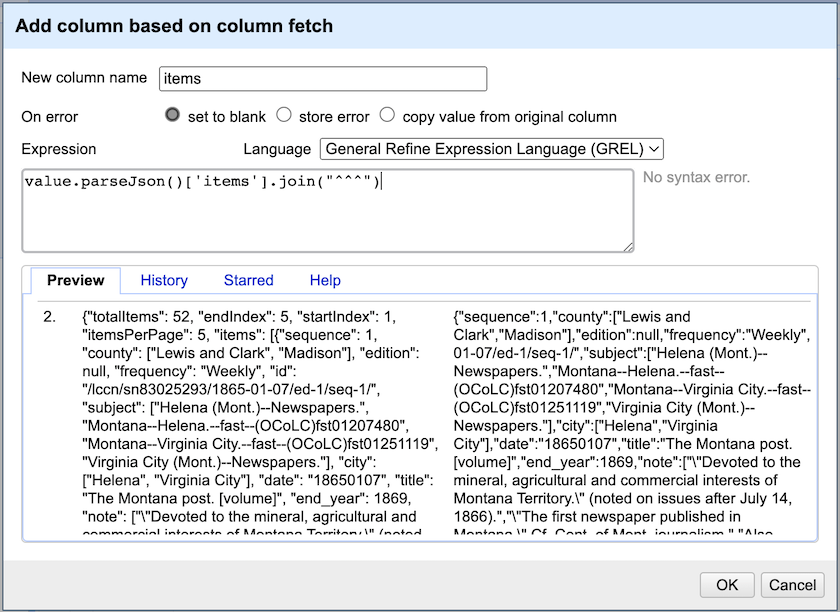
Add a new column based on fetch with the name “items” and enter this expression:
value.parseJson()['items'].join("^^^")
parse json items
Selecting ['items'] exposes the array of newspaper records nested inside the JSON response.
The join() function concatenates the array with the given separator resulting in a string value.
Since the newspaper records contain an OCR text field, the strange separator “^^^” is necessary to ensure that it is unique and can be used to split the values.
Split Multivalued Cells
With the individual newspapers isolated, separate rows can be created by splitting the cells.
On the items column, select Edit cells > Split multivalued cells, and enter the join used in the last step, ^^^.
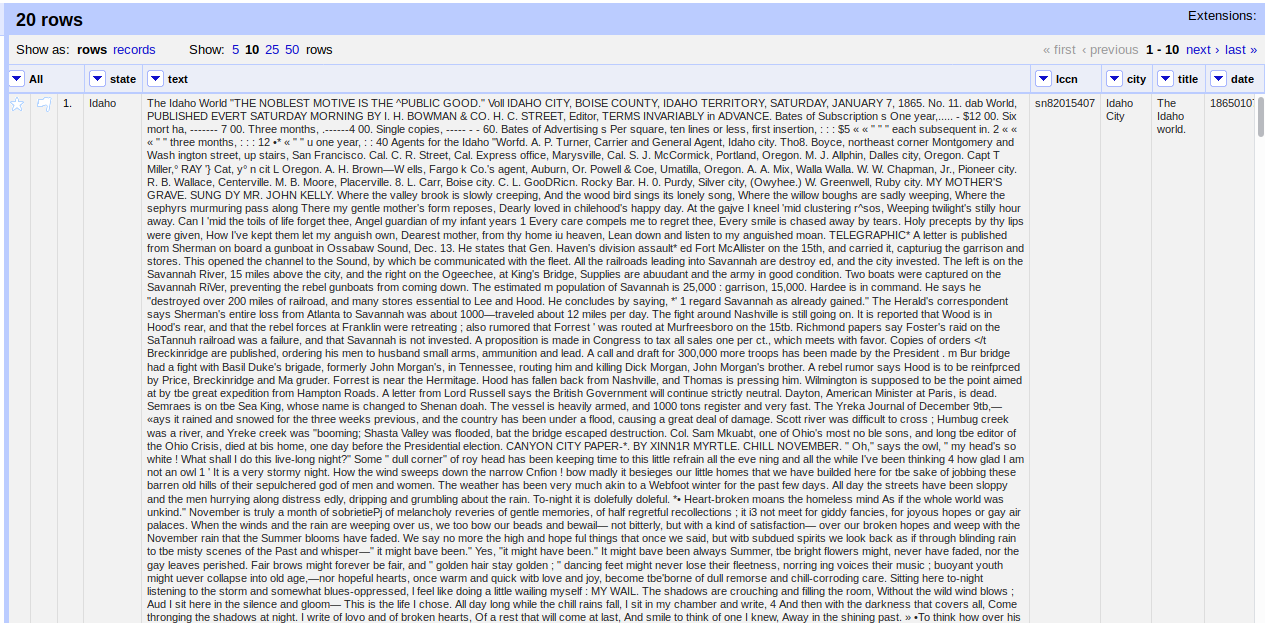
After the operation, the top of the project table should read 20 rows.
Clicking on Show as records should read 4, representing the original CSV rows.
Notice that the new rows are empty in all columns except items.
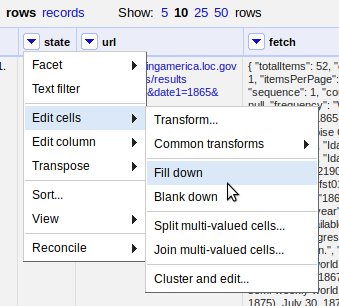
To ensure the state is available with each newspaper issue, the empty values can be filled using the Fill down function.
Click on the state column > Edit cells > Fill down.
fill down
This is a good point to clean up the unnecessary columns. Click on the All column > Edit columns > Re-order / remove columns. Drag all columns except state and items to the right side, then click OK to remove them.
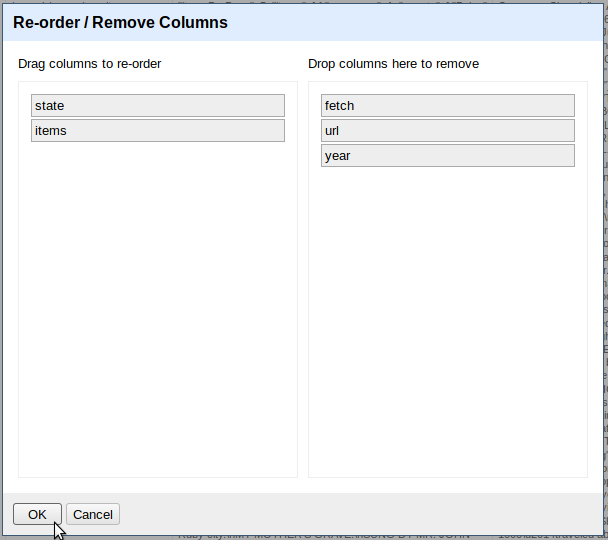
Re-order / remove columns
Sanity check: with the original columns removed, both records and rows will read 20. This makes sense, as the project started with four states and fetched five records for each.
Parse JSON Values
To complete the data set, it is necessary to parse each newspaper’s JSON record into individual columns.
This is a common task, as many web APIs return information in JSON format.
Again, GREL’s parseJson() function makes this easy.
Create a new column from items for each newspaper metadata element by parsing the JSON and selecting the key:
- “date”,
value.parseJson()['date'] - “title”,
value.parseJson()['title'] - “city”,
value.parseJson()['city'].join(", ") - “lccn”,
value.parseJson()['lccn'] - “text”,
value.parseJson()['ocr_eng']
value.replace("\n",""). (Nov. 2022)
After the desired information is extracted, the items column can be removed by selecting Edit column > Remove this column.
Final ChronAm project columns
Each column could be further refined using other GREL transformations.
For example, to convert date to a more readable format, use GREL date functions.
Transform the date column with the expression value.toDate("yyyymmdd").toString("yyyy-MM-dd").
Another common workflow is to extend the data with further URL queries.
For example, a link to full information about each issue can be formed based on the lccn.
Create a new column based on lccn using the expression "https://chroniclingamerica.loc.gov/lccn/" + value + "/" + cells['date'].value + "/ed-1.json".
Fetching this URL returns a complete list of the issue’s pages, which could in turn be harvested.
For now, the headlines of 1865 from the Northwest are ready to enjoy!
Example 3: Advanced APIs
Example 2 demonstrated Refine’s fetch function with a simple web API, essentially utilizing URL patterns to request information from a server. This workflow uses the HTTP GET protocol, meaning the query is encoded in the URL string, thus limited in length (2048 ASCII characters), complexity, and security. Instead, many API services used to enhance text data, such as geocoding or named entity recognition, use HTTP POST to transfer information to the server for processing.
GREL does not have a built in function to use this type of API. However, the expression window language can be changed to Jython, providing a more complete scripting environment where it is possible to implement a POST request.
Jython is Python implemented for the Java VM and comes bundled with Refine. This means Python 2 scripts using the Standard Library can be written or loaded into the expression window, and Refine will apply them to each cell in the transformation. The official documentation is sparse, but the built-in Jython can be extended with non-standard libraries using a work around.
Keep in mind that spending time writing complex scripts moves away from the strengths of Refine. If it is necessary to develop a lengthy Jython routine, it will likely be more efficient to process the data directly in Python. On the other hand, if you know a handy method to process data in Python 2, Jython is a easy way to apply it in a Refine project.
Jython in the Expression Window
Return to the “Sonnets” project completed in Example 1. If the tab was closed, click Open > Open Project and find the Sonnets example (Refine saves everything for you!).
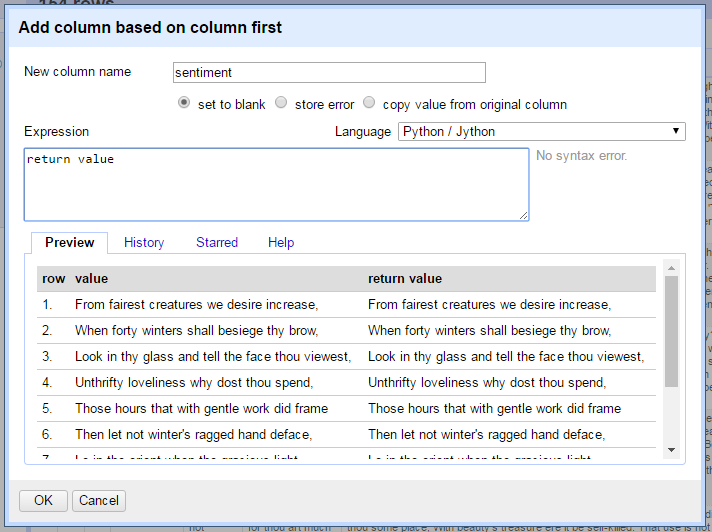
Add a new column based on the first column named “sentiment”. We will use this window to test out a series of expressions, so leave it open until we get to the final iteration of the request.
On the right side of the Expression box is a drop down to change the expression language. Select Python / Jython from the list.
Jython expression
Notice that the preview now shows null for the output.
A Jython expression in Refine must have a return statement to add the output to the new cells in the transformation.
Type return value into the Expression box.
The preview will update showing the current cells copied to the output.
The basic GREL variables can be used in Jython by substituting brackets instead of periods.
For example, the GREL cells.column-name.value would be Jython cells['column-name']['value'].
Jython GET Request
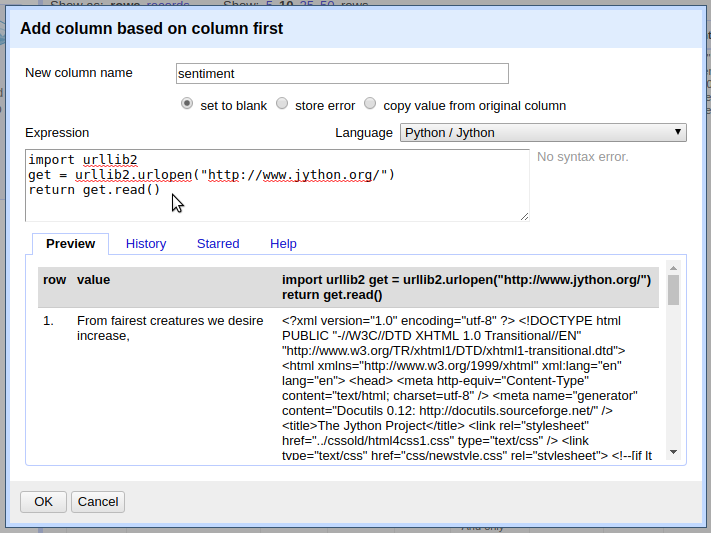
To create a HTTP request in Jython, use the standard library urllib2. Refine’s fetch function can be recreated with Jython to demonstrate the basics of the library. In the expression box, type:
import urllib2
get = urllib2.urlopen("http://www.jython.org/")
return get.read()
Jython GET request
The preview should display the HTML source of the Jython home page, this is an HTTP GET request as in previous fetch examples.
Notice that similar to opening and reading a text file with Python, urlopen() returns a file-like object that must be read() into a string.
The URL could be replaced with cell variables to construct a query similar to the fetch used in Example 2.
POST Request
Urllib2 will automatically send a POST if data is added to the request object. For example, Text Processing provides natural language processing APIs based on Python NLTK. The documentation for the Sentiment Analysis service provides a base URL and the name of the key used for the data to be analyzed. No authentication is required and 1,000 calls per day are free for non-commercial use.2
This type of API is often demonstrated using curl on the commandline.
Text Processing gives the example curl -d "text=great" http://text-processing.com/api/sentiment/ which can be recreated in Jython to test the service.
Building on the GET expression above, the POST data is added as the second parameter of urlopen, thus the request will be in the form urllib2.urlopen(url, data).
Type this script into the expression window:
import urllib2
url = "http://text-processing.com/api/sentiment/"
data = "text=what is the sentiment of this sentence"
post = urllib2.urlopen(url, data)
return post.read()
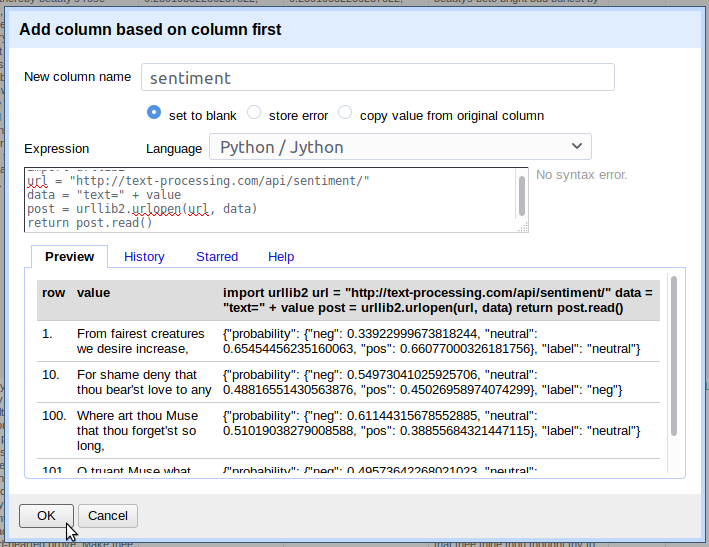
The preview should show a JSON response with sentiment probability values. To retrieve sentiment analysis data for the first lines of the sonnets (remember we are still adding a column based on first!), put the basic Jython pattern together with the values of the cells:
import urllib2
url = "http://text-processing.com/api/sentiment/"
data = "text=" + value
post = urllib2.urlopen(url, data)
return post.read()
jython request
Click OK and the Jython script will run for every row in the column.
The JSON response can then be parsed with GREL using the methods demonstrated in Example 2 (for example, value.parseJson()['label']).
Given the small expression window and uniform data, the script above is pragmatically simplified and compressed.
When Refine is encountering problems, it is better to implement a more complete script with error handling.
If necessary, a throttle delay can be implemented by importing time and adding time.sleep() to the script.
For example, the POST request could be rewritten:
import urllib2, urllib, time
time.sleep(15)
url = "http://text-processing.com/api/sentiment/"
data = urllib.urlencode({"text": value.encode("utf-8")})
req = urllib2.Request(url,data)
try:
    post = urllib2.urlopen(req)
except urllib2.URLError as e:
    if hasattr(e, "reason"):
        return "Failed: ", e.reason
    elif hasattr(e, "code"):
        return "Error code: ", e.code
else:
    response = post.read()
    return response
Some APIs require authentication tokens to be passed with the POST request as data or headers. Headers can be added as the third parameter of
urllib2.Request()similar to how data was added in the example above. Check the Python urllib2 documentation and how-to for advanced options.When harvesting web content, character encoding issues commonly produce errors in Python. Trimming whitespace, using GREL
escape()/unescape(), or Jythonencode("utf-8")will often fix the problem.
Compare Sentiment
To practice constructing a POST request, read the documentation for Sentiment Tool, another free API.
Find the service URL and data key necessary to modify the Jython pattern above.
Create a new column from first named sentiment2 and test the script.
There are many possible ways to create the request, for example:
import urllib2
url = "http://sentiment.vivekn.com/api/text/"
data = "txt=" + value
post = urllib2.urlopen(url, data)
return post.read()
The JSON response contains different metrics, but it will be obvious that the APIs disagree on many of the sentiment “labels” (for example, use value.parseJson()['result']['sentiment'] to extract a label comparable to the first API).
These are simple free APIs for demonstration purposes, but it is important to critically investigate services to more fully understand the potential of the metrics.
Both APIs use a naive bayes classifier to categorize text input. These models must be trained on pre-labeled data and will be most accurate on similar content. Text Processing is trained on twitter and movie reviews3, and Sentiment Tool on IMDb movie reviews4. Thus both are optimized for small chunks of modern English language similar to a review, with a limited bag of words used to determine the sentiment probabilities.
Archaic words and phrases contribute significantly to the sonnets’ sentiment, yet are unlikely to be given any weight in these models since they are not present in the training data. While comparing the metrics is fascinating, neither is likely to produce quality results for this data set. Rather than an accurate sentiment, we might be surprised to find a quantifiable dissonance between the sonnet’s English and our modern web usage. However, a model optimized to Shakespeare’s words could be developed using more appropriate training data. To learn more about classifiers and how to implement one, see Vilja Hulden’s PH lesson “Supervised Classification: The Naive Bayesian Returns to the Old Bailey” or Steven Bird, Ewan Klein, and Edward Loper’s “Learning to Classify Text” in the NTLK Book.
Accessing data and services on the web opens new possibilities and efficiencies for humanities research. While powerful, these APIs are often not aimed at humanities scholarship and may not be appropriate or optimized for our inquiries. The training data may be incomplete, biased, or secret. We should always be asking questions about these aggregations and algorithms, thinking critically about the metrics they are capable of producing. This is not a new technical skill, but an application of the historian’s traditional expertise, not unlike interrogating physical primary materials to unravel bias and read between the lines. Humanities scholars routinely synthesize and evaluate convoluted sources to tell important narratives, and must carry that skill into digital realm. We can critically evaluate data sources, algorithms, and API services, as well as create new ones more suited to our questions and methods.
With its unique ability to interactively wrangle data from raw aggregation to analysis, Refine supports exploratory research and offers a wonderfully fluid and playful approach to tabular data. OpenRefine is a flexible, pragmatic tool that simplifies routine tasks and, when combined with domain knowledge, extends research capabilities.
-
David Huynh, “Google Refine”, Computer-Assisted Reporting Conference 2011, http://web.archive.org/web/20150528125345/http://davidhuynh.net/spaces/nicar2011/tutorial.pdf. ↩
-
As of July 2017, see API Documentation. ↩
-
Jacob Perkins, “Sentiment Analysis with Python NLTK Text Classification”, http://text-processing.com/demo/sentiment/. ↩
-
Vivek Narayanan, Ishan Arora, and Arjun Bhatia, “Fast and accurate sentiment classification using an enhanced Naive Bayes model”, 2013, arXiv:1305.6143. ↩