Contents
Module Goals
For those interested in audio, basic sound editing skills go a long way. Being able to handle and manipulate the materials can help you take control of your object of study: you can zoom in and extract particular moments to analyze, process the audio, and upload the materials to a server to compliment a blog post on the topic. On a more practical level, these skills could also allow you to record and package recordings of yourself or others for distribution. That guest lecture taking place in your department? Record it and edit it yourself! Doing so is a lightweight way to distribute resources among various institutions, and it also helps make the materials more accessible for readers and listeners with a wide variety of learning needs.
In this lesson you will learn how to use Audacity to load, record, edit, mix, and export audio files. Sound editing platforms are often expensive and offer extensive capabilities that can be overwhelming to the first-time user, but Audacity is a free and open source alternative that offers powerful capabilities for sound editing with a low barrier for entry.
For this lesson we will work with two audio files: a recording of Bach’s Goldberg Variations and another recording of your own voice that will be made in the course of the lesson.
This tutorial uses Audacity 2.1.2, released January 2016.
Working in Audacity
First, download the necessary files.
You will need the mp3 file of Bach’s Goldberg Variations. To download, right click here and select ‘Save Link As’ to download the file onto your computer as an MP3.
Next, download and install Audacity, which is available on the project site. Audacity can be used on Mac OSX, Windows, or Linux.
Download the program and double-click to install.
To begin, open the Bach recording you just downloaded by using the Audacity File menu.
The interface will change to reflect the loaded data:
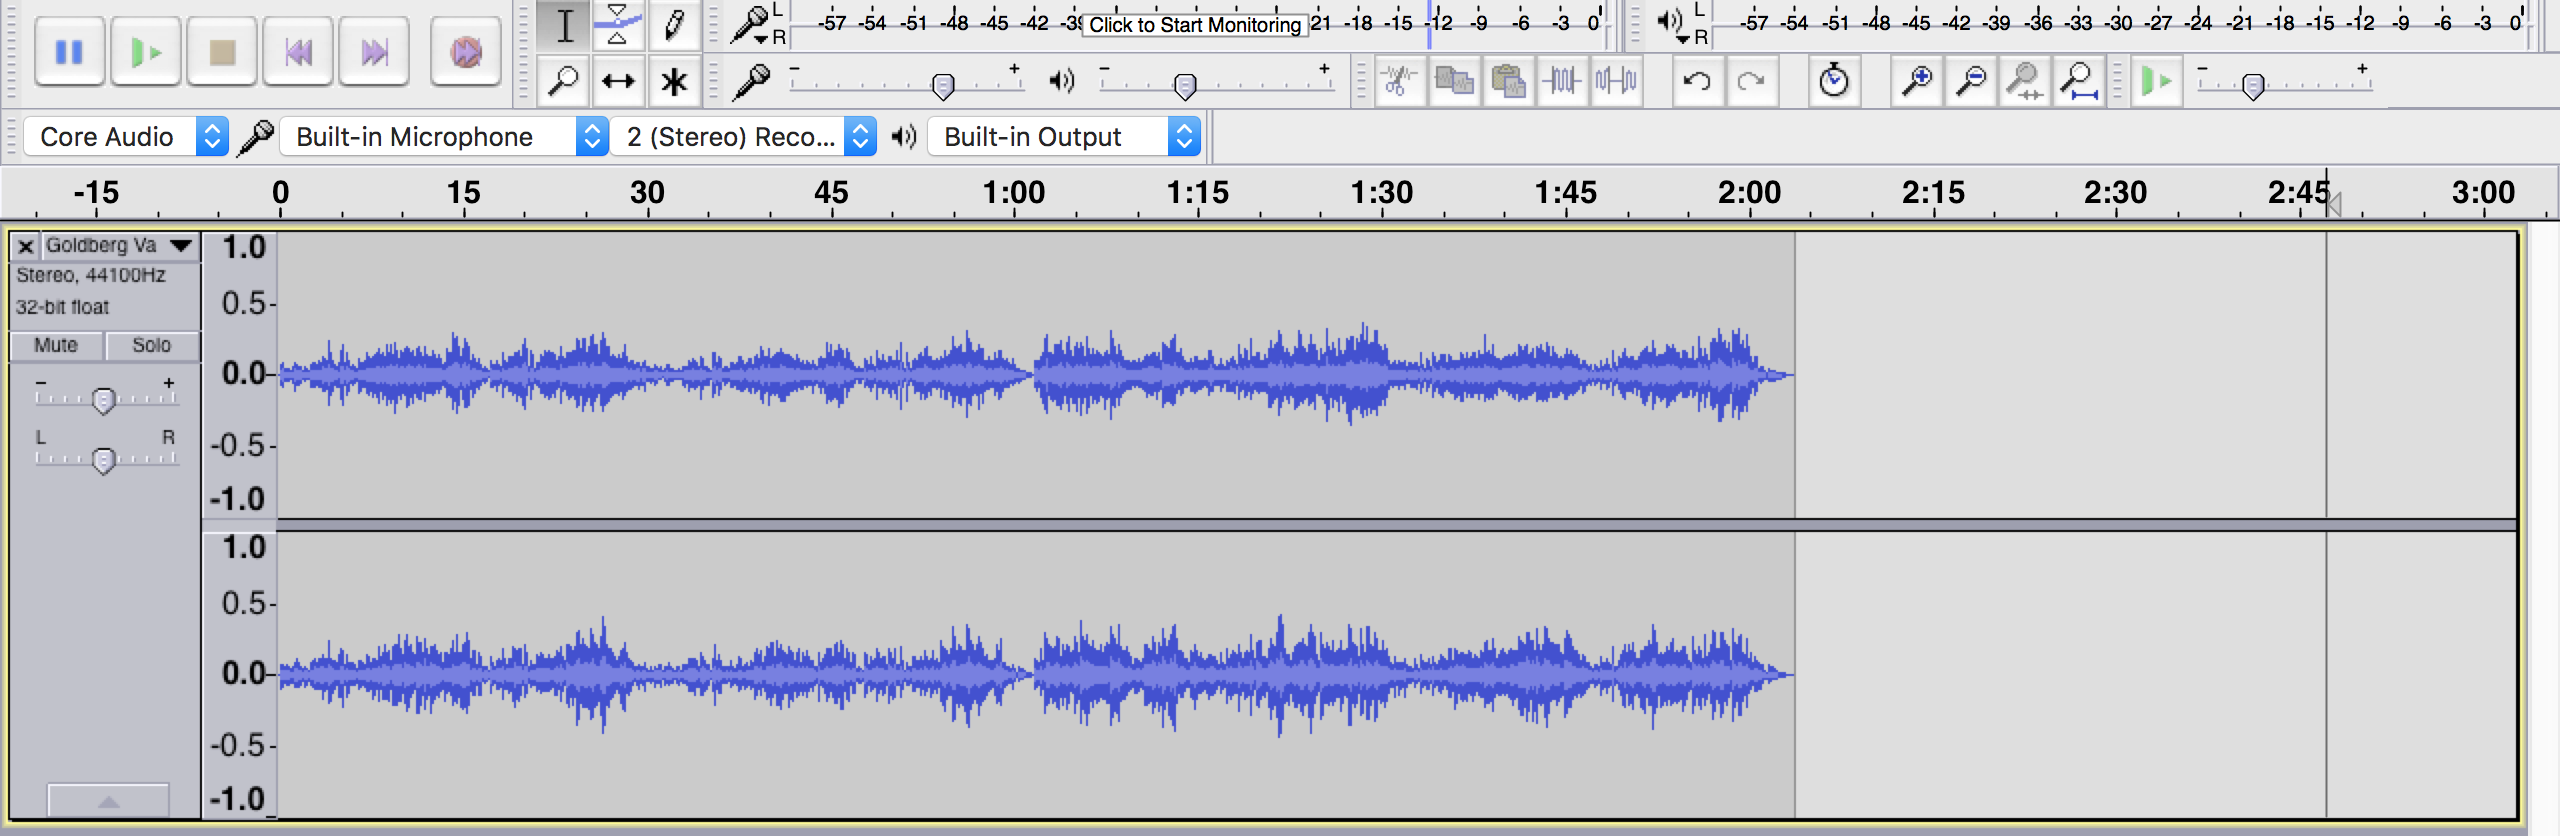
Bach waveform in Audacity
Audacity converts your sound into a waveform, a commonly used mode for representing sound. The x-axis represents time as seconds (or minutes and seconds, depending on the length of the clip). The beginning of the sound occurs at the far left of the interface, and Audacity ticks off periodic time markers as the wave continues to the right. If we click the play button, Audacity will move from left to right over the sound, with a vertical line representing our currrent point in the clip.
The y-axis represents amplitude, what we experience as loudness or volume. By default, the y-axis measures volume on a vertical linear scale from -1 to 1: the -1 and 1 extremes represent the loudest possible recorded sound without distortion, while 0 represents silence. So silence begins as a flat line, and the sound will get taller and deeper as it increases in intensity. For more information on why some of the numbers are negative, check out Jeffrey Hass’ very short primer to acoustics.
Audacity’s representation of time and amplitude are your first and easiest point of reference for editing sound, and the tool offers handy ways to navigate around them. I keep calling this a wave, but it doesn’t look all that much like one just yet. Let’s take a closer look by selecting a piece of the audio track.
- Click somewhere on the wave to begin selecting.
- Drag to highlight a piece of the wave (any part with sound will work). If you are unhappy with the selection you can drag the edges of your selection to adjust the boundaries.
- Once you have a piece you are happy with, select “Zoom in” from the View menu.
If you zoom in six or seven times, you’ll start to see something that might look more like a sine wave:
Zoomed in view of Bach waveform
Take note of how the time increments in Audacity have also adjusted as you zoom in. Pitch frequencies are measured in waves per second, and the program has to smash things together a bit to make the whole sound clip fit in a workable window. The result is the waveform that we see when we zoom back out by selecting “Zoom Normal” from the View menu. Each view - the micro and the macro - has its own uses. We will come back to both.

Audacity playback palette
Before proceeding, it is also worth observing the various palettes that Audacity offers for its most common functions. The playback pallete offers symbols that are likely familiar: buttons that allow you to pause, play, stop, fast forward to beginning or end of a clip, and record.

Audacity tool palette
The tool palette, on the other hand, probably looks new. We will not discuss all of the features that Audacity offers, so some of these buttons will go unused. But take note: the top-left “selection” and the bottom-middle “time shift” tools will be the two that we use in this lesson. By default, when you open Audacity you will be using the selection tool.
Recording Audio
We’ve loaded in the intro music for our podcast. Let’s continue by recording our own voice.
- By default, Audacity will both play and re-record your original track when you try to record a new one. To get around this, you can temporarily mute your Bach track while you record your voice. To mute the track, click the “Mute” buttom to the left of the Bach waveform. The Bach track will turn grey to show you that it will not be played.
- To begin recording in Audacity press the big red circle at the top left of the Audacity window. Don’t worry too much about getting the quality just right - we will work on editing the sound file next.
- Do your best NPR impression in the direction of your computer, and hit the square to stop recording when you are done.
You will be presented with something that looks like this:
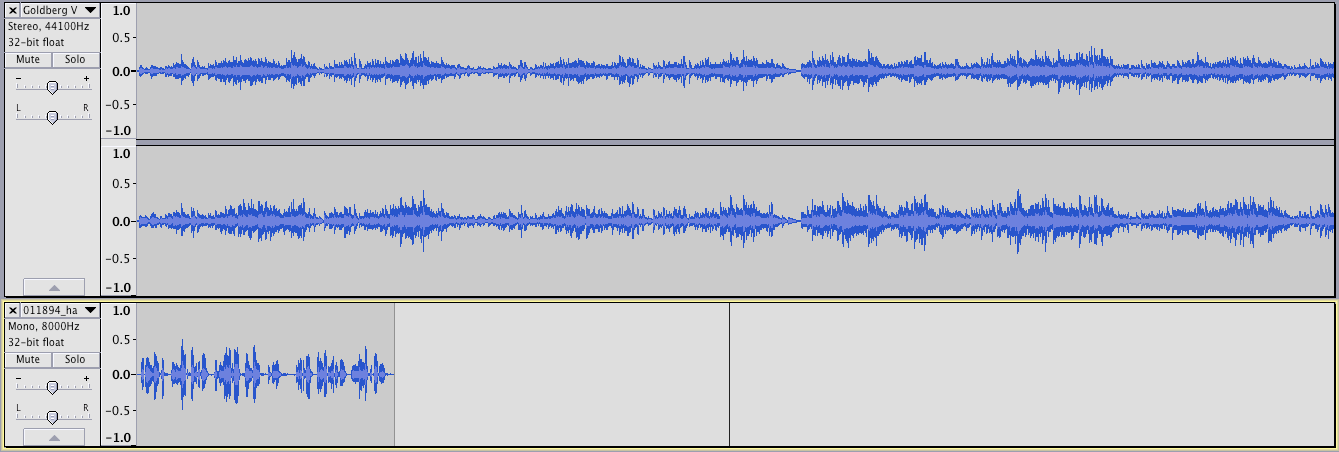
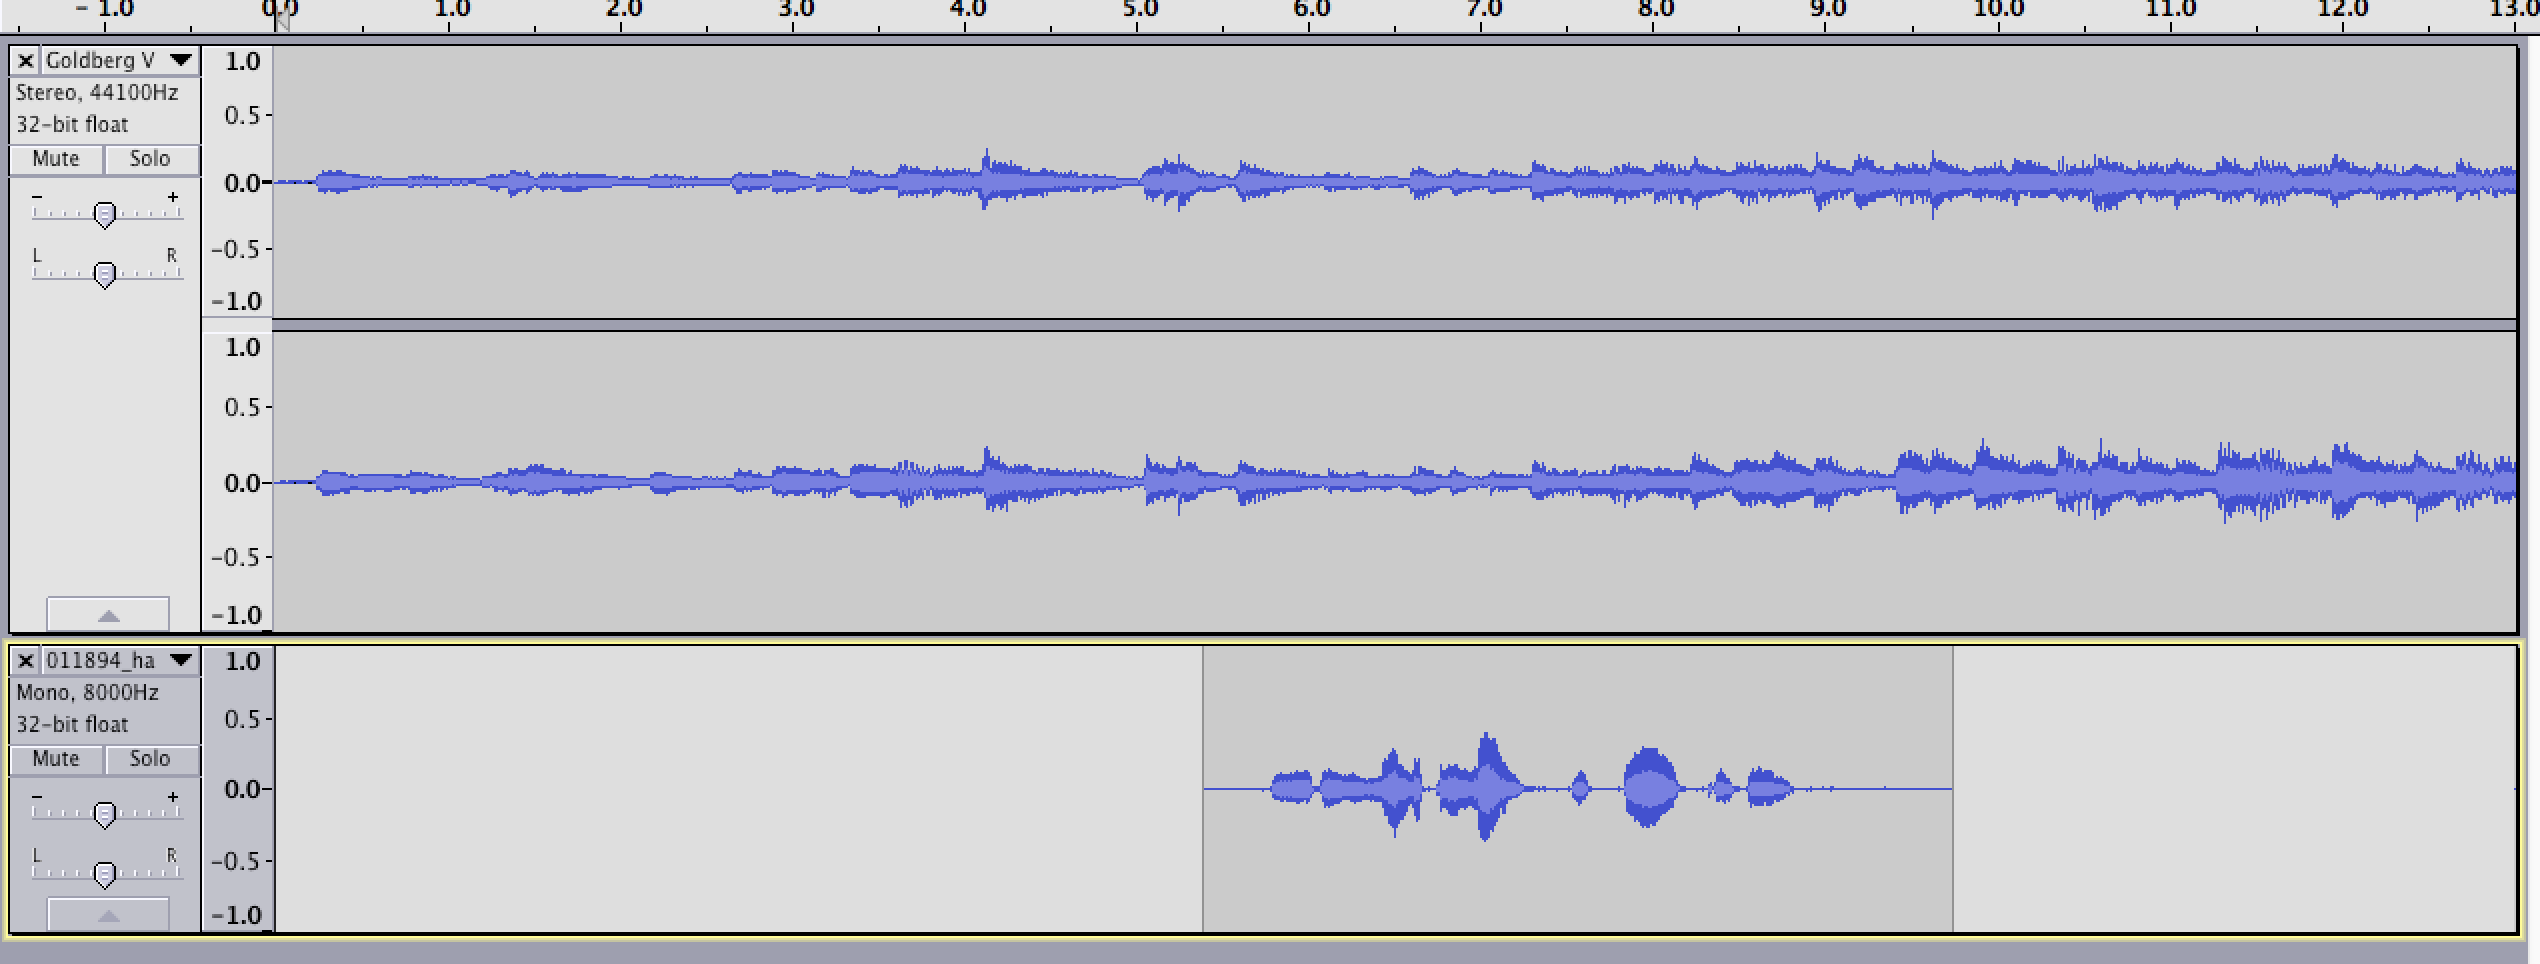
Two tracks loaded into Audacity
Our original Bach recording stays at the top of the interface, while our new recording gets added below it. By default, Audacity will not overwrite your previous recording. Instead, it isolates both soundstreams, or tracks, allowing us to manipulate separate components before we mix them together in a final recording. We can make changes to one without affecting the other. Note how, time-wise, the new track by default was recorded at the beginning of the audacity project. For right now, the Bach and vocal tracks both begin at the same time. There are potentially some other imperfections in your unique recording, some of which we can fix.
Finally, note how in my example there are two waveforms for the Bach recording but only one for the recording of my own voice. The Bach recording was made in stereo, meaning there were two input feeds, while my own recording was made in mono. Audacity allows you to record in both, and either one will work for this lesson, so don’t worry if your recording appears in stereo. You can change from mono to stereo recording and vice versa from the ‘Edit’ toolbar, accessible from the ‘Toolbars’ portion of the ‘View’ menu. For more information on mono vs stereo, check out this reading.
An aside: it can frequently be helpful to turn your laptop’s sound output into its input, so that you can record the sounds playing from your computer without worrying about extraneous noise from the outside world or to rerecord digital audio. For information on how to carry out this process, check out Soundflower.
Editing Audio
The topic of audio engineering is vast and can be the subject for a long and fruitful career – we can’t hope to exhaust all of the potential topics here. But we can offer just a few basic techniques useful to working with digital audio. Your experiences may vary based on the unique character of your own recording.
In order to use the recorded track we will need to clean it up a bit, isolating and refining the pieces that we want. Our first step will be to remove unwanted silence created in the lag between when I started recording and when I started speaking.
-
Zooming in at the beginning of the clip will give us a view of the silence, and by clicking and dragging over sections of the waveform we can eliminate them by hitting the delete key.
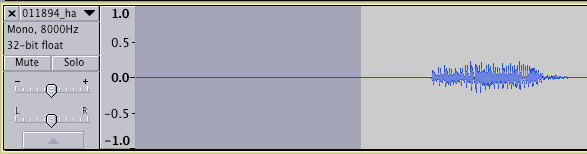
Beginning of vocal track ready to delete
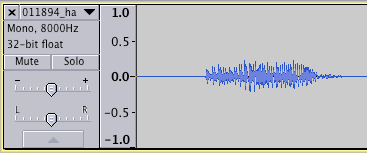
Beginnning of track after deleting
These small pauses may be virtually unnoticable, but they are important elements of any audio track. And we want the bounds of the new vocal audiotrack to contain no extraneous data. After deleting, you should have a nice, tight audio clip with only a hair of silence on either end.
To ensure smooth transitions between tracks, we will need to introduce fades, or gradual transitions in amplitude. It is a good idea to include both a very small fade in at the beginning of a track and a fade out at the end that carries you into silence. Doing so can help prevent clicks and glitches by keeping the sound from suddenly exploding in and out of existence.
- Zoom in on the beginning of the track, highlight the very beginning of the wave including just a hair of your target sound, and select “Fade in” from the Effect menu.
If you selected only a very small portion of audio, you may not be able to see the changes that the fades caused. These ultra-zoomed screenshots will help:

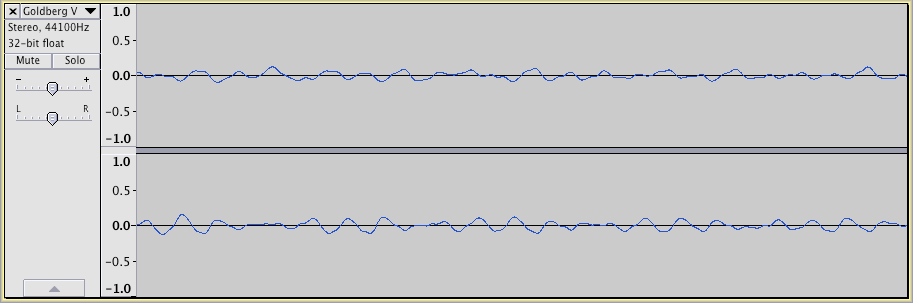
Track before fade in
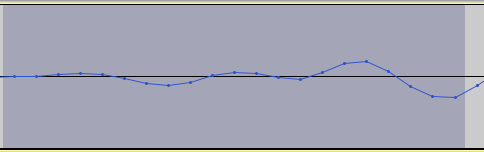
Track after fade in
The fade in lowered the beginning amplitude dramatically and introduced very gradual changes in amplitude over the course of the highlighted sections of the track, smoothing things out and creating the perception of an increase in volume.
- Repeat this at the end of the clip, but now with a “Fade out”.
Your clip will be set up to be smoothly inserted at any point in the file.
Eliminating silence and unwanted sound prepared the clip, but we still need to move it to the timestamp that we want. We will want to position it at the appropriate part of the podcast, after the intro music has played for a bit. To move a clip horizontally on the x-axis of the waveform and reassign it a new position in time, use the time shift tool. With this tool selected, clicking on a sound clip allows you to move it horizontally in time relative to the other tracks.
-
Move our vocal clip to the right, so that it begins after the intro music has played for a few seconds.
Repositioning audio clip in time
If the volume of your voice relative to the introduction music strike you as unbalanced, you can rearrange them to be more equitable. The volume of a particular track overall can be adjusted by using the track volume slider in the left of each track panel. It looks like a small -/+ scale:
Track volume slider
But we will eventually want to transition the track’s focus away from the intro music entirely and give new emphasis to the recording of our voice. A crossfade like this is easy to implement in Audacity.
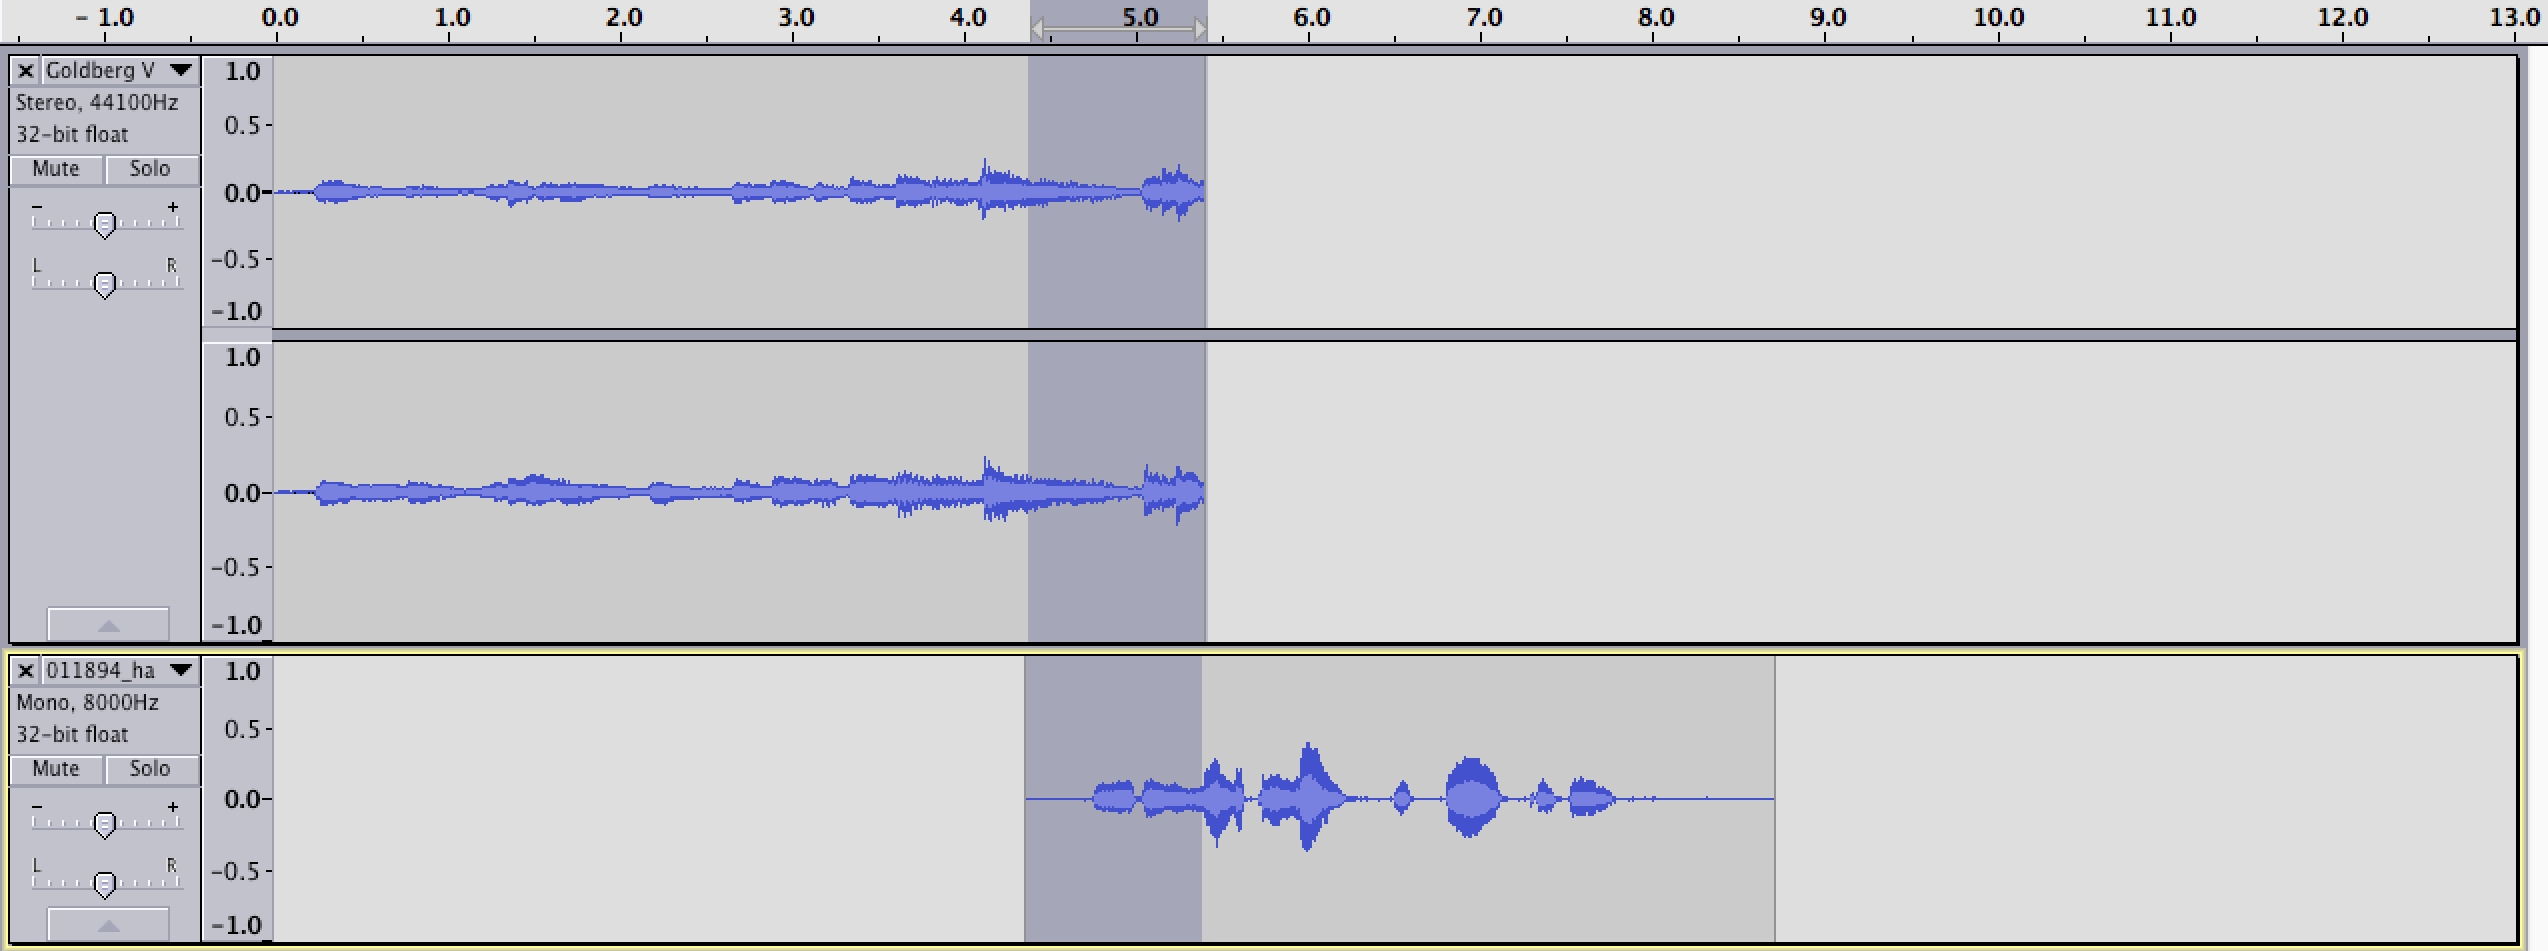
- First, delete all but the first five seconds or so of the Bach introduction. Place your cursor in the track where you want to begin deleting and then press ‘Shift K’ or select “Select/Cursor to Track End” from the Edit Menu. This will select everything from your cursor’s location to the end of the track.
- Align what remains with your vocal track using the time shift tool so that the two tracks overlap just slightly.
-
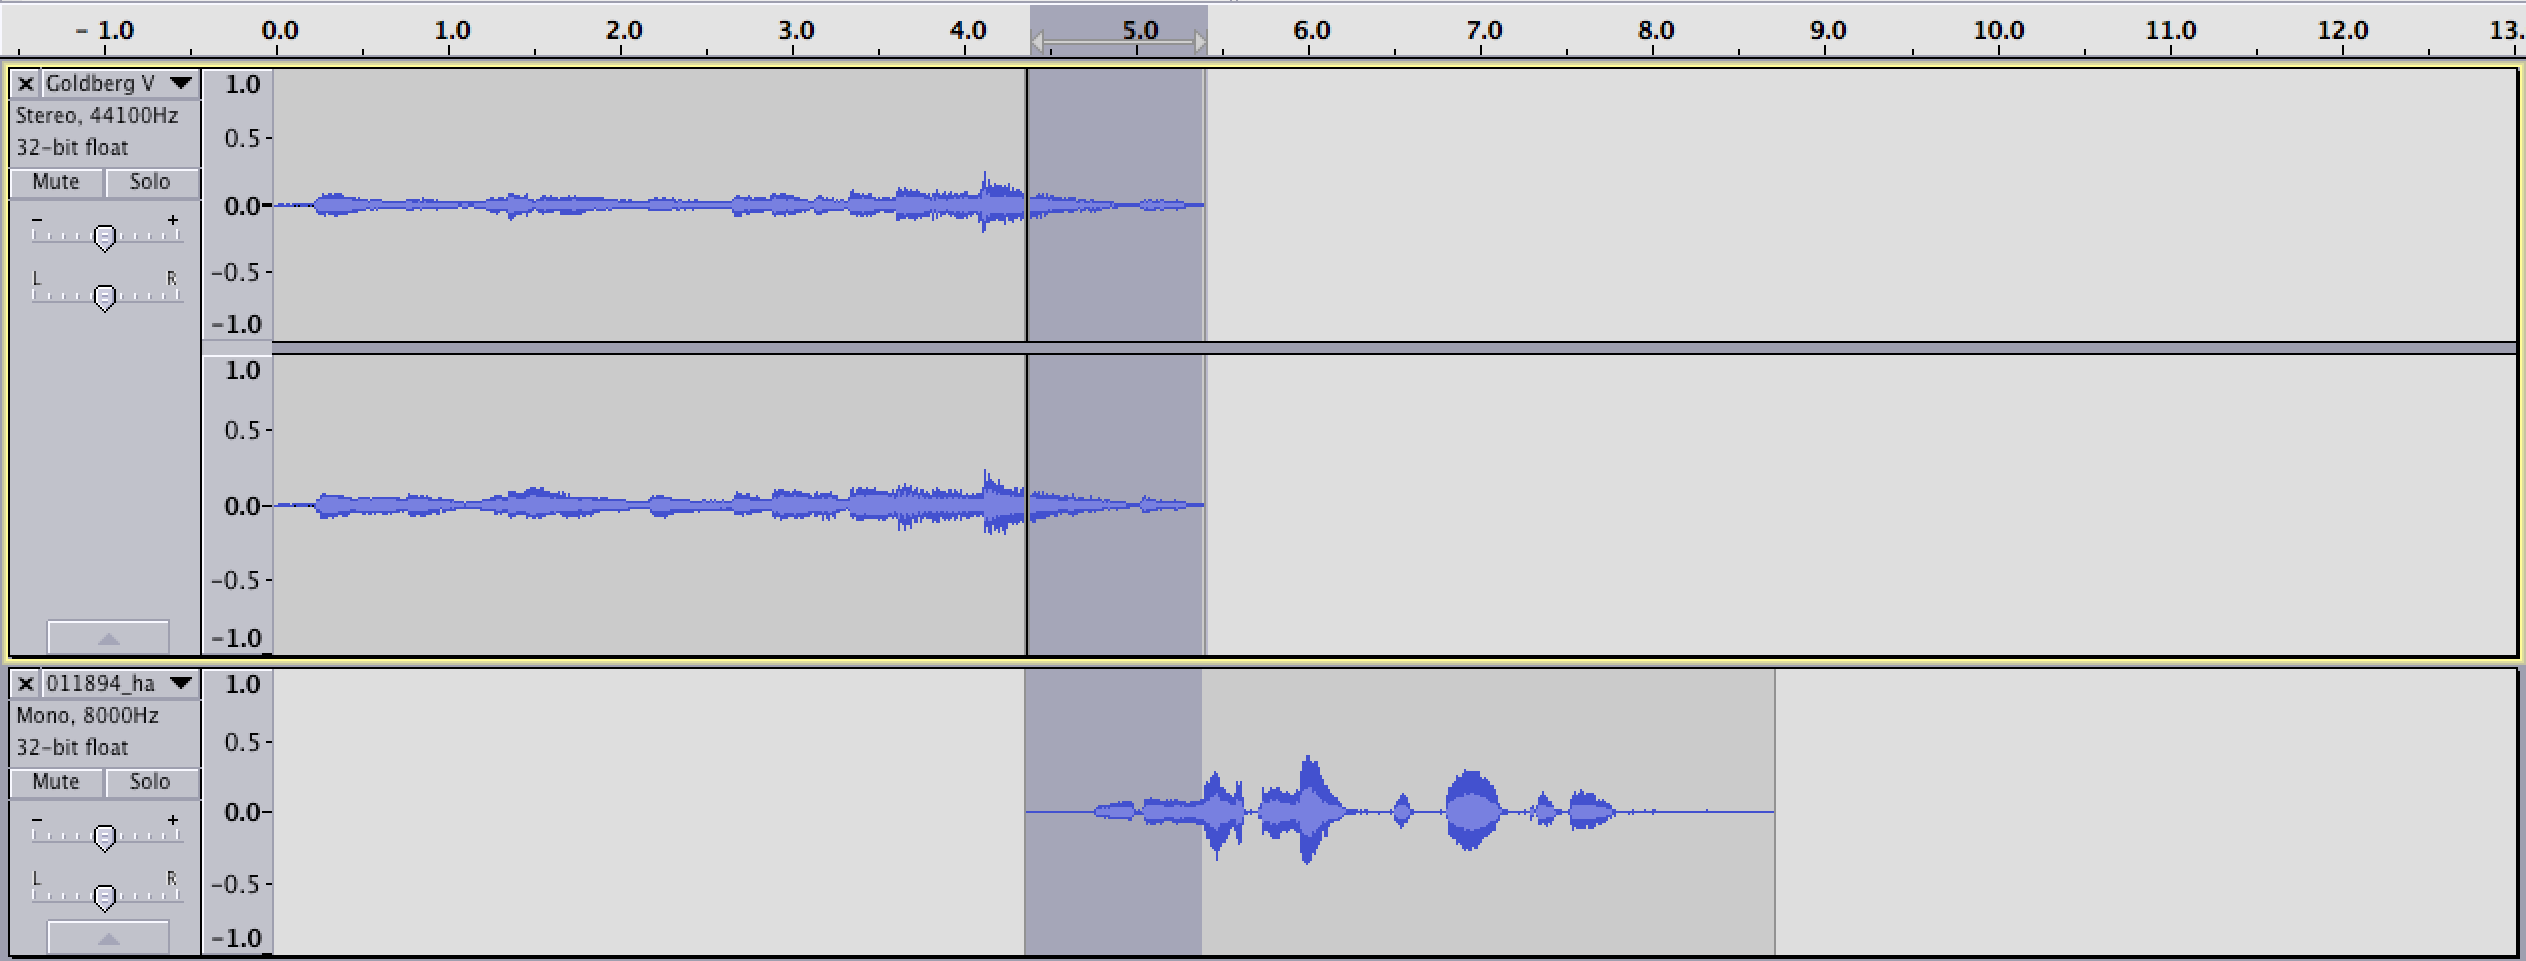
Then use the selection tool to click and drag to highlight the section in which they overlap, starting with the top track and ending in the bottom one. Both tracks should be highlighted.
Highlighting across tracks for crossfading
- Selecting “Crossfade Tracks” from the Effect menu will tell Audacity to fade out the top track while fading in the bottom track - the positioning of the tracks matters in this case.
Audacity will prompt you with options for your crossfade, but for now it is fine to go with the default setting of “Constant Gain.” This setting ensures that both tracks will fade in or linearly (for more information, check out the Audacity documentation on crossfades)
Post-crossfade
When the final product is mixed, the result will be a seamless transition between the two elements.
Exporting
By default, everything you do in Audacity is saved in the tool’s own filetype, .aup. To complete this baby project we will need to export it to a form that can be played by most audio programs.
- Select “Export Audio” from the file menu.
Doing so will mix the multiple tracks down to a single audio file and give you the opportunity to provide your work with metadata.
There are a range of different options for you to refine the exporting process, but the most important is “File Type.” MP3 and Ogg are good options for audio meant to be displayed on the web, as they both compress the files so that they will be quicker to load. For best results, you can actually include both formats and only display the one as a fallback when one is not supported by a user’s web browser. For more information, NCH Software provides a good technical breakdown of the different options, while Jonathan Sterne has done fascinating work on the cultural implications of such format decisions. And the W3Schools offer a good comparison of these file formats for use in web development.
Congratulations! You have successfully produced a baby podcast. It might not seem like much, but I frequently employ this same bag of tricks for presentations, websites, and scholarship. This lesson has by no means begun to exhaust the many topics under that umbrella. But it should have given you some basic tools useful to working with sound in digital humanities projects.