
Contents
- Introduction
- Lesson Overview
- Playing in the ‘Ludic Century’
- What are tabletop games?
- Why play Timeline in the classroom?
- Why Generate and Share Your Own Version of Timeline with Digital Tools in the Classroom
- How to Make Your Own Version of Timeline with Digital Tools
- What is nanDECK and How to Use it
- How to use nanDECK to Generate Cards
- How to Read a nanDECK Script that Generates a Deck of Cards
- Build Your Own Timeline
- Professionally Printing Cards with nanDECK
- Why Import your Tabletop Game into Tabletop Simulator
- Printing Digital Cards for Tabletop Simulator
- Build Your Own Timeline in Tabletop Simulator
- Conclusion
- Endnotes
Introduction
We no longer require students to memorize tables of historical events and their respective years of occurrence through the practice of rote learning, as was done in mid-nineteenth century America.1 Setting aside the broader arguments for and against teaching chronology in the classroom,2 this lesson assumes that it is useful to ‘help students develop a rich body of knowledge in our content areas’3 and that games are well situated to serve in this pursuit.
Challenging students to make their own games - or to make a modification (‘mod’) of an existing game – can provide an opportunity to teach them to manipulate and transform digital objects into physical objects, which can then be further manipulated to share rich, pedagogical experiences. This tutorial will show how students can create their own paper or digital versions of games using the chronology building mechanic popularized by Frederic Henry’s commercial game, Timeline.
Just as authors or publishers use word processors to create printed books, designers of tabletop games regularly use digital tools to create paper prototypes of their work. This tutorial will introduce you to two of these specialized digital tools: Andrea Nini’s nanDECK and Tabletop Simulator.
As an instructor, you will have the opportunity to direct students’ attention to the different affordances of paper versus digital versions of the same informational object. Given the ability to play the same game around both a physical and a digital tabletop, students can reflect on the ways in which medium affects the experience of game play. With their new-found ability to modify the assets or pieces of familiar games, students will gain the ability to explore what happens when the rules of well-known games are changed.4
Lesson Overview
This lesson begins by briefly considering games as a kind of ‘literacy’ that can generate real experiences, and by insisting on the value of teaching game design to everyone. It then recognises that tabletop and video games have already been well-established in history classrooms for at least the last half-century.
The lesson then introduces Timeline, a commercial history-themed game, as well as some of its variants. Since game mechanics do not fall under copyright protection, you can use the Timeline mechanics to shape your own game, for play or for historical exploration. With the stage set, the tutorial introduces two digital tools commonly used by both amateur and professional game designers: nanDECK and Tabletop Simulator. Then, it outlines the steps needed to generate one’s own deck of Timeline-like cards: first using the author’s example deck dedicated to the history of Windsor, Ontario, Canada; then with the components of a sample 6-card deck which readers can download to generate themselves.
Playing in the ‘Ludic Century’
In 2013, game designer Eric Zimmerman published a ‘Manifesto for a Ludic Century’5 which includes these tenets:
The Ludic Century is an era of games.
When information is put at play, game-like experiences replace linear media. Media and culture in the Ludic Century is increasingly systemic, modular, customizable, and participatory. Games embody all of these characteristics in a very direct sense.
Increasingly, the ways that people spend their leisure time and consume art, design, and entertainment will be games - or experiences very much like games.
Games are a literacy.
Systems, play, design: these are not just aspects of the Ludic Century, they are also elements of gaming literacy. Literacy is about creating and understanding meaning, which allows people to write (create) and read (understand).
New literacies, such as visual and technological literacy, have also been identified in recent decades. However, to be truly literate in the Ludic Century also requires gaming literacy. The rise of games in our culture is both cause and effect of gaming literacy in the Ludic Century.
In the Ludic Century, everyone will be a game designer.
Games alter the very nature of cultural consumption. Music is _played _by musicians, but most people are not musicians – they listen to music that someone else has made. Games, on the other hand, require active participation.
Game design involves systems logic, social psychology, and culture hacking. To play a game deeply is to think more and more like a game designer – to tinker, retro-engineer, and modify a game in order to find new ways to play. As more people play more deeply in the Ludic Century, the lines will become increasingly blurred between game players and game designers.
These particular tenets support the idea that games should be used in the classroom as a means to facilitate learning, and that students would benefit from an introduction to game design that gives them the tools to modify and create their own games.
For the purposes of this paper, the reader does not have to believe that games ought to maintain their long-standing presence in settings of teaching and learning history.6 Still, readers unsure about the place of games in education are advised to read the ‘Why Games’ section of ‘Interactive Fiction in the Humanities Classroom: How to Create Interactive Text Games Using Twine’.7
What are tabletop games?
The category of ‘tabletop games’ encompasses all physical games played on or around a table. While laypeople may simply separate commercial games between ‘video games’ and ‘board games’, many hobbyists and professionals in the gaming industry prefer the term ‘tabletop games’ over ‘board games’, as it encompasses not only board games, but also dice, card, pen-and-paper, and role-playing games.
In this lesson, you will learn how to make you own version of a tabletop card game called Timeline.
What is Timeline?
Timeline is a card game designed by Frédéric Henry, first published in 2012 and still available for purchase through the global game publisher Asmodee and its subsidiary Zygomatic. Timeline can be played with 2 to 8 players. As it is a very simple game to learn to play with a group, Timeline is frequently described as a party game as much as an educational game. The game is published in several languages and in a number of differently themed versions, including Timeline: Inventions, Timeline: Music and Cinema, Timeline: American History, and Timeline Star Wars.
Timeline is a card game where each card depicts a specific historical event, invention or discovery, but only one side displays the year in which that event occurred. Players take turns placing a card from their hand in a row on the table. After placing the card, the player flips it to reveal the date on the back. If the card was placed in chronological order with all the other cards on the table, it stays in place; otherwise the card is removed from play and the player takes another card from the deck. The first player to get rid of all their cards by placing them correctly wins.8
The game mechanic of adding cards to a chronological series is not exclusive to Timeline. In 2020, Tom James Watson published the single player, online game Wikitrivia, in which you try to beat your own ‘streak’ of cards successfully added to a timeline of historical events pulled from Wikidata and Wikipedia. In August of 2023, The New York Times launched a beta version of a weekly history quiz called Flashback which requires players to organize eight historical events into chronological order.9
Game variations of Timeline like Wikitrivia and Flashback are permissible under American copyright law because game rules are not copyrightable. Section 102(b) of the Copyright Act states: ‘In no case does copyright protection for an original work of authorship extend to any idea, procedure, process, system, method of operation, concept, principle, or discovery, regardless of the form in which it is described, explained, illustrated, or embodied in such work’.10
Why play Timeline in the classroom?
Playing a game in the classroom can provide a low-stakes opportunity for students to test their knowledge outside of a formal assessment process and its associated pressures. Timeline not only challenges players by asking them if they have an understanding of the chronology of the events depicted on the cards in front of them, but it also demands some degree of metacognition, since skillful play requires students to assess their own confidence of the facts at hand.11
How to Make Your Own Version of Timeline With Index Cards
To make a game that mimics the Timeline mechanic, all you need is a small set of cards. You can make your own cards by folding a sheet of paper in half, three times over, before cutting the paper along the fold lines into eighths. Or, you can buy and use a stack of index cards. On the face of each card, write down only the name of the event in question and, on the back, write down the name and the year of the event.
In 2018, I made a small deck of Timeline cards using index cards for my family. Inspired by my children’s fascination with the character dance emotes from the video game Fortnite (when those dances suddenly became ubiquitous on professional sports fields and on playgrounds around the world), I looked up the origin year of dances like The Twist, The Carleton, and The Nae Nae, and I built a small deck of cards with their names and years. I played the game with my family and it was an enjoyable experience for everyone. Even though I did not play the game myself, since I knew the answers, I enjoyed watching my children attempt to remember and use logic to guess the chronology of the different dances they knew.
In this instance of casual gameplay, the hand-made cards were satisfying enough to create an enjoyable experience. That being said, the cards I made could have beeen much improved upon by adding photographs of the dances, providing additional contextual cues to help my children make educated guesses about when the photo was taken. However, the work of collecting images, printing copies, cutting them out, and then transferring them to cards would have taken a significant amont effort and time. Helpfully, there exist a number digital tools that we can use to facilitate this work.
Why Generate and Share Your Own Version of Timeline with Digital Tools in the Classroom
There are compelling reasons for learning methods to design, iterate, and produce printed cards with digital tools. Digital templates can be easily altered or amended – for instance, if there was confusion or other unwanted reactions from participants during gameplay. Capturing the design template of a deck of cards in a digital format allows us to quickly retrieve and reproduce the card deck in the future.
A digital template can also be distributed among a group of people, such as a classroom of students, so that each person can design their own individual cards. When finished, these can be collected and printed together, to form a singular deck. Each student can be asked, for example, to create a small set of Timeline cards commemorating events of a particular period of history, perhaps constrained to a certain subject or geogrpahical area. A classroom deck could therefore combine a variety of cards based on local sports history, the history of medicine, key moments in architecture, and a selection of paintings. This ‘mixing of histories’ facilitates one of the most enjoyable experiences of Timeline gameplay, and an aspect that is enthusiastically promoted by the game:
Could you drink champagne when Darwin laid the foundations of the Theory of Evolution? Was the clothes iron invented before or after Man’s first journey into space? Combine your intuition and your history knowledge with the game Timeline.12
If used in a classroom lesson, this tutorial could be accompanied by librarian guidance (or general recommendations) for finding appropriate historical images on the internet.13 One could also use the opportunity to teach students how to recognize copyright statements from the Creative Commons, to determine whether the images found can be used outside of the ‘educational fair use provisions’ in the United States, or the ‘educational exception of fair dealing’ in Canada’s Copyright Act.14
How to Make Your Own Version of Timeline with Digital Tools
At the time of publication, Microsoft makes its web-hosted versions of Word and Excel freely available to anyone who registers with an email address. It is possible to generate and print simple playing cards using Word’s Mail Merge functionality, which can import text and locally-hosted images from an Excel file into customized ‘labels’ (cards) in Word. For the purposes of simple card design, this combination of ubiquity and functionality might be all that’s necessary for the task at hand.
That being said, you may be interested in using a tool that many amateur and professional game designers, like Elizabeth Hargrave,15 use to produce prototype cards for game testing and game play: nanDECK.
What is nanDECK and How to Use it
A crucial part of game design involves making adaptive changes to game cards through an iterative process of playtesting and noting the effects of design alterations. nanDECK is a software for Windows designed to aid game inventors by facilitating the process of designing and printing card decks for prototyping and playtesting.
The tool was created and made freely available by Andrea ‘Nand’ Nini. The software has been in development since its version 1.0 release in April 2006, the most recent version (at the time of writing) being nanDECK 1.273, released in November of 2023.
While nanDECK was designed for creating playing cards, the program can also be used to generate graphics for other play objects, including tiles and counters.
nanDECK Installation
Windows
nanDECK can run on any version of Windows. The software can be downloaded, unzipped, and then run, as it does not need to be installed. This means that nanDECK can be run even from a USB stick.
Linux
Users with Linux computers can run nanDECK if they install the Windows emulator Wine, as well as the Microsoft core fonts.
OSX
nanDECK can be downloaded and then run on OSX using the Windows emulator Wine. That being said, those with Apple computers running on MacOS Catalina or later will need to take additional steps, as Wine no longer runs on operating systems that have dropped 32-bit OS support.
The official nanDECK Manual16 suggests a workaround for MacOS which requires you to install Winebottler and XQuartz to run the same version of Windows on an OSX computer. Alternatively, users can consider installing and using nanDECK through an emulator like Virtual Box or through a commercial subscription service such as Parallels.
Installation Problems
If you run into installation issues, there are several online forums you can visit where others may offer kind assistance. The author of nanDECK, Andrea Nand, is an active participant of the nanDECK Users Forum on BGG. There is also a smaller, but still active, community of nanDECK users on Reddit.
How to use nanDECK to Generate Cards
This section will begin with a description of the nanDECK interface and its main components. Then, it will give a 12-line script with careful line-by-line explanations of what the script instructs and how it functions. The example provided in this section was used by the author to generate a set of 59 cards for a Timeline-themed deck dedicated to the history of Windsor, Ontario, Canada. This particular example uses a locally-hosted Excel spreadsheet to hold all the cards’ labels, along with the image file locations needed to illustrate them. We’ve also included specific directions for those who prefer to use Google Sheets over Excel. This section then also provides links to a set of files that readers can use to generate their own six-card example Timeline deck.
This lesson will only read through the script to produce a Timeline-like deck – it will not provide more general instructions on how to use nanDECK. For a very useful video introduction to using nanDECK, I would recommend Ryan Langewisch’s five-part set of YouTube tutorials. Also useful is Andrea Nini’s nanDECK Manuel, which is available online in the form of a 188 page PDF document.
nanDECK’s Main Interface
The nanDECK Manual begins with this overview:
nanDECK is a program capable of creating graphic elements from scripts: every line of a script contains a command, for rendering texts, rectangles, and other graphic elements. The program was made for creating cards, but it can be used for many other graphic objects; each card is treated like a different page, in which you can draw different graphical elements. At the start, you can write the script in the large edit box in the center of the window:
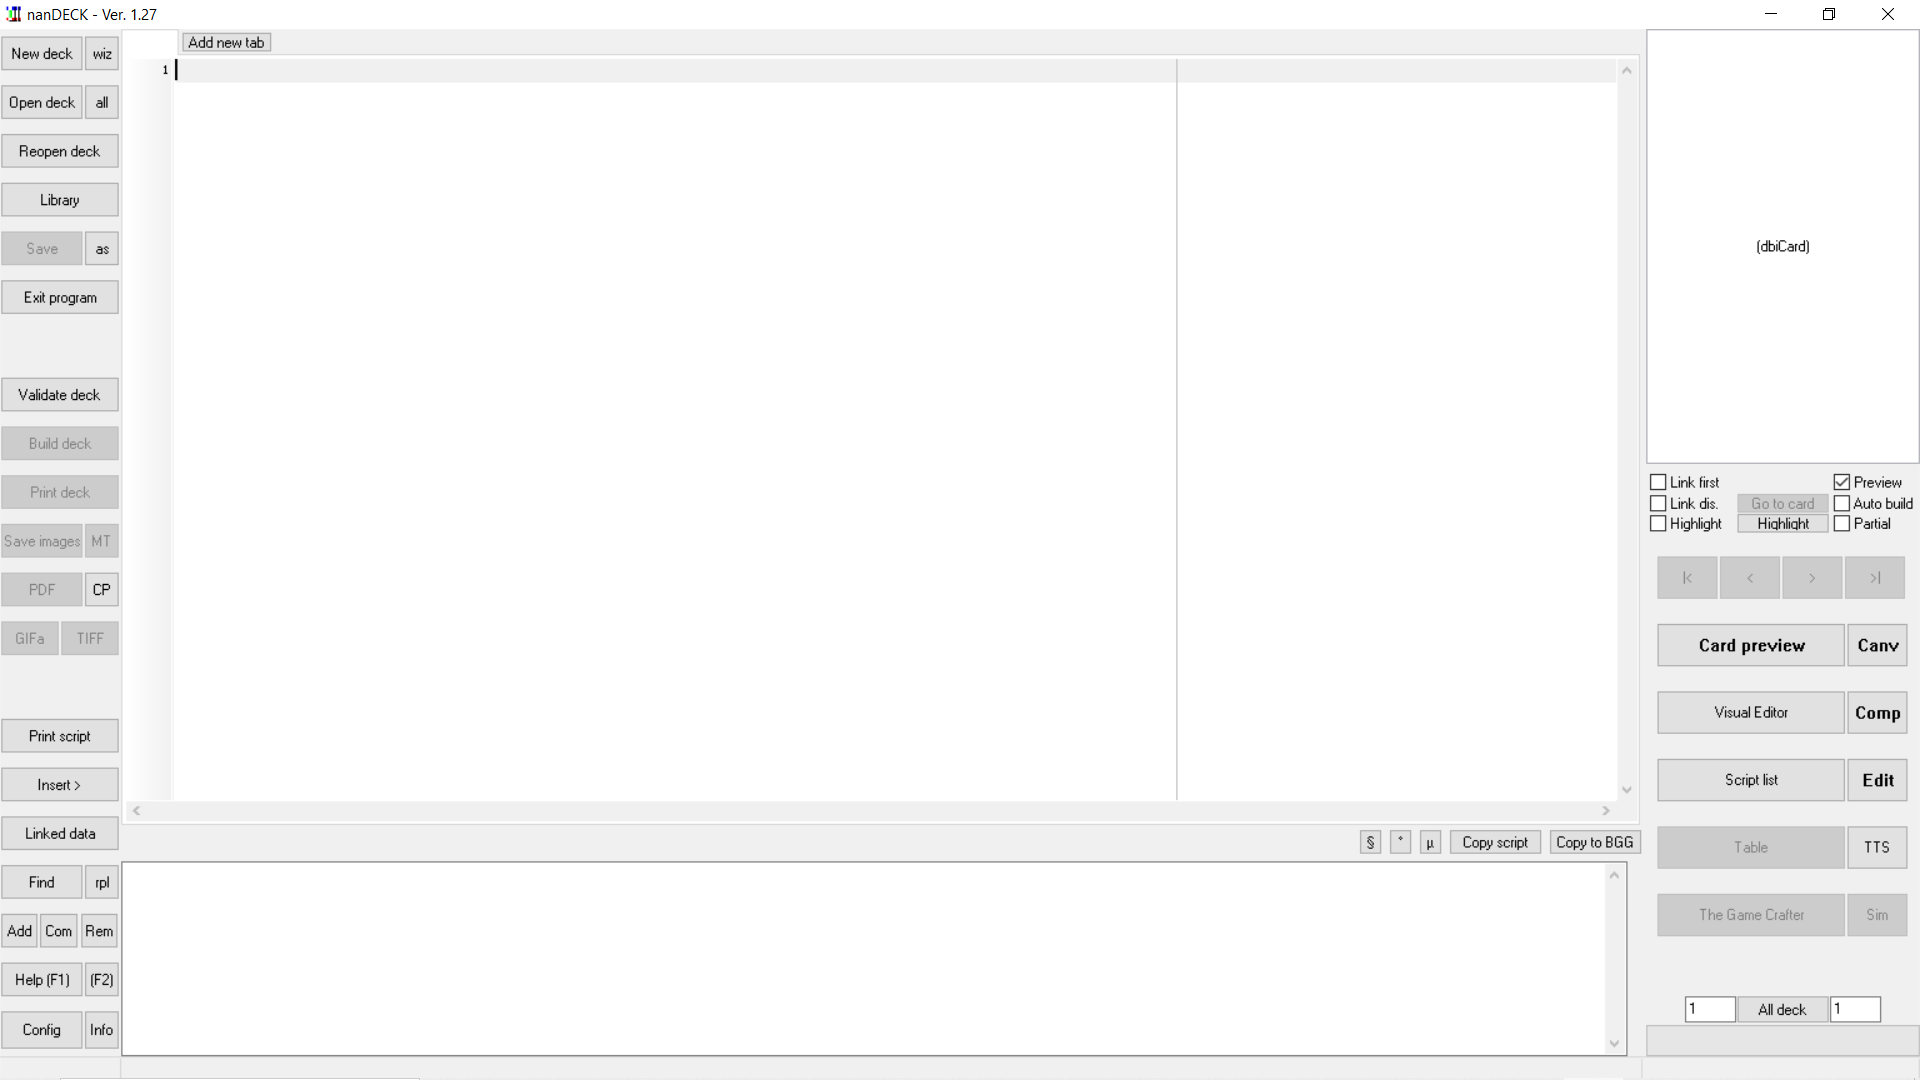
Figure 1. A screenshot of the main interface window of nanDECK Version 1.27
All script commands in nanDECK are composed of a keyword, an equal sign (=) and a list of parameters. It is necessary to refer to nanDECK’s Manual to understand what parameters are available for each command. For example, for the command FONT, the manual advises:
FONT
This directive sets the font for any following TEXT command (see page 164). Note that there is not any reference to a range of cards. If you want a ranged command, you can use FONTRANGE instead (see page 105).Syntax:
FONT = “font name”, font size, style, html color font, html color background, outline x, outline y, step x, step y, char spaceParameters:
- “font name”: character font name (string)
- font size: character font size, in typographical points (1 point = 1/72 of an inch)
- style: character font style and flag used for visualization; values accepted are:
- B: bold
- I: italic
- U: underline
- S: strikeout
Knowing the above, we can now understand the code sample below:
FONT = Arial, 32, B, #0000FF
It sets the font name to Arial, the font size to 32, the style as bold, and the text colour as blue, expressed in hex numerical format.
The FONT command is one of the few script types in nanDECK that are applied to every card in the deck. For most nanDECK commands, though, the first parameter will indicate the desired range of cards upon which the command will be executed. For example, the first parameter of FONT RANGE is ‘range’. To use bold, blue, Arial font on only the first 20 cards would require this code:
FONTRANGE = 1-20, Arial, 32, B, #0000FF
Some of the more common elements that can be applied to the design of each card include BORDER, TEXT, IMAGE, COLOR, RECTANGLE and CIRCLE.
nanDECK also allows parameters to be calculated through the use of ‘Expressions’, delimited by { and }.
TEXT="1-{(FACT)}",\[FACT]
How to Read a nanDECK Script that Generates a Deck of Cards
The fact that a deck of Timeline cards can be generated with only twelve lines of script is a real testament to the power of nanDECK.
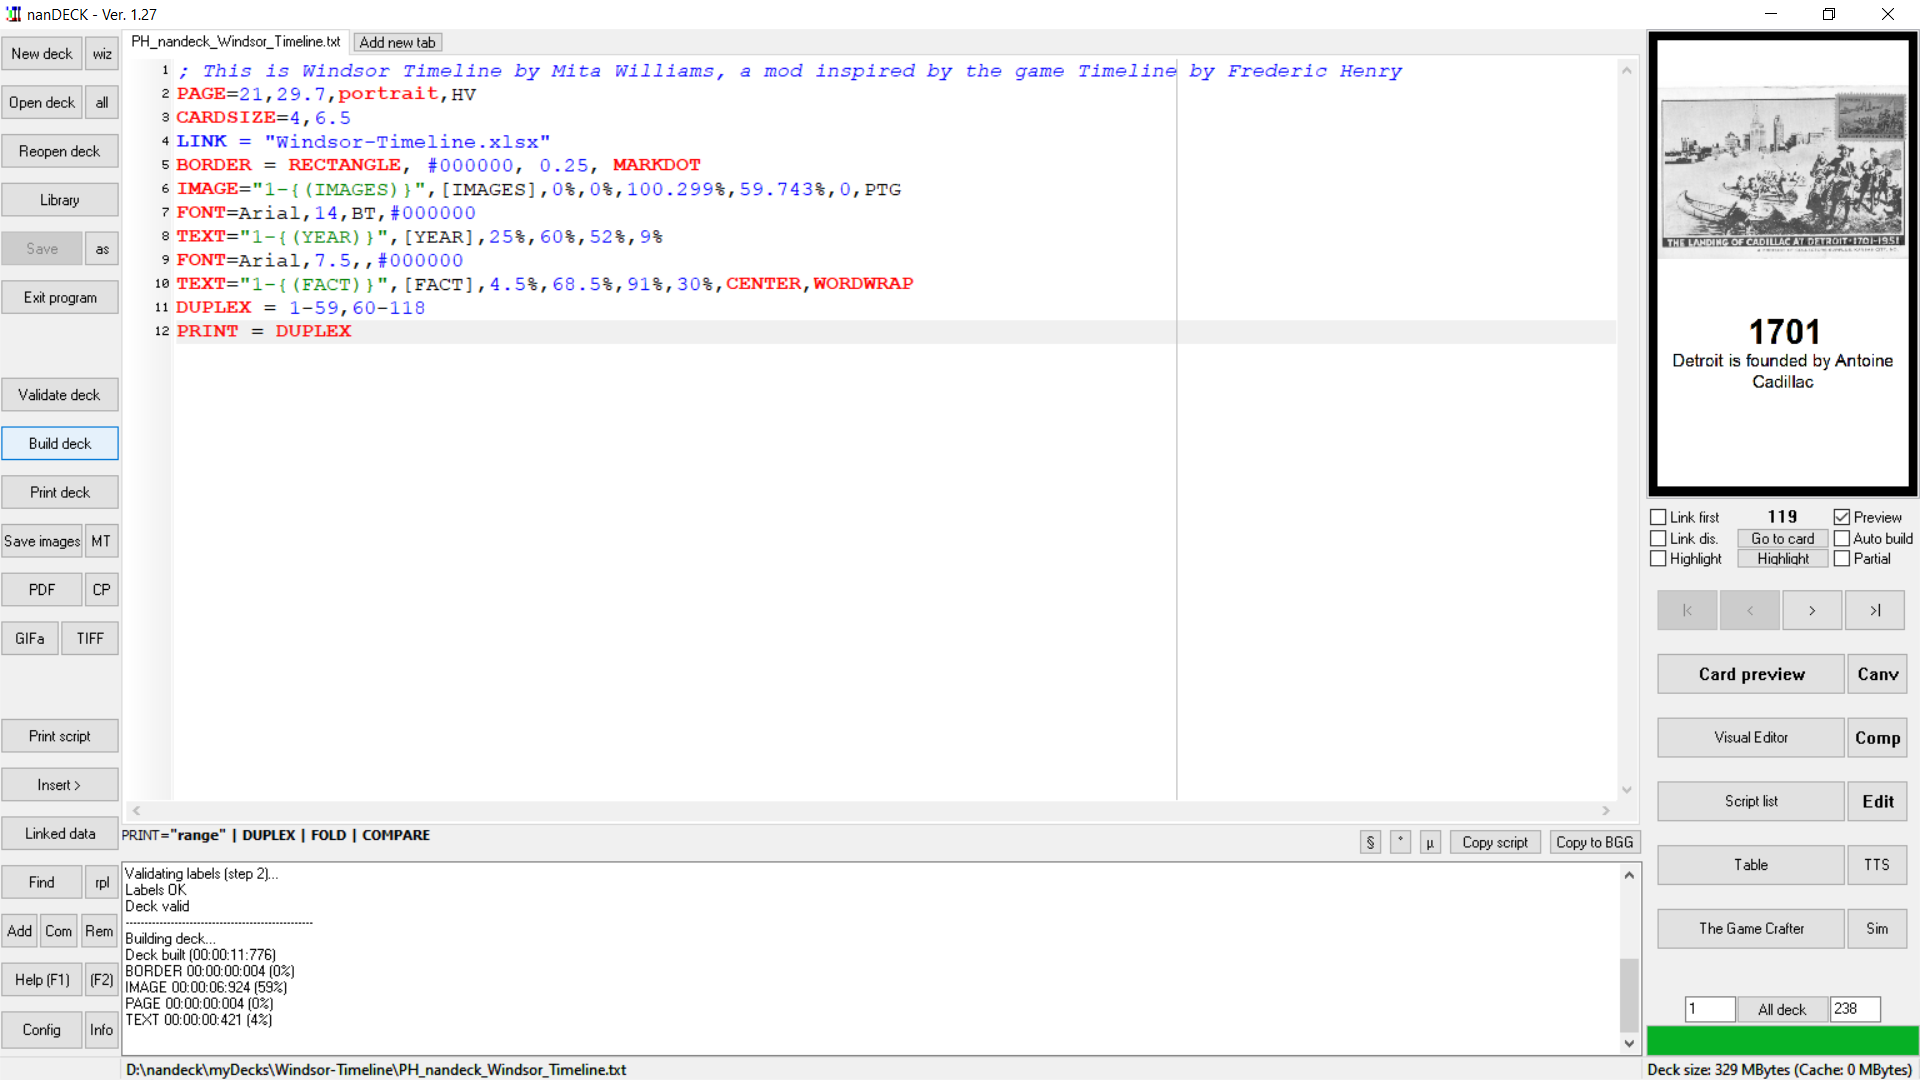
Figure 2. A screenshot of nanDECK with twelve lines of instruction used to generate a deck of Timeline cards.
The next section explains each line of the script to show how the different components are brought in and assembled into cards. This is the script the author used to generate a deck of 59 Timeline cards marking historical events in the city of Windsor, Ontario, Canada, where she currently resides.
Line 1: COMMENTS
Text in nanDECK that begins with a semicolon is not interpreted as script, but as a ‘comment’, or a helpful explanation for the human reader.
1. ; This is Windsor _Timeline_ by Mita Williams, a mod inspired by the game _Timeline_ by Frederic Henry
It is also possible to add a comment in-line alongside a particular bit of code by doubling the semicolon character:
2. PAGE=21,29.7,portrait,HV ;; this sets the page dimensions in CM
Line 2: PAGE
The PAGE directive sets the paper’s size and orientation, which will come in useful when creating and printing the PDF .
Parameters:
- width: page width (in cm)
- height: page height (in cm)
- orientation: the orientation can be chosen between:
- LANDSCAPE: horizontal
- PORTRAIT: vertical
- flags: to specify a special behavior for pages, with possible values including:
- H: the cards are horizontally centered
- V: the cards are vertically centered
2. PAGE=21,29.7,portrait,HV ;; this sets the page dimensions in CM
We can read the above line as a directive setting the page size to the metric equivalent of a US standard 8.5” x 11” sheet of paper (21, 29.7), in portrait orientation. nanDECK will understand HV as an instruction to make the necessary calculations for cards to be centred both horizontally and vertically.
Line 3: CARDSIZE
The CARDSIZE directive sets the width and height of each card (in cm).
3. CARDSIZE=4,6.5
If this line is omitted, the nanDECK applies a default of 6 cm x 9 cm instead. However, cards generated with this default size are oversized compared to standard playing cards, which are 2.5” x 3.5”, or 5.71 cm x 8.89 cm.
For the purposes of this deck, I have opted to create smaller cards, similar to the dimensions of the Timeline cards published by Asmodee.
Line 4: LINK
LINK is used to connect nanDECK to external data that has been formatted either as a text file with comma-separated values (CSV format), or in the form of an Excel spreadsheet (with .xls or .xlsx extensions). The spreadsheet used by the author in this example is called Windsor-Timeline.xlsx.
You can also LINK nanDECK to a Google Sheets spreadsheet by following the additional steps outlined in the nanDECK Manual, under the section for LINK.16 They are reproduced here:
You can also link a Google Sheet document, using the ID of the file instead of ‘filename’ parameter, but you must share it first, following these steps:
• select the file in Google Drive web page
• click the Share icon (the icon with the ‘little man’ in top-right button bar)
• click the dropdown menu below ‘Link sharing on’ in the window
• select a link sharing option, one of the ‘Anyone with the link…’ optionNow Google shows you a link like this:
https://docs.google.com/spreadsheets/d/SAMPLE_ID/edit?usp=sharingCopy and paste the link ID into a nanDECK line like this:
LINK=SAMPLE_IDYou can also select one of the sheets, with this syntax:
LINK=ID!Sheet_name
Example:
LINK=SAMPLE_ID!Beta
But you must enable the web sharing, with these steps:
• open the spreadsheet in a browser
• select from menu File → Publish to the Web
• click on the ‘Publish button
Note that nanDECK assumes that the first row of the linked data contains the names of the fields being imported.
LINK = “Windsor-Timeline.xlsx”, “Year”, “Fact”, “Images”
If the field names are omitted, they will be given the names contained in the first row of the file. This applies to our example.
4. LINK = "Windsor-Timeline.xlsx"
The table below replicates a truncated version of the spreadsheet that shows both the first and last rows:
| A | B | C | |
|---|---|---|---|
| 1 | Year | Fact | Images |
| 2 | 1929 | The Ambassador Bridge is opened | Ambassador_Bridge_SWODA_1038.jpg |
| 3 | 1908 | The H. J. Heinz company establishes a factory in Leamington | Heinz_SWODA_2889.jpg |
| 4 | 1904 | Ford Canada is established in Windsor | Ford_Factory_SWODA_3466.jpg |
| 5 | 1799 | Treaty 2, or the McKee Purchase, was signed | McKee_Treaty_SWODA_2465.jpg |
| 6 | 1930 | The Windsor-Detroit Tunnel opens | Windsor_Detroit_Tunnel_SWODA_1977.jpg |
| 7 | The Ambassador Bridge is opened | Ambassador_Bridge_SWODA_1038.jpg | |
| 8 | The H. J. Heinz company establishes a factory in Leamington | Heinz_SWODA_2889.jpg | |
| 9 | Ford Canada is established in Windsor | Ford_Factory_SWODA_3466.jpg | |
| 10 | Treaty 2, or the McKee Purchase, was signed | McKee_Treaty_SWODA_2465.jpg | |
| 11 | The Windsor-Detroit Tunnel opens | Windsor_Detroit_Tunnel_SWODA_1977.jpg |
Line 5: BORDER
BORDER’s parameters include:
- type: the type of border can be chosen between:
- RECTANGLE draws a rectangle (the default)
- ROUNDED draws a rectangle with rounded corners
- MARK draws cut marks
- html color: black if not specified
- thickness: in cm. The thickness of the border is measured between two cards. This means a thickness of 1 cm will result of a border of 0.5 cm, on each card guidelines: this is for drawing lines beyond the card’s boundaries, to help with cutting
5. BORDER = rectangle, #000000, 0.25, MARKDOT
In this example, nanDECK was directed to draw a black, rectangular border around each card, and add some dotted cut marks.
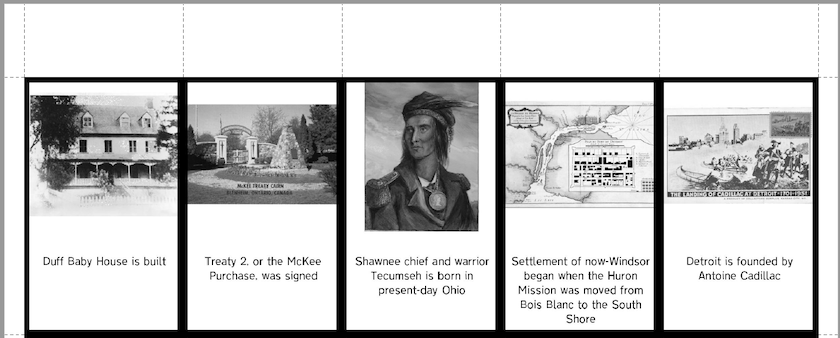
Figure 3. An example of a page of cards generated by nanDECK with the requested black borders and dotted cutting lines.
Line 6: IMAGE
nanDECK includes a basic visual editor that allows you to draw shapes or import images onto the cards. In this deck, we want to add external .jpg images collected from various digital history collections and stored on a local directory.
There are a large variety of parameters and flags associated with the IMAGE directive, as we can see by its syntax:
IMAGE = range, image file, pos x, pos y, width, height, angle, flag, alpha, texture width, texture height, skew x, skew y, img width, img height, loc x, loc y, copy x, copy y
Understanding the order of the syntax can help us decipher the IMAGE directive in our script:
6. IMAGE="1-{(IMAGES)}",\[IMAGES],0%,0%,100%,60%,0,PTG
nanDECK can very usefully calculate the number of items listed under a designated field in a spreadsheet. It does this using an expression delimited by curly brakets. In this case, the expression {(IMAGES)} instructs nanDECK to caculate the number of items listed under the IMAGE field. Here, there are 59 images, so {(IMAGES)} returns 59. Knowing this, you’ll see that at line 6 of figure 4 below, IMAGE="1-{(IMAGES)}" instructs nanDECK to print the images from rows 1 through 59.
In the instruction window, it can sometimes be difficult to determine exactly what parameter the numbers or terms listed after each directive refer to. If you want to know what parameter a variable represents, you can hover your mouse over the variable and check the syntax reminder below: nanDECK will show the relevant parameter name in bold.
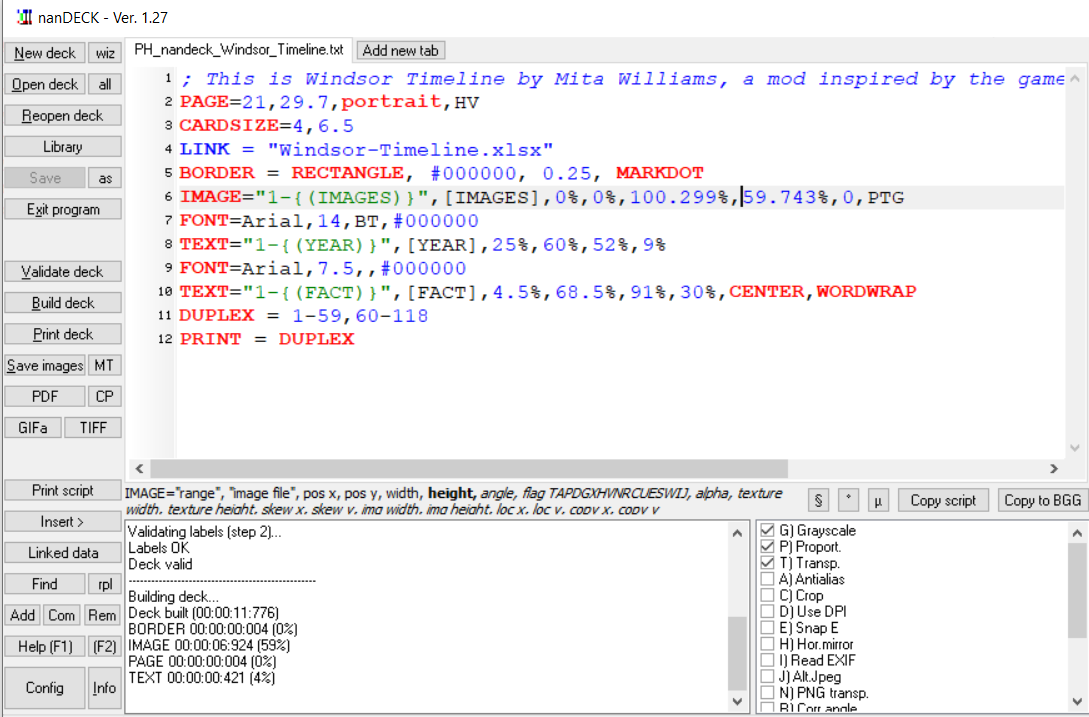
Figure 4. The bolded text corresponds to the variable over which the mouse cursor is currently hovering.
The script in figure 4 directs nanDECK to insert the image indicated under the ‘Image’ field of the spreadsheet, to place it at the 0,0 position, and let it fill 100% of the card’s width (if possible), but only 60% of the height (if possible). Selecting the P flag asks nanDECK to maintain the image’s original proportions. I also opted to make all the images grayscale using the G flag, to give the cards in the deck some uniformity. You can see the result in the example below, where nanDECK inserted the image found at Images/Sandwich_First.jpg:
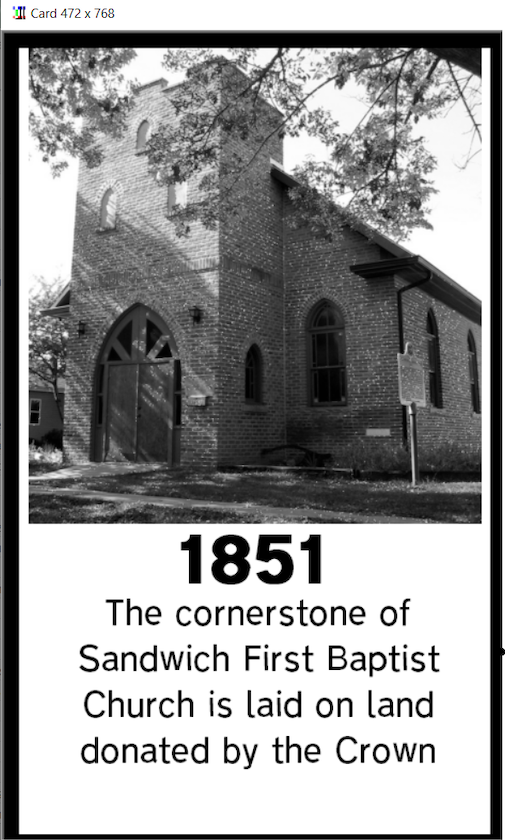
Figure 5. A card generated using nanDeck.
Lines 7 and 9: FONT
nanDECK can use the fonts that you have installed on your machine. The code below inputs font formatting:
7. FONT=Arial,14,BT,#000000
8. TEXT="1-{(YEAR)}",\[YEAR],25%,60%,52%,9%
9. FONT=Arial,7.5,,#000000
In line 7, nanDECK is directed to set the font to size 14, bold, on a transparent background. Line 8 directs nanDECK to generate the text for YEAR in this font, and line 9 reduces the font size to 7.5 when applied to the FACT text (generated in line 10). Note the two commas that follow each other in line 9: this lets nanDECK know that the style parameter is empty, so the text formatting will remain neutral.
Lines 8 and 10: TEXT
nanDECK provides a variety of options for writing TEXT on cards:
TEXT = “range”, “text”, pos x, pos y, width, height, horizontal alignment, vertical alignment, angle, alpha, outline width, circle offset, circle angle, width factor, height factor
We kept the text formatting simple in this example, but text placement posed a bit of a challenge. Most playing cards have two sides: the ‘face’ and the ‘back’. In many games, most of the relevant information is found on the face of the card, while the the back is simply decorative, or indicates the card type. As you may recall, a card in a Timeline deck actually has two faces: one side shows the name or description of an event, and the other side bears the name and date of the event.
8. TEXT="1-{(YEAR)}",\[YEAR],25%,60%,52%,9%
10. TEXT="1-{(FACT)}",\[FACT],4.5%,68.5%,91%,30%,CENTER,WORDWRAP
Line 8 of the script instructs nanDECK to write the year for every card that was given a year under the spreadsheet’s ‘year’ field. Line 10 tells nanDECK to write a description of the event on every card that was given a fact under the spreadsheet’s ‘fact’ field. How does this script produce the cards we need to play Timeline?
Rather than use complicated scripting to ensure that the year only appears on one side of each printed card, we instead provide instructions to print everything that was explicited designated in the linked Excel spreadsheet. In the spreadsheet (replicated in the table below), the first 59 rows provide an image, a description, and a year, to be printed on the face of the card. The next 59 rows only provide an image and a description, because the ‘year’ field is left empty.
| A | B | C | |
|---|---|---|---|
| 1 | Year | Fact | Images |
| … | … | … | … |
| 57 | 2008 | The Weather Network designates Windsor as ‘The Smog Capital of Canada’ | Image/smogfest.png |
| 58 | 2012 | ‘Stephen Colbert calls Windsor, Ontario ‘the earth’s rectum’ | Image/earth.jpg |
| 59 | 2013 | ‘Lights that read ‘All We Are Is All We Were’ is added to the Sandwich Windwoll | Image/AllWeAre.png |
| 60 | 2016 | Windsor was named the Worst Place to be a Woman in Canada by the CCPA | Image/theworst.png |
| 61 | Detroit is founded by Antoine Cadillac | Image/Cadillac.jpg | |
| 62 | Settlement of non-Windsor began when the Huron Mission was moved from Bois Blanc to the South Shore | Image/Earlyeuropean.jpg | |
| 63 | Shawnee chief and warrior Tecumseh is born in present-day Ohio | Image/Tecumseh.jpg |
This is admittedly not the most efficient method, as the information needed to generate new cards must be added twice into the spreadsheet (one entry with the year and one entry without), but it does produce the desired end result.
Lines 11 and 12: DUPLEX and PRINT
One of the greatest strengths of nanDECK is its ability to generate synchronized faces and backs of cards. It does this through the DUPLEX and PRINT directives.
DUPLEX
This directive copies a card (or a range of cards) to another position (or range of positions) calculated automatically by the software. It is useful to manage duplicates, or synchronize the face and back of cards for a duplex printing.
DUPLEX = “range face”, “range back”, number
In order to align the card faces and backs, designate the range you want to duplicate. In the case of my personal deck, there are 59 unique cards: the faces will be generated from cards in the 1-59 range, and the backs from the cards in the 60-118 range.
11. DUPLEX = 1-59,60-118
12. PRINT = DUPLEX
Before you can print your deck, you must first select the Validate Deck button to check that your script’s syntax is valid. You can then press the Build Deck button to generate your deck of cards, where you will be shown a preview of the generated cards in the right-side pane. In this display, you might see a surprising number of blank cards, but don’t worry. These blank cards are inserted into your deck by nanDECK in order to generate a PDF document that will be well aligned when printed.
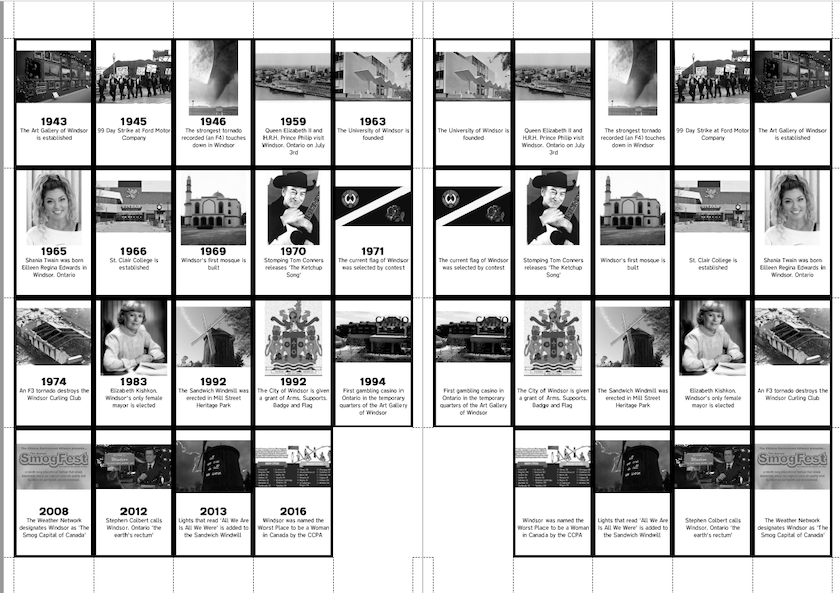
Figure 6: Two pages generated by nanDECK for printing. Note that the pages are oriented so that they can be folded together to make matched, double-sided cards.
Finally, use the Print Deck button to instruct nanDECK to generate your deck as a PDF file, ready for printing. nanDECK can print your deck in a multitude of ways. Each card generated by the program can be saved either as a separate graphical image, or they can all be combined into a single PDF ready for printing, assembling, cutting, and gluing. Since the common practice of game design involves multiple rounds of observed play-testing, each of which informs iterative changes to a game’s design, nanDECK’s ability to easily regenerate variations of a deck of cards is extremely valuable.15
Build Your Own Timeline
In order to help you get started with nanDECK and Tabletop Simulator, I have made available a starter set of files for you to build upon, which you can download from GitHub. It contains two sub-folders, one named nanDECK and the other named Tabletop-Simulator.
The nanDECK sub-folder includes:
PH_nandeck_Your_Timeline.txt: the script to open in nanDECKBuild-Your-Own-Timeline.xlsx: the spreadsheet which the script given to nanDECK will use to find the assets and build the deck- Six
.pngimages
Similar to the example we walked through above, PH_nandeck_Your_Timeline.txt starts with three lines of comments, then eleven lines of directives. Unlike the example above, though, this script links to a Google Sheet rather than an Excel spreadsheet.
1   ; This is a template to create your own mod inspired by the game Timeline by Frederic Henry
2   ; This template generates a deck from a Google Sheet
3   ;
4   PAGE=21,29.7,portrait,HV
5   CARDSIZE=4,6.5
6   LINK = 1lP2mFRcxEsJeDniVy8byPMkwRe7JfkI78OR7NDe9zkU
7   BORDER = RECTANGLE, #000000, 0.25, MARKDOT
8   IMAGE="1-{(IMAGES)}",[IMAGES],0%,0%,100.299%,59.743%,0,PTG
9   FONT=Arial,14,BT,#000000
10  TEXT="1-{(YEAR)}",[YEAR],25%,60%,52%,9%
11  FONT=Arial,7.5,,#000000
12  TEXT="1-{(FACT)}",[FACT],4.5%,68.5%,91%,30%,CENTER,WORDWRAP
13  DUPLEX = 1-6,7-12
14  PRINT = DUPLEX
Line 4 tells nanDECK that the page size is the metric equivalent to an 8½” x 11”, that it should be oriented in portrait mode, and that the cards should be centred in the page, both horitonzally and vertically. Line 5 sets the size of each card, in centimeters.
Line 6 takes advantage of nanDECK’s hard-coding, which will automatically interpret the LINK as a URL to a Google Spreadsheet. 1lP2mFRcxEsJeDniVy8byPMkwRe7JfkI78OR7NDe9zkU is understood to fill the SAMPLE_ID placeholder, in this URL format: https://docs.google.com/spreadsheets/d/SAMPLE_ID/edit?usp=sharing. nanDECK will translate this to https://docs.google.com/spreadsheets/d/1lP2mFRcxEsJeDniVy8byPMkwRe7JfkI78OR7NDe9zkU/edit?usp=sharing.
nanDECK’s ability to draw from an external directory of resources means that developing your own version of Timeline (or another variation of a card game) need not to be a solo endeavour. A entire classroom of students could collect images and facts into a single shared directory and spreadsheet. The downside of this approach is that the ‘secrets’ of each other’s cards would be visible, so any subsequent play would not be a surprise. This is why this lesson suggests that each student make their own deck and then combine their cards together, to discover through gameplay what others have created.
Line 7 describes the border: rectangular, black, 0.25cm thick, and with dotted marks for easier cutting.
Line 8 indicates that, where possible, images should be set on the cards at position 0,0 and take up 100% of the card width and 60% of the card’s height, while maintaining the image’s proportions, and be printed in grayscale.
Line 9 tells nanDECK what font the following text should be printed in: in this case, in bold, black, 14pt Arial, with a transparent background.
Line 10 tells nanDECK to print the YEAR for every Google Sheets row whose ‘year’ field is filled out, and to position it centred horizontally, but a little more than halfway down the card.
Line 11 sets the font from 14pt to 7.5pt Arial, in black but unbolded. This sets the type for Line 12, which prints, for the relevant cards, the FACT, centred, below YEAR. Line 12 also directs nanDECK to wrap the text if it goes over the card’s dimensions.
Line 13 and 14 designate that the printed page will have the first six card faces printed on one side, and the six backs on the other, in such a way that they will be aligned when printed duplex or double-sided.
Once you have entered the script into the edit window, validated the script, and used the Build button to create the deck, your results should look like this .pdf image.
Professionally Printing Cards with nanDECK
You also have the option to get your cards printed professionally: nanDECK’s creator has established a formal relationship with Game Crafter, an American print-on-demand company that specializes in producing cards and other tabletop game components. On the nanDECK interface panel, you’ll find a button that uploads your nanDECK files to the Game Crafter site, for future printing of single sets and limited runs.
Commercial publishers will not typically print images that they believe are under somebody else’s copyright, even if the game is intended for personal or educational use, rather than for commercial sale. Even though my version of Timeline was primarily drawn from public domain sources or from collections that had clear licenses allowing for reuse, many of the images that I wanted to use in my cards fell under copyright. As a result, there is a significant chance that a commercial publisher would refuse to publish even a single copy of my game.
But there are other ways to bring people together to play our new game!
Why Import your Tabletop Game into Tabletop Simulator
nanDECK provides tight integration with another platform called Tabletop Simulator. Tabletop Simulator is a physics ‘sandbox’, in which up to ten players can manipulate and play with digital game pieces. It’s currently available on Steam for $19.99.
While Tabletop Simulator (TTS) is not the only digital platform that allows people to gather in front of a shared screen to play cards and board games, it is a well-known name, used by game designers to observe play-testers engaged in early game prototypes. It can be difficult to find enough volunteers in one’s physical community who are willing to play a game in its early stages of development. TTS allows game designers to test their new designs with the help of play-testers who are physically dispersed around the world.17 Not only does TTS act as a gathering point for people who share niche interests, it is also an important outlet for those who are unable to play tabletop games in person, due to health vulnerabilites, time, cost, or global pandemics.18
Printing Digital Cards for Tabletop Simulator
Once you understand how to import your cards into TTS, your game turns into a kind of video game, with no rule-coding necessary. Even though TTS doesn’t require knowing how to code to make use of its open-ended toolbox, it is not a simple or intuitive enviroment. Berserk Games, the company that produces TTS, provides a seven-part YouTube video tutorial to teach new players to make games and play them in their environment.
This next section will describe how I turned my ‘Windsor Timeline’ deck into digital format for TTS. Then, generalized instructions will explain how to follow the same process with the game assets we just used to make our simple six-card starter deck.
Printing Card Faces and Card Backs Separately for ‘Windsor Timeline’
Unlike nanDECK, which generates each card separately, Tabletop Simulator requires two image files (one for each side of the deck) to be uploaded in standardized format, so that it can parse each one into multiple cards. A normal card deck will generally have an illustration on the card back (such as a mosaic pattern), while information and symbols appear on the card face (such as the 4 of Clubs). In other words, TTS requires one image file that portrays all the card faces and another file that portrays all the card backs.
Before we can upload our Timeline deck into TTS, we will need to regenerate our cards into this required format. To do this, we have to split our original spreadsheet into two. The first spreadsheet will generate the deck’s faces and, as such, will have the necessary information to generate facts, images and years. This spreadsheet will no longer need the duplicate entries without the ‘years’. The second spreadsheet will be identical to the first, except that it won’t include the ‘year’ column.
Now that we have two spreadsheets, we need to make a couple amendments to our previous set of instructions in the nanDECK interface before we can run the script.
First, let’s change the LINK variable to point to the spreadsheet that will generate the decks’ faces, which the author has called Windsor-Timeline_for_Tabletop_Face.xlsx in this example.
LINK = "Windsor-Timeline_for_Tabletop_Face.xlsx"
Because we are no longer generating one document to be printed and folded, we can remove the following lines from our code:
DUPLEX = 1-59,60-118
PRINT = DUPLEX
TTS requires the image files for each side of the deck to be provided in a certain standard format: one page containing ten cards across, and seven down. This standardization is necessary for the program to calculate where the cards should be parsed into separate images. (If your deck has more than 70 cards, then you will have to run through this exercise several times, each time generating sets of cards of 70 cards or less. For example, if you would like to generate the card faces of 200 cards, you would need to generate and process three spreadsheets: two spreadsheets of 70 rows each, and one spreadsheet of 60 rows.)
The script that generates this standard is:
RECTANGLE=70,0,0,100%,100%,#000000
nanDECK then creates a singular image using its DISPLAY command after the deck is generated.
DISPLAY="Windsor_Timeline_TTS_Face.png"
Once you’ve pressed Validate and Build Deck, nanDECK should have generated the image Windsor_Timeline_TTS_Front.png (named as such for this example) in the current directory.
You would then have to repeat this process to generate the deck’s backs. The only changes needed are to switch the LINK to Windsor-Timeline_for_Tabletop_Back.xlsx, and DISPLAY to Windsor_Timeline_TTS_Back.png.
Printing Card Faces and Card Backs Separately for your Starter Deck
In the starter set of files you’ll find a sub-folder called Tabletop-Simulator. It contains:
PH_nandeck_Your_Timeline_TTS_Face.txt: the script to open in nanDECK to generate the card facesPH_nandeck_Your_Timeline_TTS_Back.txt: the script to open in nanDECK to generate the card backsBuild-Your-Own-Timeline-TTS-Face.xlsx: the spreadsheet used by nanDECK to generate the card facesBuild-Your-Own-Timeline-TTS-Back.xlsx: the spreadsheet used by nanDECK to generate the card backsYour_Timeline_TTS_Face.png: the image of card faces produced by nanDECK using the assets above, to be uploaded into TTSYour_Timeline_TTS_Back.png: the image of card backs produced by nanDECK using the assets above, to be uploaded into TTS
If we look at the script in PH_nandeck_Your_Timeline_TTS_Face.txt, we see that it no longer instructs nanDECK to generate a double-sided document meant for printing. Rather, it turns it into a single .png file, Your_Timeline_TTS_Face.png.
1   ; This is a template to create your own mod inspired by the game Timeline by Frederic Henry
2   ; This template generates the face of a deck of cards from a Google Sheet and images that are hosted on Google Drive
3   ; This script generates a PDF for uploading into Tabletop Simulator
4   ;
5   PAGE=21,29.7,portrait,HV
6   CARDSIZE=4,6.5
7   LINK = 19abmOKGPc6dixxi38cc1wVDqmMBOYI-2J59qim3wQFw
8   BORDER = RECTANGLE, #000000, 0.25, MARKDOT
9   IMAGE="1-{(IMAGES)}",[IMAGES],0%,0%,100.299%,59.743%,0,PTG
10  FONT=Arial,14,BT,#000000
11  TEXT="1-{(YEAR)}",[YEAR],25%,60%,52%,9%
12  FONT=Arial,7.5,,#000000
13  TEXT="1-{(FACT)}",[FACT],4.5%,68.5%,91%,30%,CENTER,WORDWRAP
14  RECTANGLE=70,0,0,100%,100%,#000000
15  DISPLAY="Your_Timeline_TTS_Face.png",1,55,10
You are now ready for Tabletop Simulator!
Build Your Own Timeline in Tabletop Simulator
When you first open Tabletop Simulator, it asks you whether you want to join an existing game, or Create a new game: choose Create. You will be prompted to load a Classic Game, a Digitally Licensed Game, a game from the Steam Workshop, or to Save and Load your own local content. Choose Save and Load and exit out of the screen.
This should leave you in front of an empty tabletop. From the top menu options, select Objects, then Components, and then Cards. From the options presented, select Custom Deck. This will add a blank deck to your virtual tabletop and you will be given the option to import your files from nanDECK to create your own custom deck (if you don’t see this option, right-click on the blank deck).
From this menu, you will be able to select the deck’s face from your local drive. Make sure to check the box beside the option Unique backs. Leave the width option on 10 and the height option on 7, but do adjust the slider so that it displays the true number of cards in your deck. Once these steps are complete, hit the Import button and your deck will be built for virtual play.
You will now be able to play your version of Timeline in an online environment with up to nine other invited players. Furthermore, if you choose to upload and make your game assets available through the Tabletop Simulator’s Steam Workshop, you can add your deck to a collection of over 11,000 sets of cards that are available to a community of over 2 million TTS customers.19

Figure 7. While one of the most delightful features of Tabletop Simulator is the ability to flip the table, throwing cards around is also pretty enjoyable.
Conclusion
I will end this lesson with another tenet from Eric Zimmerman’s ‘Manifesto for a Ludic Century’:
Digital technology has given games a new relevance.
The rise of computers has paralleled the resurgence of games in our culture. This is no accident. Games like Chess, Go, and Parcheesi are much like digital computers, machines for creating and storing numerical states. In this sense, computers didn’t create games; games created computers.
Zimmerman is not the only one who believes this. Tabletop games have previously been described as ‘paper computers’, as they are designed by humans and ‘they enact systems of rules and procedures’.20
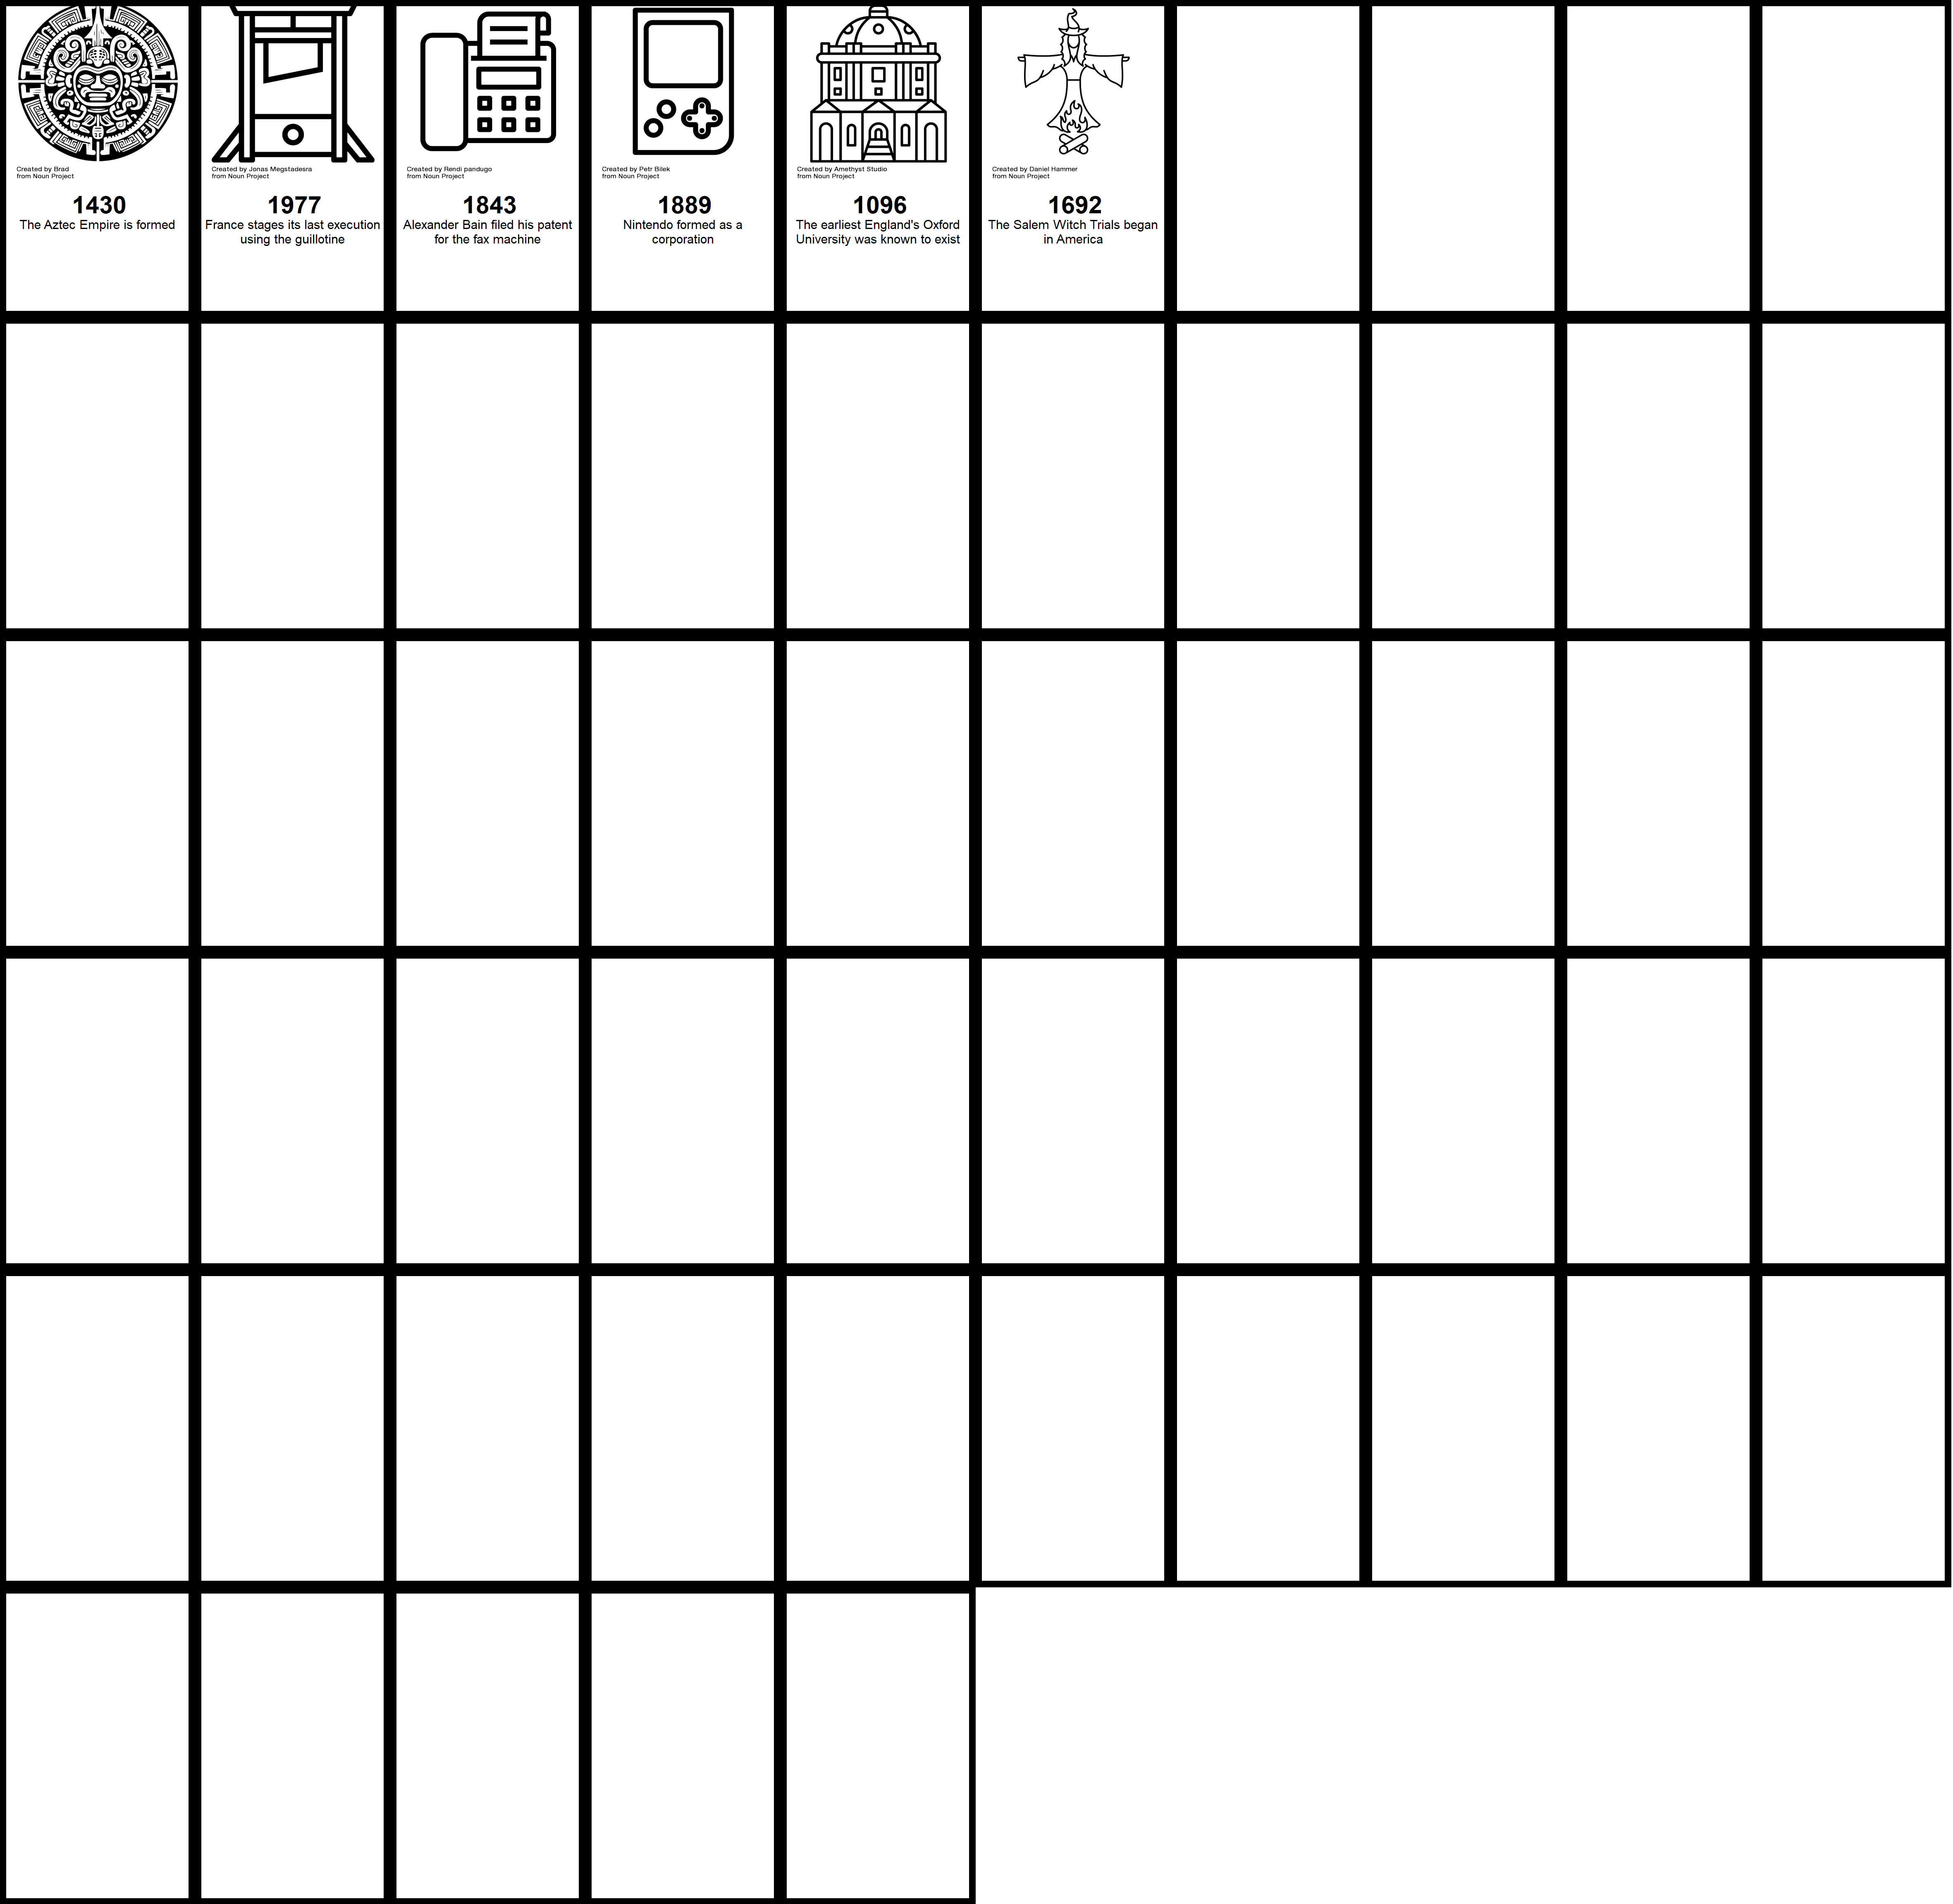
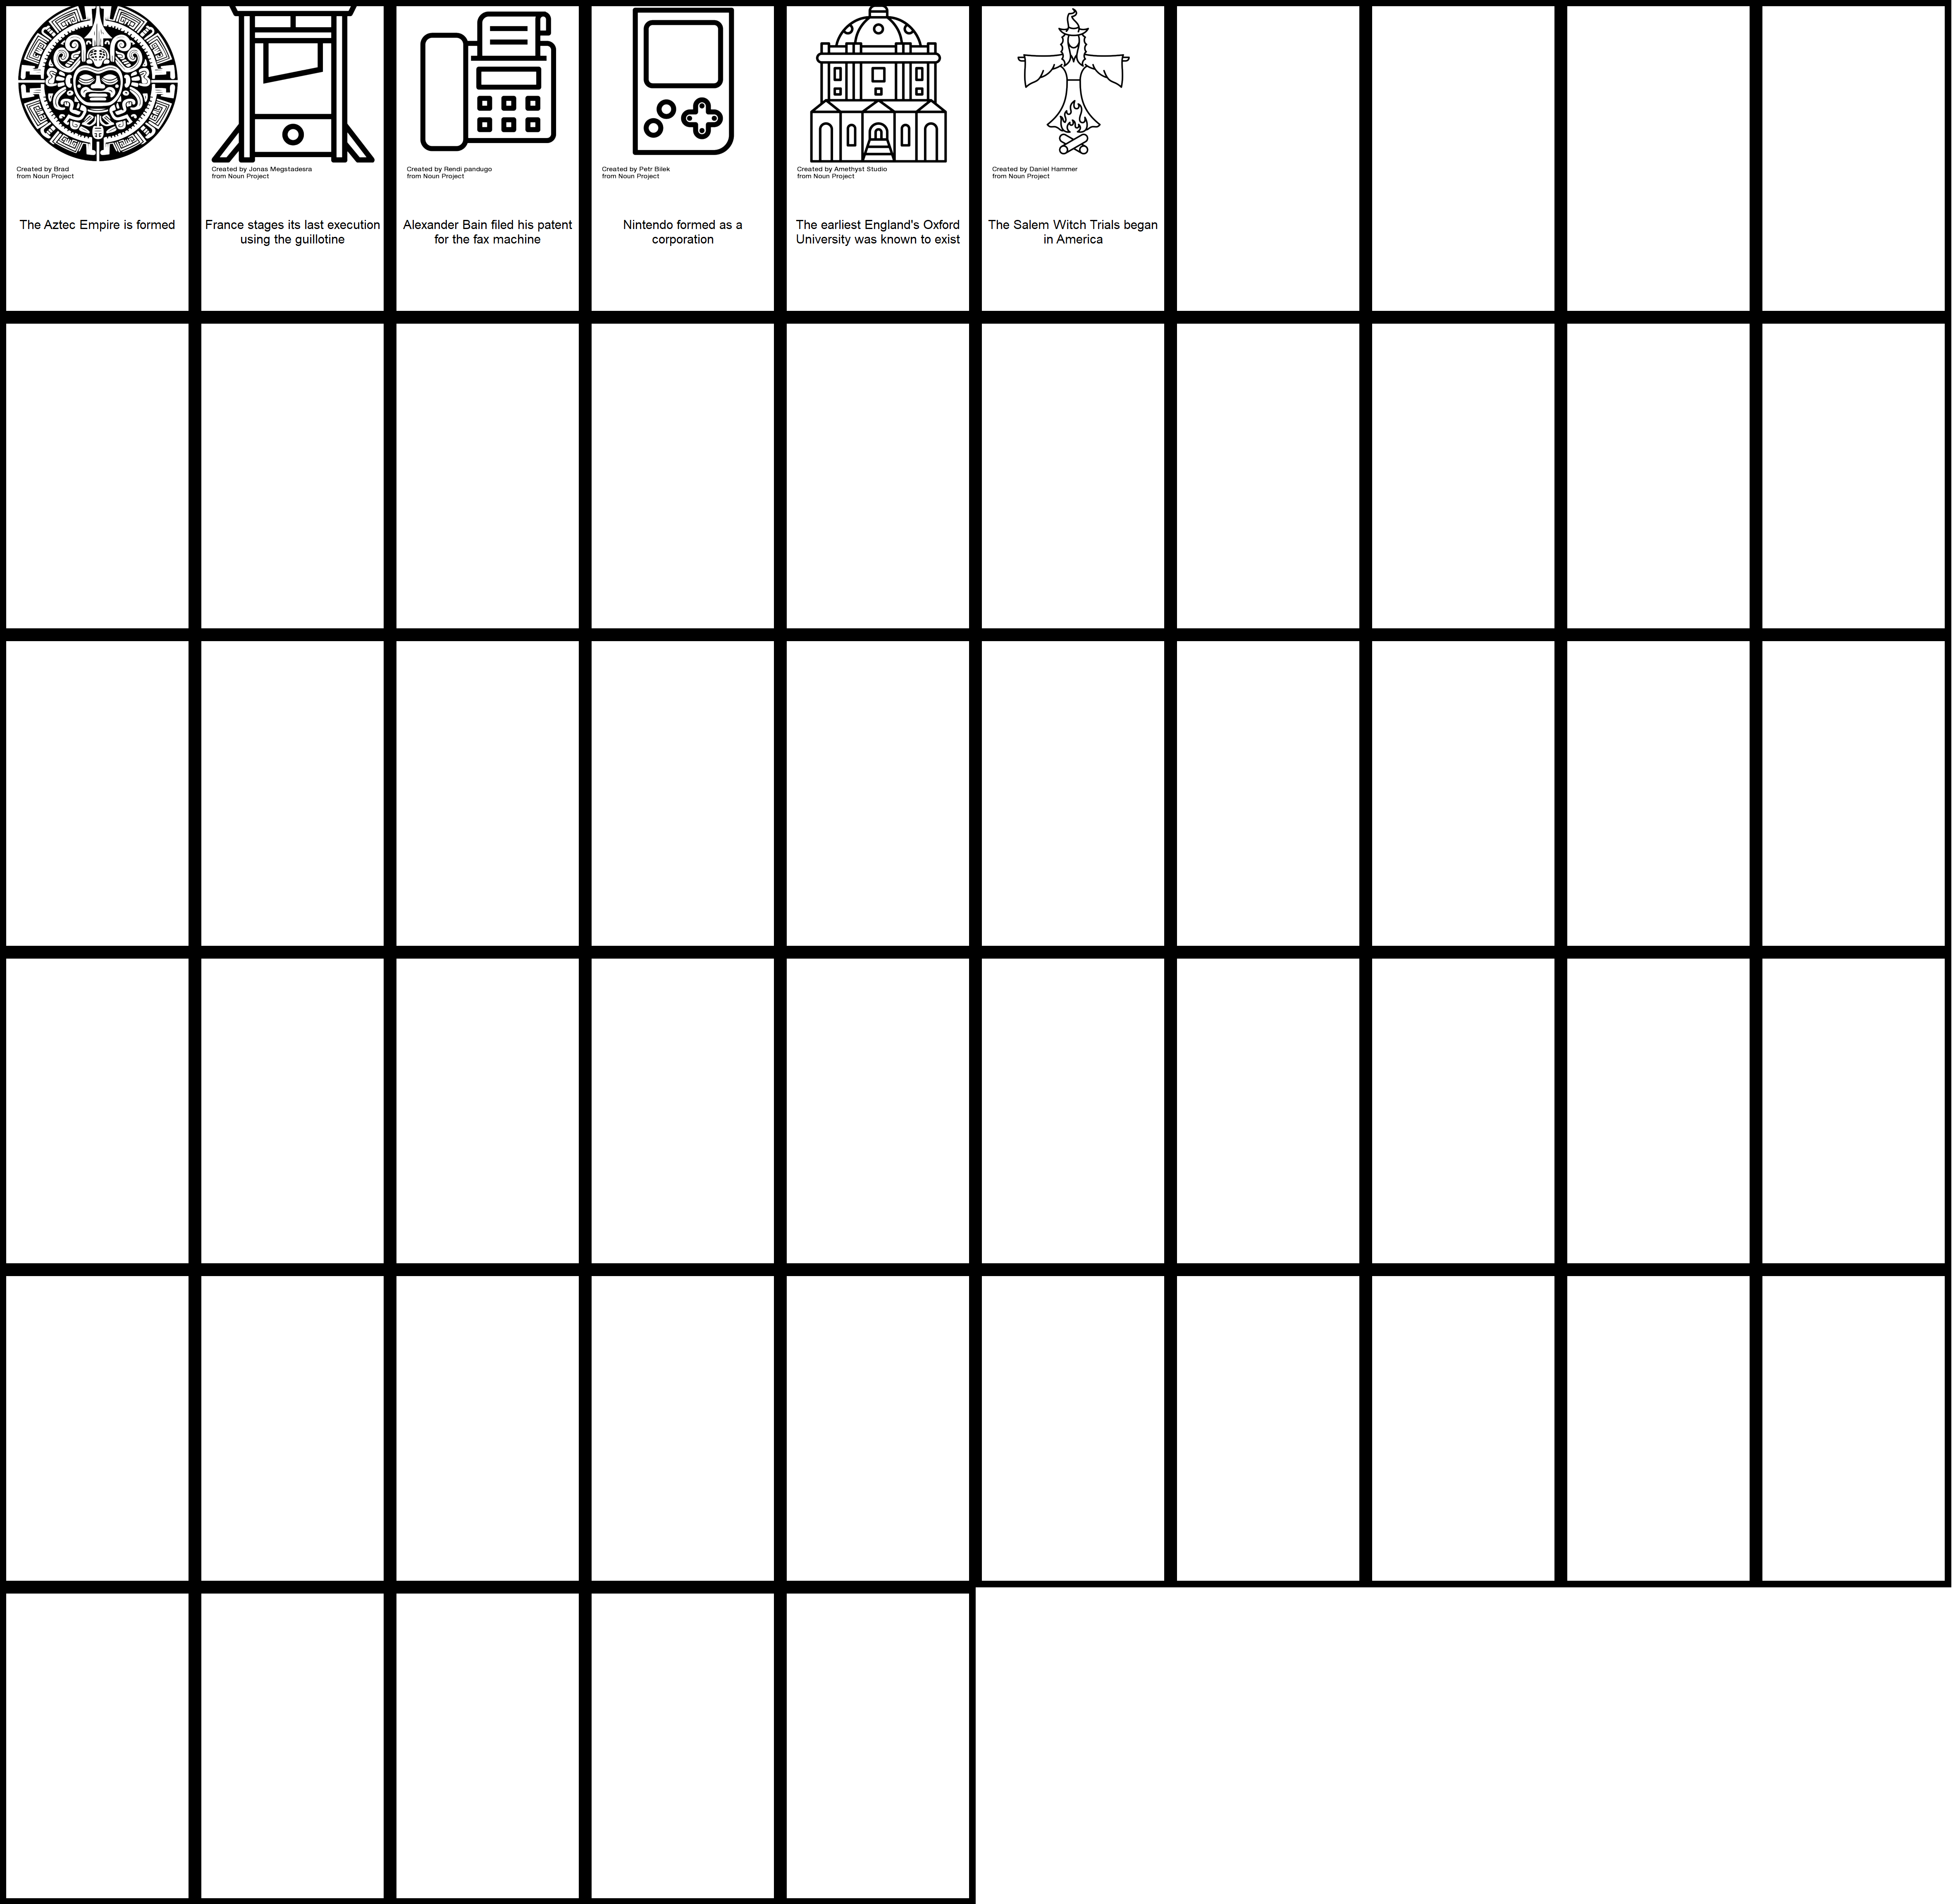
This lesson will hopefully facilitate history students and/or beginner game designers to create and generate their own variations of Timeline, perhaps opting to cover a specific theme or aspect of history, and share their work with others. These decks could be combined, to intersperse (for example) local history with foreign history. Through this process, players will discover moments of synchronology and historical overlap that can surprise and delight (did you know that Oxford University is older than the Aztec Empire?).
Hopefully, this experience will inspire others to also create modifications of other existing games. One could imagine creating and adding their own cards to decks of ‘Trivial Pursuit’, ‘Magic The Gathering’, or even ‘Uno’. Perhaps it will even lead to creating a brand new game.
Endnotes
-
Rosenberg, Daniel. “Mark Twain Memory-Builder.” Time OnLine, 2013, https://timeonline.uoregon.edu/twain/pleasures.php. ↩
-
Hodkinson, Alan, and Christine Smith. “Chronology and the New National Curriculum for History: Is It Time to Refocus the Debate?” Education 3-13, vol. 46, no. 6, Sept. 2018, pp. 700–11. Taylor and Francis+NEJM, https://doi.org/10.1080/03004279.2018.1483804. ↩
-
Lang, James M. Small Teaching: Everyday Lessons from the Science of Learning. First edition., Jossey-Bass, 2016. ↩
-
Zimmerman, Eric. (2022). The rules we break: Lessons in play, thinking, and design. Princeton Architectural Press. ↩
-
Zimmerman, Eric. “Manifesto for a Ludic Century.” The Gameful World: Approaches, Issues, Applications, edited by Steffen P. Walz and Sebastian Deterding, The MIT Press, 2015, pp. 19–22. ↩
-
McCall, J. (2016). “Teaching History With Digital Historical Games: An Introduction to the Field and Best Practices”. Simulation & Gaming, 47(4), 517–542. https://doi.org/10.1177/1046878116646693. ↩
-
Kirilloff, G. “Interactive Fiction in the Humanities Classroom: How to Create Interactive Text Games Using Twine”, Programming Historian 10, 2021. https://doi.org/10.46430/phen0095, 2021. ↩
-
“Timeline.” BoardGameGeek. Accessed February 21, 2024. https://boardgamegeek.com/boardgame/128664/timeline. ↩
-
Leonhardt, D. (2023, August 6). “A new Times quiz”. The New York Times. https://www.nytimes.com/2023/08/06/briefing/a-new-times-quiz.html ↩
-
Boyden, Bruce E. Games and Other Uncopyrightable Systems. 1580079, 20 Apr. 2011, Social Science Research Network, https://ssrn.com/abstract=1580079. ↩
-
Timeline & Stag Hunt. Directed by Richard Malena-Webber, vol. 8, 2017. YouTube, https://www.youtube.com/watch?v=dZbkxMuBR_I. ↩
-
Zygomatic, (n.d.), “Games—Dobble”, Retrieved January 26, 2024, from https://www.dobblegame.com/en/games/. ↩
-
Jones, R. A. (n.d.). “LibGuides: Free Images from Libraries, Museums, and Archives”. Retrieved January 26, 2024, from https://libguides.lib.msu.edu/c.php?g=138076&p=7641602. ↩
-
Canada Copyright Act, RSC 1985, c C-42, s 29. ↩
-
Ludology. Ludology: Ludology Episode 203 - Winging It. 203, https://ludology.libsyn.com/ludology-episode-203-winging-it. Accessed 8 Oct. 2022. ↩ ↩2
-
Nini, Andrea “Nand.” NanDECK Manual Program Version 1.27 – 2022-07-27. Andrea “Nand” Nini, 2022, https://www.nandeck.com/download/204/. ↩ ↩2
-
Hall, C. “Tabletop gaming in 2021 will be defined by these last 12 months of chaos”, 8 Jan. 2021, Polygon. https://www.polygon.com/2021/1/8/22178462/board-games-rpgs-2021-magic-dungeons-dragons-pandemic-black-lives-matter. Accessed 25 Jan. 2024. ↩
-
Boyle, B. “How Board Gamers Embraced Tabletop Sims During Lockdown”, 29 May 2020, Vice. https://www.vice.com/en/article/pkybxv/board-games-tabletop-simulator-tabletopia-quarantine. Accessed 25 Jan. 2024. ↩
-
Berzerk Games. “Developer & Publisher Information.” Tabletop_Simulator, 2023, https://tabletopsimulator.com/contact/publishers. ↩
-
Sayers, Jentery. Paper Computers. 2018, https://jntry.work/archive/syllabi/508v4/. ↩