Contents
- Introduction
- What is XML?
- What is XSL?
- Necessary and Helpful Software Packages
- Choosing and Preparing XML Data
- Creating and Testing Your XSL File
- Populating Your Outputs
- Selecting and Printing Values
- Sorting Results
- Filtering Results
- Conclusion
- Possible Solutions to the Exercises
- Further Reading
- Notes
Introduction
The day before your colleague is due to give a seminar on Slave Rebellions in the New World, he phones you to say he is ill and needs you to cover his sessions. You decide to compile a selection of primary sources to work through in class. You find some websites and readers with good sources, but scanning or cutting-and-pasting them into a new document is time consuming; the formatting and citations are inconsistent and you begin to wonder if the ones you have chosen work well together. One site allows you to download an XML version of all its sources, but there are so many records, and so much metadata, that you cannot find the material you want quickly.
Or perhaps…
You find an old copy of Inscriptions of Roman Tripolitania (1952) and wish that you could run a statistical analysis on the appearance of certain phrases in certain locations. Fortunately, King’s College London has produced an extensive e-version of the text with images, translations and location information. You can search through the material manually using the full-text search on the site, but curating the information you want, in the format you need to run an analysis, will take time.
Then again…
You are starting a new project analysing book auction catalogues from the early seventeenth century. You start recording the publication details and auction listings into a series of Word documents and Excel spreadsheets. A month into the project, you are invited to present your research to the Pro-Vice Chancellor. Your head of department suggests that you create a ‘snazzy’ set of slides and handouts to help her understand your project. You have some preliminary conclusions about the material, but the data is scattered in several places and formatting it properly will take more time than you have.
In all three of these situations, a basic understanding of XML, and its sister-language XSL, could have saved you time and aggravation.1 This tutorial will provide you with the ability to convert or transform historical data from an XML database (whether a single file or several linked documents) into a variety of different presentations—condensed tables, exhaustive lists or paragraphed narratives—and file formats. Whether filtering a large database or adding formatting such as headings and pagination, XSL offers digital researchers the ability to reshape databases to support their changing research or publication needs.
What is XML?
The eXtensible Markup Language (XML) is a highly flexible method for encoding or structuring your data. Unlike Hypertext Markup Language (HTML), which has a set vocabulary, XML is extensible; it can be expanded to include whatever sections, sub-sections, and sub-sub-sections you need in order to store your data in the way you wish.
A database can be made up of one or more XML files and each file has the same basic structure. Each section, or layer, of the file is surrounded by a set of elements. An element is, essentially, a category or name for the type of data you are providing. Like Russian Nesting Dolls, each level of elements exists entirely within another one. The top-level element encloses the entire database. Each element within the top-level element is a child of that element. Likewise, the element surrounding a child element is called the parent element.
<top>
  <parent>
    <child></child>
  </parent>
</top>
Depending on the rules of your database, every element can have a value (textual or numerical) as well as any number of child elements.
<top>
  <parent>
	<child_1>value</child_1>
	<child_2>value</child_2>
	<child_3>value</child_3>
  </parent>
</top>
They can also have attributes, which can be thought of as metadata for the element. Attributes can, for example, help you distinguish between different types of values without having to create a new type of element.
<top>
  <name>
    <last>Crockett</last>
    <first type="formal">David</first>
	<first type="informal">Davy</first>
  </name>
</top>
Once you are given an XML database, or have stored your own data within one, you can use XSL to sort, filter and display this information in (almost) any way you wish. You can even break open OpenXML files, such as Word (.docx) or Excel (.xslx) files, and see or remove any additional information that Microsoft has inserted into your documents, such as tags identifying geographical locations.
A more detailed discussion of XML, its structure, and its use in the humanities, is available from the Text Encoding Initative.
What is XSL?
eXtensible Stylesheet Language (XSL) is the natural complement to XML. At its most basic level, it provides layout and formatting instructions in much the same way as Cascading Stylesheets (CSS) do for HTML files. This allows you to transform your plain-text data into richly formatted text, as well as dictate its layout on a screen or in print, without altering your original data files. At a more advanced level, it also allows you to sort or filter your records based on particular critera, or create and display compound or derived values based on your original dataset.
By keeping your data (XML) and formatting instructions (XSL) separate, you are able to refine and alter your layout without the risk of compromising the structure of your data. You are also able to create a number of different styles, each serving a different purpose, and apply them as necessary to a single data set. In practice, this means only having to update your data in one place, even if you export it to many different documents.
The following tutorial will therefore explain:
- editors: the tools needed to create XSL transformation files
- transformers: the tools needed to apply your XSL transformation instructions to your XML documents
- choosing and preparing XML data: how to connect your XML data to your XSL transformation instructions
It will walk you through the creation of some of the most common transformations intructions as well, including:
- printing values: how to print or display your data
- for-each loops: how to display particular data for each record
- sorting results: how to display your data in a particular order
- filtering results: how to select which records you display
Necessary and Helpful Software Packages
Editors
One of the advantages of storing data in a plain-text format is the ease of obtaining appropriate software for viewing and manipulating it. For the purposes of this tutorial, we recommend that you install the open-source editor Visual Studio Code (“VSCode”, for short), although any other programming editor can be used for this tutorial (Notepad++, Atom, Emacs, Vim, etc.). VSCode handles and conserves the plain-text format of your data while providing you with different colour schemes (such as green-on-black or brown-on-beige) as well the ability to collapse (hide) sections or easily comment-out (temporarily disable) sections of your code.
When you become more comfortable with XML and XSL, and are ready to tackle more complicated transformations, you may want to consider using a dedicated XML editor, such as OxygenXML, although it is neither free nor open-source.
XSL Processors
Once you have installed VSCode on your system, you will need to install an XSL processor. There are several ways to use XSL stylesheets to transform your XML data:
- via the web browser, using an embedded simple XSL processor
- via an XSL processor included in an XML program or editor
- via a standalone XSL processor from the command line (or as a binding within another programming language)
Until recently, the first option would have been the most comfortable way to learn how to work with XSL. However, web browsers have introduced security restrictions that make it more difficult to natively transform local XML documents. In order to avoid this problem, you could install add-ons in Chrome or Firefox, or modify their security policies directly, to allow transformations to run. However, this has the disadvantage of making the web browser vulnerable to certain kinds of cyber attacks. For this reason, we will avoid taking this route.
The second option requires the installation of a specialised editor such as Oxygen XML Editor or Altova XMLSpy. However, since these are neither free nor open source editors, we will not take this route either.
We are left with the third option. We will use a free and open source XSL processor called Saxon-HE, developed by Michael Kay, one of the most renowned specialists in the field of XML, XSLT, XPath, XQuery, and related technologies. The “HE” in “Saxon-HE” stands for “Home Edition”. Saxonica, Michael Kay’s software house, also has much more powerful editions of the Saxon processor for sale, suitable for larger projects and higher technical requirements. However, for our purposes —and indeed for most projects requiring XML transformation via XSLT— the Saxon-HE edition is more than sufficient.
Saxon-HE Installation
Saxon-HE is a Java application (in fact, its full technical name is “SaxonJ-HE”). Accordingly, our system must have a Java Virtual Machine (Java VM) installed in order to run this edition of Saxon. Saxon-HE version 11, the latest version to date, requires at least Java SE 8 (JDK 1.8). We must make sure that it is installed on our system. If it is not, we must install it ourselves.
To check if it is, we will use the command line of our operating system. In order to do that, let us open our terminal emulator (hereinafter, the “terminal”). If you are on Microsoft Windows, it is advisable to use either PowerShell or Git Bash. If you are on Mac OS, you can use the application Terminal.app (included by default in the system). Finally, on Linux you can use any terminal application.
If you are on Windows, type the following command and press enter:
java -version
On MacOS and Linux you must type the following:
java --version
(note the double hyphen --).
If Java is not installed, you will get an error message like this one:
java: The term 'java' is not recognized as a name of a cmdlet, function, script file, or executable program.
Check the spelling of the name, or if a path was included, verify that the path is correct and try again.
But if it is installed, you will get something like this:
java version "1.8.0_321".
Java(TM) SE Runtime Environment (build 1.8.0_321-b07)
Java HotSpot(TM) 64-Bit Server VM (build 25.321-b07, mixed mode)
Now, if the Java version is less than 1.8, or if it is simply not installed, you must download and install the latest version. To do this, go to the official Java download page, https://www.java.com/en/download/, and download the appropriate version for your operating system. After installing it, you must reboot your system so that the global variables, which inform the system where the Java executable is, are applied. Once this is done, check the Java version again at the command line.2
Next you will need to download and install Saxon.
Do this from the Saxonica SourceForge repository at this address:
https://sourceforge.net/projects/saxon/files/Saxon-HE/11/Java/
Look for the most recent version in the list, which as of today is 11.2.
Now download the SaxonHE11-2J.zip file (or the most recent one) and unzip it inside some folder on your computer.
Next open the terminal in that exact folder and run the following command (bear in mind that the executable —saxon-he-11.2.jar— may be named differently in your case):
java -jar saxon-he-11.2.jar -t
(the -t option tells Saxon to display its version, as well as other useful information).
For example, on Windows you will get:
PS C:\Users\usuario\Downloads\SaxonHE11-2J> java -jar saxon-he-11.2.jar -t
SaxonJ-HE 11.2 from Saxonica
Java version 1.8.0_321
No source file name
Usage: see http://www.saxonica.com/documentation/index.html#!using-xsl/commandline
Format: net.sf.saxon.Transform options params
Options available: -? -a -catalog -config -cr -diag -dtd -ea -expand -explain -export -ext -ext -im -init -it -jit -json -l -lib -license -nogo -now -ns -o -opt -or -outval -p -quit -r -relocate - repeat -s -sa -scmin -strip -t -T -target -TB -threads -TJ -Tlevel -Tout -TP -traceout -tree -u -val -versionmsg -warnings -x -xi -xmlversion -xsd -xsdversion -xsiloc -xsl -y --y --?
Use -XYZ:? for details of option XYZ
Params:
  param=value Set stylesheet string parameter
  +param=filename Set stylesheet document parameter
  ?param=expression Set stylesheet stylesheet parameter using XPath
  !param=value Set serialization parameter
Now, since you have unzipped Saxon into a random folder (in C:\Users\user\Downloads, in our example), you will only be able to run Saxon from there.
This means that if you are in another location on your system, you won’t be able to simply run the java -jar saxon-he-11.2.jar command to get started, since the saxon-he-11.2.jar executable won’t be available there.
This is not really a problem.
You just need to make sure that the XML and XSL documents you want to use in your transformations are always in the same folder as your Saxon executable.3
The command line code examples we will show here will assume that this is the case.
Choosing and Preparing XML Data
In order to begin transforming XML, you will need to obtain a well-formed dataset. Many online historical databases are built upon XML and provide their data freely. This tutorial will make use of the Scissors and Paste Database.
The Scissors and Paste Database is a collaborative and growing collection of articles from British and imperial newspapers in the 18th and 19th centuries. Its original purpose was to allow for careful comparisons of reprints (copies) that appeared in multiple newspapers as well as to detect similarly themed articles across different English-language publications. Like many XML databases, Scissors and Paste contains both data (the article’s text), formatting information (such as italics and justification), and metadata. This metadata includes documentation about the particular article, such as its pagination and printing date, information about the newspaper in which it was published, and the themes, individuals or locations mentioned in the text.
As of 2015, the database contained over 350 individual articles, each with attached metadata. Although some researchers may need all of this information, most will only be interested in a subsection of the data—a particular year, theme or publication. By using XSL, these researchers can quickly filter out the information they do not need or re-arrange the material in the way that is most helpful for their project. For example, the module tutor in our introduction or a researcher who wants a simple table of the dates, publications and page numbers of humorous articles within the database. Both can be quickly created using XSL.
To begin work with the Scissors and Paste Database, download the following ZIP archive: master.zip.
Open the ZIP file and you will find a folder named scissorsandpaste-master. Extract this folder by either using the extract button of your unzipping programme or by dragging and dropping the folder onto your desktop.
This data package has three main items:
TEISAP.XML: The central XML databaseTransformers: A collection of XSL stylesheetsOutputs: Outputs derived from the database using the XSL stylesheets
The package also includes:
- a
Template, for anyone wishing to contribute to the database - a
READMEfile, providing information about the database - a
Citefile, explaining the preferred way to cite the database - a
Licensefile, explaining the terms of use
Once you have completed the tutorial, you can explore the different XSL stylesheets (transformers) included here, and their associated outputs, to discover additional possibilities for your own datasets.
The main TEISAP.XML database has been encoded to Text-Encoding Initiative (TEI) standards and includes a significant amount of metadata. For the purposes of this tutorial, however, we will be using a simplified version of the database that focuses on some of the core historical data.
Open the outputs folder and continue into the XML folder. Here you will find a folder entitled Simplified. Next, copy the SimplifiedSAP.xml file to the same folder you previously unzipped the Saxon executable into.
Open the SimplifiedSAP.xml file in VSCode and examine it now.
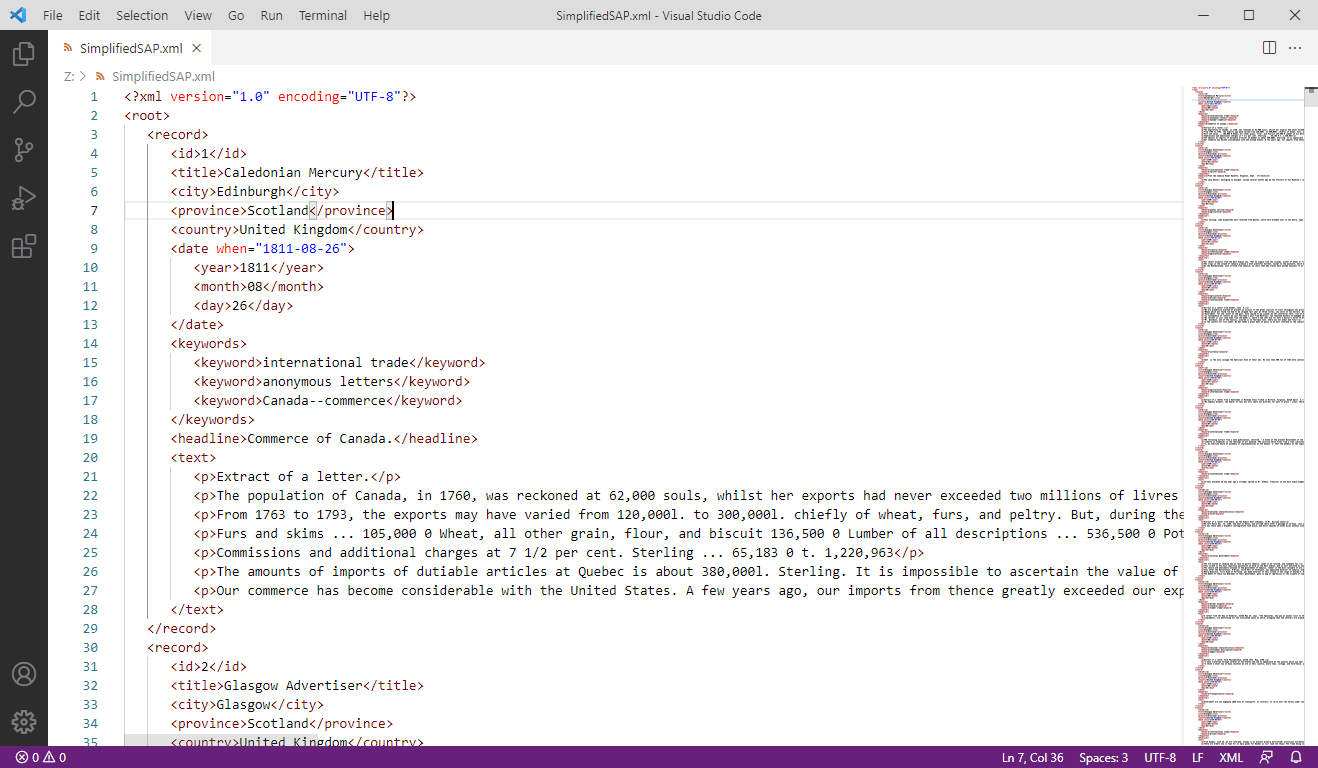
Figure 1: Viewing the XML
The first line of the XML database is:
<?xml version="1.0" encoding="UTF-8"?>
which indicates the version of XML used (1.0) and the encoding method of the text (UTF-8). The second line is <root>, which has a matching line, </root>, at the end of the file.
<root> is the top-level element of this database and surrounds all the records within it. Each individual record, containing the information for one historical newspaper article, is opened by the element <record> and closed with the element </record>.
Within these records there are a number of different child elements. The Text-Encoding Initiative allows for hundreds of different sub-elements to fit a very wide range of data. Moreover, the beauty of XML is that you can name your elements anything you like (with a few small exceptions). In the Scissors and Paste Database, each record has the following elements:
<id>: The ID number of the record<title>: The title of the newspaper<city>: The city of the newspaper<province>: The province or administrative region of the newspaper<country>: The country of the newspaper<date>: The full ISO date of the article<year>: The year of publication<month>: The month of publication<day>: The day of publication<keywords>: The section containing keywords describing the article<keyword>: An individual keyword describing the article<headline>: The headline of the article. This may be blank.<text>: The section containing the text of the article<p>: An individual paragraph within the text.
These are the different types of data that you will be able to use in creating your outputs.
Creating and Testing Your XSL File
It is now time to create your XSL file.
To do this, open VSCode, create a new blank file and save it as mystyle.xsl.
Once again, make sure the file is saved in the same directory that contains both the SimplifiedSAP.xml file and the Saxon executable.
The first three lines of your XSL file should be the following:
<?xml version="1.0" encoding="UTF-8"?>
<xsl:stylesheet version="1.0" xmlns:xsl="http://www.w3.org/1999/XSL/Transform">
<xsl:output method="text"/>
The first line documents that this is an XML document encoded as UTF-8.
The second line states that the document is an XSL document version 1.0 and the standards (or namespace) established by the World Wide Web Consortium, whose web address you have listed.
(Note that an XSL document is ultimately an XML document!)
Finally, the third line tells your transformer what sort of output you would like to create. In this case, you are indicating that you will be creating a plain-text file.
(You could also have written xml or html, instead of text, in order to produce an XML or and HTML document, respectively.)
Every time you open an element <element> you will need to close it </element> (or however the element is named); otherwise you will receive an syntax error as the document is not well-formed.
Close your stylesheet by adding the following as the final line of your file:
</xsl:stylesheet>
The next part of your XSL stylesheet will be the main template, or formatting instructions, for your output.
On a new line, directly underneath <xsl:output method="text"/> type
<xsl:template match="/">

</xsl:template>
It is between these two elements that you will put all your layout instructions.
You have written / in your match attribute to indicate that you will be referring to everything within the XML file.
You could have also used root, which would have indicated that you were only using data within the <root> element.
However, using root may cause unexpected later on, so it is best practice to use / for your main template.
Your file should now look like this:
<?xml version="1.0" encoding="UTF-8"?>
<xsl:stylesheet version="1.0" xmlns:xsl="http://www.w3.org/1999/XSL/Transform">
<xsl:output method="text"/>
<xsl:template match="/">

</xsl:template>
</xsl:stylesheet>
Save your file. For the remainder of the tutorial, remember to save your file after each change you make.
In between your template elements, type <xsl:value-of select="root"/> You do not need to do so on a new line, nor to indent it to the right, but doing so will make your stylesheet more readable. You’ll notice that I didn’t include a closing </xsl:value-of> tag. This is because <xsl:value-of select="root"/> is self-closing; the / at the end of the element closes it immediately.
Your mystyle.xsl file should look like this:
<?xml version="1.0" encoding="UTF-8"?>
<xsl:stylesheet version="1.0" xmlns:xsl="http://www.w3.org/1999/XSL/Transform">
  <xsl:output method="text"/>
  <xsl:template match="/">
    <xsl:value-of select="root"/>
  </xsl:template>
</xsl:stylesheet>
Next, you will transform the contents of the SimplifiedSAP.xml document into plain text, by means of the XSL stylesheet you have just created.
To do this, go to the command line and run the following:
java -jar saxon-he-11.2.jar -xsl:mystyle.xsl -s:SimplifiedSAP.xml
When you run this command, you will see a huge amount of text displayed in the terminal, so much so that it is not easy to read it right there.
The -xsl: option provides the name of the XSL stylesheet that Saxon will use to transform the XML document, while the -s: option (from source) provides the name of that very document.
If you want to save the text given by Saxon as its output, you must use the -o: option (from output), followed by a filename, for example like so:
java -jar saxon-he-11.2.jar -xsl:mystyle.xsl -s:SimplifiedSAP.xml -o:output.txt
(This will always be the command you must run in the terminal to transform an XML document via an XSLT stylesheet. You must run it every time you want to perform a transformation. In other words, you can’t just make changes to your stylesheet to make the transformation happen; you must always run Saxon to do it.)
Now you can open the output.txt file in VSCode to inspect it. The result should be the text with the existing line breaks, but without the XML elements, as seen in the following image:
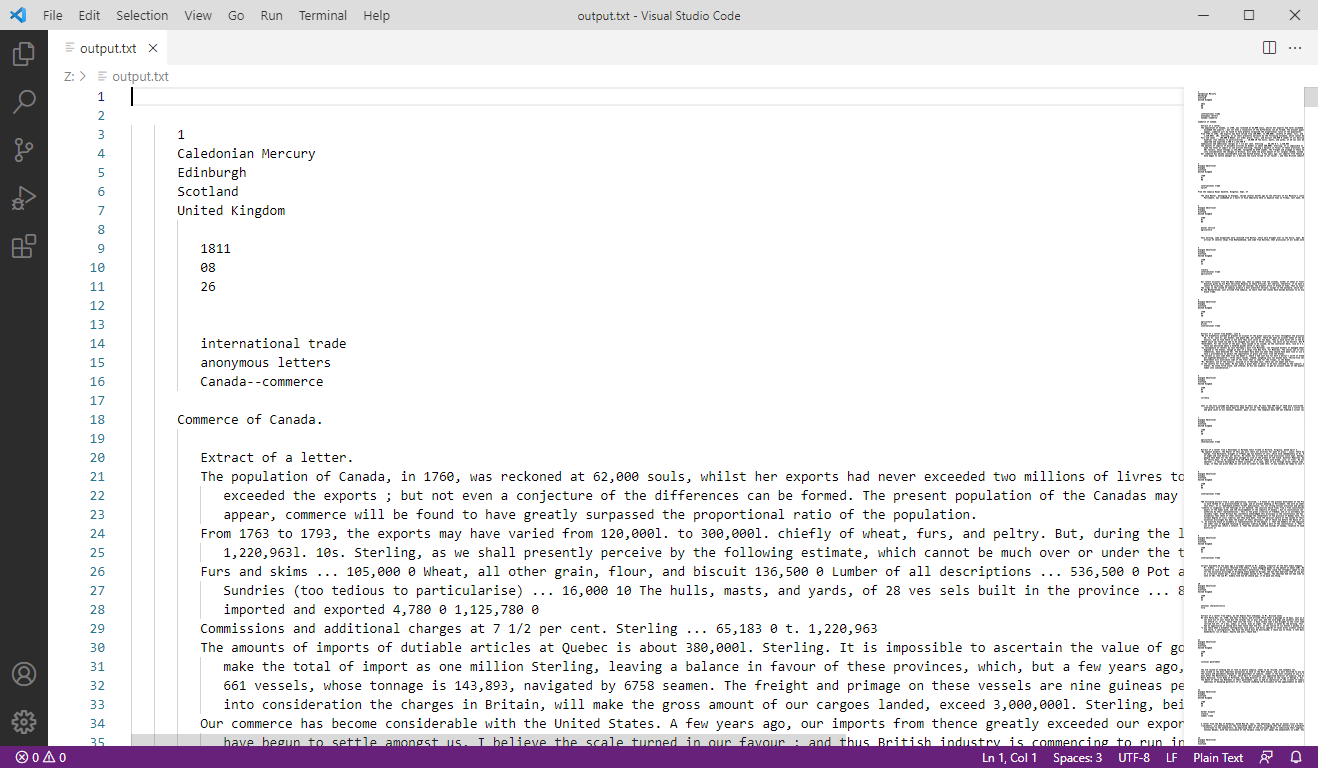
Figure 2: Initial text output
Populating Your Outputs
Your single line of code <xsl:value-of select="root"/> selected (and printed) the entire database in plain-text format.
If you look at the components of this line, you can see why:
-
xsl:value-of: an instruction for selecting the value of an element; that is, the text between the opening and closing tag of an element within the XML file. -
select="root": an instruction that explains which element it should select the value of. Unless you instruct it otherwise, pointing to a parent (outside) element will also tell the transformer to select the values of any child (inside) elements as well. Thus, pointing to element<root>also selects elements<id>,<title>and so on, which are contained in it. (Technically speakingselectis an attribute of the<xsl:value-of>element, and the value of that attribute isroothere.)
Selecting and Printing Values
In order to select and print the value of a particular element, you simply need to replace root with its name. Let’s try it.
In your XSL stylesheet, replace root with title in the proper line:
<xsl:value-of select="title"/>
Save your file, run the transformation command in the terminal once again, and examine the result in VSCode. (VSCode with automatically refresh the window whenever it detects the output file has changed.)
It didn’t work? That is because the XSL processor didn’t know where to find the <title> elements. Let’s see why.
Parents and Children
<title> is not the top-level element, so we must explain to the XSL processor how to get to the element we mean.
This more specific direction is known as the XPATH of the element, and works in a similar way to the file paths on your computer. Replace title with root/record/title, like so;
<xsl:value-of select="root/record/title"/>
Save the file, execute Saxon to run the transformation again, and examine the result in VSCode.
The editor should now display Caledonian Mercury, the title of the first register in our database. Where are the rest? Although, we have over 300 title values in the database, we did not specify which we wanted the XSL processor to select and print, so it assumed we meant the first one, and only the first one. When the XSL processor selects and prints it, it stops.4
For Loops
To a human being, it may seem natural that we wanted all the titles, but the XSL processor does not know this by default.
Instead, we must create a for loop, which, besides selecting and printing them, affords us a great deal of control on the way it does so.
In XSL, a for loop tells the transformer that for a certain condition, it should loop through the entire database and follow the instructions each time the data meets certain criteria.
Create a new line after <xsl:template match="/"> and insert <xsl:for-each select="root/record">. This tells the transformer that for each record within the root element, it should take some action.
Remove root/record from your <xsl:value-of> element.
It should now simply say title, because we are now already within a root/record context.
After your <xsl:value-of>, add a new line that closes the <xsl:for-each> element, </xsl:for-each>
Your file should look like this now:
<?xml version="1.0" encoding="UTF-8"?>
<xsl:stylesheet version="1.0" xmlns:xsl="http://www.w3.org/1999/XSL/Transform">
  <xsl:output method="text"/>
  <xsl:template match="/">
    <xsl:for-each select="root/record">
      <xsl:value-of select="title"/>
    </xsl:for-each>
  </xsl:template>
</xsl:stylesheet>
Here you can see that your <xsl:template> contains three lines of code:
- an opening tag for your loop
- an instruction for selecting one
<title>and printing its contents - a closing tag for your loop
Save your file, run the transformation, and examine the output in VSCode again. You should now have a very messy line of text, listing the value of every title element in the database.
You can organise this data by instructing the transformer to add a new line after each entry.
Just below the <xsl:value-of select="title"/> line, type <xsl:text>
</xsl:text> to add a line break.

 is the ISO 10646 hex code for a new line.5
The <xsl:text> element tells the transformer to print the value as plain text.
Depending on the type of outputs you are using (with the <xsl:output> element), some special characters, particularly multiple spaces or line breaks, may not render correctly if entered on their own.
Using <xsl:text> elements ensures that your text renders exactly the way you intend it to.
The complete code of your XSL file is therefore the following:
<?xml version="1.0" encoding="UTF-8"?>
<xsl:stylesheet version="1.0" xmlns:xsl="http://www.w3.org/1999/XSL/Transform">
<xsl:output method="text"/>
<xsl:template match="/">
<xsl:for-each select="root/record">
<xsl:value-of select="title"/>
<xsl:text>
</xsl:text>
</xsl:for-each>
</xsl:template>
</xsl:stylesheet>
Save the file, execute Saxon to run the transformation again, and examine the result in VSCode. Using this information, you should now be able to print the value of any element for each record in the database.
Exercise A:
Note: Possible solutions for the following exercises are located at the end of the tutorial.
Print an inventory of the records in database, displaying the id, title and date of each record. A solution to this and the following exercises is available at the end of the tutorial.
Exercise B:
Print the text of all the articles in the database, displaying the id in square brackets ([]) at the start of each article.
Attributes
In an element, not all data is stored as its content (i.e., what is found between its opening and closing tags).
Some data can be stored as the value of an attribute of that element.
For example the <date> element has an attribute called when with the value of the date of the article:
<date when="1815-01-12"/>
To print the value of when you will need to reference the attribute using @when (note the @ before it):
<xsl:value-of select="date/@when"/>
which means: select and print the value when of element <date>.
Exercise C
Create an inventory of records in the database, listing the title of the newspaper followed by the date of publication.
Sorting Results
This XML database was compiled as data was collected, rather than by date or title.
To re-sort it, you can add a <xsl:sort> element to the top of any for loop, immediately following the <xsl:for-each> element.
This instruction has several optional attributes that will dictate how your data is sorted:
select: contains the name of the element to sort the data byorder: informs the XSL processor if the data should be sorted in anascendingordescendingorderdata-type: informs the transformer if the data istextor anumber
It must be attributed in this order.
For example, to sort the element <id>, whose content is numerical, in reverse order, use:
<xsl:sort select="id" order="descending" data-type="number"/>
You can sort by an element even if you do not print that element in your output.
Exercise D
Print the text of all the articles in the database, sorting from earliest to latest. For the purposes of the <xsl:sort> element, treat dates as text.
Filtering Results
So far, you have selected and printed all the records contained in the database.
If you only want a selection of records, you will need to filter the results using an if statement.
An <xsl:if> element has one attribute, which is a test condition.
If the condition is true, the XSL processor will follow the instructions within the <xsl:if> element.
If not, it will ignore these statements and move onto the next part of the template.
For example, to print the id numbers of all the records from 1789, you would type:
<?xml version="1.0" encoding="UTF-8"?>
<xsl:stylesheet version="1.0" xmlns:xsl="http://www.w3.org/1999/XSL/Transform">
<xsl:output method="text"/>
<xsl:template match="/">
<xsl:for-each select="root/record">
<xsl:if test="date/year='1789'">
<xsl:value-of select="id"/>
<xsl:text>
</xsl:text>
</xsl:if>
</xsl:for-each>
</xsl:template>
</xsl:stylesheet>
If you want to exclude year 1789, use date/year!='1789' instead. (!= means not equal to.)
Exercise E
Using all you have learned so far, create a list of records from 1789, starting with the most recent, listing the id, title, and date of each record. Separate the data elements with commas and place each record on its own line.
If you wish, you can specify the output file to be a Comma Separated Values (CSV) file, which can be opened and manipulated as a spreadsheet with Microsoft Excel or LibreOffice Calc. To do this, simply specify it on the command line when you perform the transformation:
java -jar saxon-he-11.2.jar -xsl:mystyle.xsl -s:SimplifiedSAP.xml -o:output.csv
Conclusion
You now know the basics of XSL stylesheet creation.
With this information you can create a range of outputs including plain text, comma-separated, tab-separated and markdown files.
You can also create web pages by changing your <xsl:output> method to html and wrapping your <xsl:value-of> commands in the appropriate HTML tags.
There are many more transformation commands that you can use to further customise your outputs. Some of these require the use of a 2.0 or 3.0 XSL processor, but the above should cover most of your day-to-day transformation needs.
Once you are comfortable using the commands listed here, explore the Transformers folder of the Scissors and Paste Database to see further examples of how to transform XML structured data.
Possible Solutions to the Exercises
Introduction (Primary Source Reader)
<?xml version="1.0" encoding="UTF-8"?>
<xsl:stylesheet version="1.0" xmlns:xsl="http://www.w3.org/1999/XSL/Transform">
<xsl:output method="html"/>
<xsl:template match="/">
<html>
<body>
<xsl:for-each select="root/record">
<xsl:if test="keywords/keyword = 'slave insurrections'">
<h2>
<i><xsl:value-of select="title"/></i>, <xsl:value-of
select="substring(date/@when, 9, 2)"/>
<xsl:text> </xsl:text>
<xsl:if test="substring(date/@when, 6, 2) = '01'">January</xsl:if>
<xsl:if test="substring(date/@when, 6, 2) = '02'">February</xsl:if>
<xsl:if test="substring(date/@when, 6, 2) = '03'">March</xsl:if>
<xsl:if test="substring(date/@when, 6, 2) = '04'">April</xsl:if>
<xsl:if test="substring(date/@when, 6, 2) = '05'">May</xsl:if>
<xsl:if test="substring(date/@when, 6, 2) = '06'">June</xsl:if>
<xsl:if test="substring(date/@when, 6, 2) = '07'">July</xsl:if>
<xsl:if test="substring(date/@when, 6, 2) = '08'">August</xsl:if>
<xsl:if test="substring(date/@when, 6, 2) = '09'">September</xsl:if>
<xsl:if test="substring(date/@when, 6, 2) = '10'">October</xsl:if>
<xsl:if test="substring(date/@when, 6, 2) = '11'">November</xsl:if>
<xsl:if test="substring(date/@when, 6, 2) = '12'">December</xsl:if>
<xsl:text> </xsl:text>
<xsl:value-of select="substring(date/@when, 1, 4)"/>
<xsl:text>

</xsl:text></h2>
<xsl:for-each select="text/p">
<p>
<xsl:value-of select="."/>
</p>
</xsl:for-each>
</xsl:if>
</xsl:for-each>
</body>
</html>
</xsl:template>
</xsl:stylesheet>
The dot (.) in the XSL element <xsl:value-of select="."/> is a shorthand for the name of the current element in context.
In this case it is the element selected with the <xsl:for-each select="text/p"> statement, i.e. the <p> child of <text>.
If we had used p instead, we would not select anything, as there is no text/p/p.
Exercise A
<?xml version="1.0" encoding="UTF-8"?>
<xsl:stylesheet version="1.0" xmlns:xsl="http://www.w3.org/1999/XSL/Transform">
<xsl:output method="text"/>
<xsl:template match="/">
<xsl:for-each select="root/record">
<xsl:value-of select="id" />, <xsl:value-of select="title" />, <xsl:value-of select="date" /><xsl:text>
</xsl:text>
</xsl:for-each>
</xsl:template>
</xsl:stylesheet>
Exercise B
<?xml version="1.0" encoding="UTF-8"?>
<xsl:stylesheet version="1.0" xmlns:xsl="http://www.w3.org/1999/XSL/Transform">
	<xsl:output method="text"/>
	<xsl:template match="/">
		<xsl:for-each select="root/record">
			[<xsl:value-of select="id"/>]
			<xsl:value-of select="text"/>
		</xsl:for-each>
	</xsl:template>
</xsl:stylesheet>
To remove the indentation preceding the ID number between brackets, you will need to take more direct control of your whitespace by using line-breaks before each ID number and paragraph, as seen below:
<?xml version="1.0" encoding="UTF-8"?>
<xsl:stylesheet version="1.0" xmlns:xsl="http://www.w3.org/1999/XSL/Transform">
<xsl:output method="text"/>
<xsl:template match="/">
<xsl:for-each select="root/record"><xsl:text>
</xsl:text>[<xsl:value-of select="id"/>]<xsl:text>
</xsl:text><xsl:for-each select="text/p"><xsl:value-of select="."/><xsl:text>
</xsl:text></xsl:for-each></xsl:for-each>
</xsl:template>
</xsl:stylesheet>
Exercise C
<?xml version="1.0" encoding="UTF-8"?>
<xsl:stylesheet version="1.0" xmlns:xsl="http://www.w3.org/1999/XSL/Transform">
<xsl:output method="text"/>
<xsl:template match="/">
<xsl:for-each select="root/record">
<xsl:text>

</xsl:text>
<xsl:value-of select="title"/>
<xsl:text> </xsl:text>
<xsl:value-of select="date/@when"/>
</xsl:for-each>
</xsl:template>
</xsl:stylesheet>
You’ll notice I used   in between my two values. This is the HEX code for a space. You could have also used a literal space, but this is may not render correctly in all cases. You could have also used a comma or any other divider.
Exercise D
<?xml version="1.0" encoding="UTF-8"?>
<xsl:stylesheet version="1.0" xmlns:xsl="http://www.w3.org/1999/XSL/Transform">
<xsl:output method="text" />
<xsl:template match="/">
<xsl:for-each select="root/record">
<xsl:sort select="date/@when" order="ascending" data-type="text"/>
<xsl:for-each select="text/p">
<xsl:text>
</xsl:text><xsl:value-of select="."/>
</xsl:for-each>
<xsl:text>
</xsl:text>
</xsl:for-each>
</xsl:template>
</xsl:stylesheet>
Exercise E
<?xml version="1.0" encoding="UTF-8"?>
<xsl:stylesheet version="1.0" xmlns:xsl="http://www.w3.org/1999/XSL/Transform">
<xsl:output method="text"/>
<xsl:template match="/">
<xsl:for-each select="root/record">
<xsl:sort select="date/@when" order="descending" data-type="text"/>
<xsl:if test="date/year = '1789'">
<xsl:value-of select="id"/>, <xsl:value-of select="title"/>, <xsl:value-of select="date/@when"/><xsl:text>
</xsl:text>
</xsl:if>
</xsl:for-each>
</xsl:template>
</xsl:stylesheet>
Further Reading
- Hunter, David et al. Beginning XML, 4th ed. Indianapolis, IN: Wiley, 2007.
- Kay, Michael, XSLT 2.0 and XPATH 2.0: Programmer’s Reference. Indianapolis, IN: Wiley, 2011.
- Kelly, David J. XSLT Jumpstarter: Level the Learning Curve and Put Your XML to Work. Raleigh, NC: Peloria Press, May 2015.
- Mangano, Sal. XSLT Cookbook, 2nd ed. Sebstopol, CA: O’Reilly, 2006.
- Riley, Jenn. Understanding Metadata: What is Metadata, and What is For? NISO, 2017.
- Tennison, Jeni. Beginning XSLT 2.0. From Novice to Professional. New York: Apress, 2005.
- Tidwell, Doug. XSLT, 2nd ed. Sebstopol, CA: O’Reilly, 2008.
Notes
-
The XSL language has two branches: (1) XSL Formatting Objects (XSL:FO), which contains formatting instructions for producing a PDF document from an XML document; and (2) Extensible Stylesheet Language Transformations (XSLT), which contains instructions for transforming an XML document into other documents (XML, HTML, XHTML and plain text). In this tutorial only the second one is discussed. ↩
-
If you have already installed the latest version and still get an error message that it is not installed, you will have to manually adjust the
PATHvariable on your system. See this explanation for more details. ↩ -
An alternative solution is to place the Saxon executable in a folder that is already included in the
PATHglobal system variable (or to change that variable to include the folder we have chosen for Saxon). However, such technical details are beyond the scope of this tutorial. (For those interested, see these pages on how to do this on Windows, MacOS and Linux.) ↩ -
As of XSLT version 2.0, the
<xsl:value-of>statement selects all occurrences of the expression in the XML document. (On this, see here.) If the reader wishes to try this, they should change the value of the@versionattribute from1.0to2.0(or3.0) in the<xsl:stylesheet version="1.0" xmlns:xsl="http://www.w3.org/1999/XSL/Transform">line of the XSL stylesheet. ↩ -
Alternatively, you can replace that line with this code:
<xsl:text> </xsl:text>(Notice the blank line as the content of the
<xsl:text>element.) Both expressions are equivalent, although the latter takes up more space (and is more obvious) than the former. ↩